
Highlights
4900 in Sticks
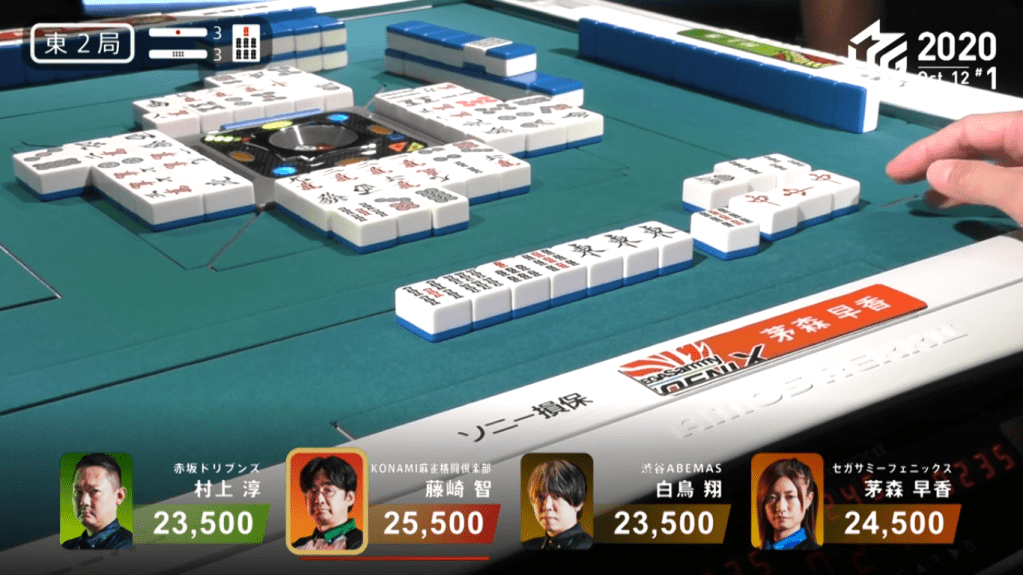
October 12, Game 1, E2-3
In E2-3, there are three riichi sticks on the table after the previous three hands had gone to a draw. The dealer Fujisaki starts out his hand with two dora and 2-shanten, while Kayamori holds an east ankou and a pair of red dragons. Looking to take advantage of an embedded yaku, Kayamori calls a quick pon on the red dragon and guides her hand to add honitsu and dora. Fujisaki continues to push for standard efficiency towards riichi, as he draws a 9p to kill the chances of calling with the hand. On turn 6, Fujisaki gets to tenpai and calls riichi on the 4m kanchan. Holding two dora and a red dora, his hand at least a dealer mangan if he wins. Not being phased by the threat of a dealer riichi, Kayamori calls chii to iishanten. Kayamori continued to push and draws to tenpai, waiting on the 9s tanki. Turn after turn, it was a tsumogiri battle between Fujisaki and Kayamori to see who would win first. In the middle of the 3rd row, Kayamori draws the 9s herself, completing he hand. She wins the hand with Honitsu/East/Red Dragon for 2,000/4,000, plus 4,000 in riichi sticks and 900 in honba. A non-dealer mangan suddenly becomes worth as much as a haneman.
Takaharu vs. Taro
October 12, Game 2
Video: https://abema.tv/video/episode/444-7_s30_p23
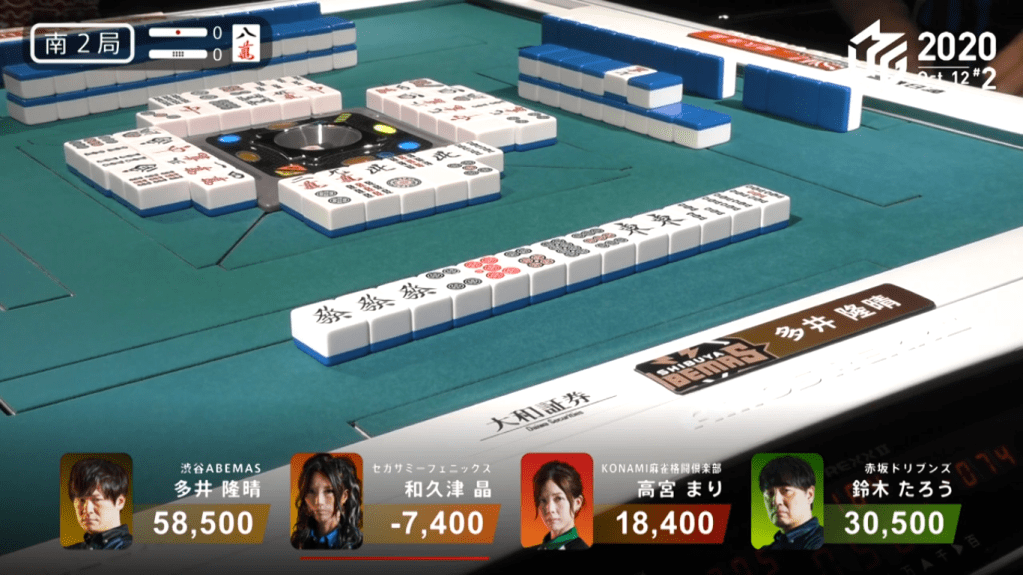
The second game of the day was all about the battle between Ooi Takaharu and Suzuki Taro.
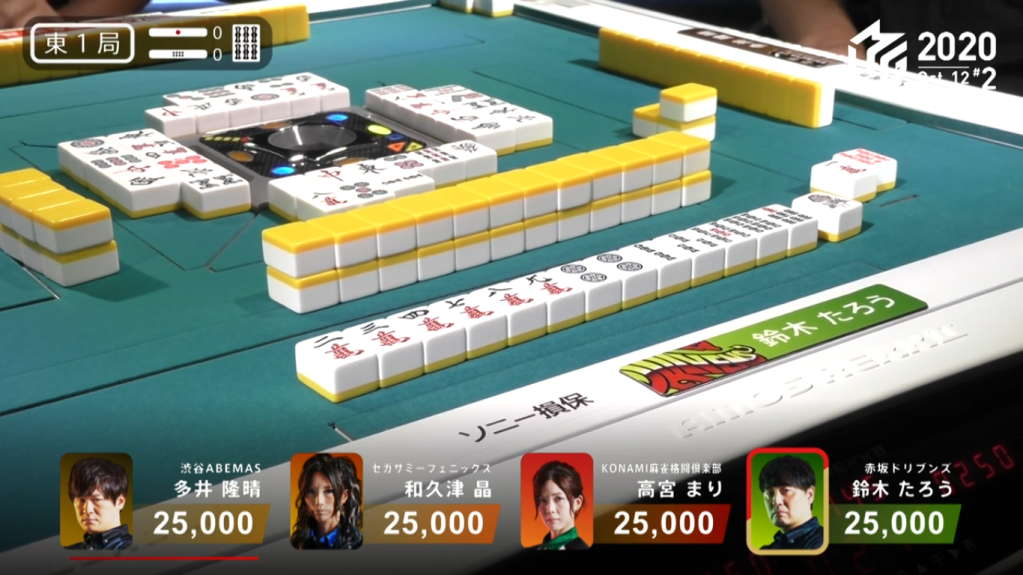
In E1-0, Taro starts out with a 2-shanten hand. Drawing a 3p on turn 2, he is open to the potential for sanshoku. On turn 5, he draws a dora 6s to shift his 79s block to a 67s ryanmen block, adding both a dora and a pinfu option. When Taro gets to tenpai in the middle of the 2nd row, he calls riichi on a Pinfu/Dora 1 hand, guaranteeing at least 5,800. On his next draw, he draws the winning tile and reveals an ura dora. With a Riichi/Ippatsu/Tsumo/Pinfu/Dora 1/Ura 1, Taro starts out the game with a big haneman tsumo for 3000/6000, hurting Ooi quite a bit with the oyakaburi.
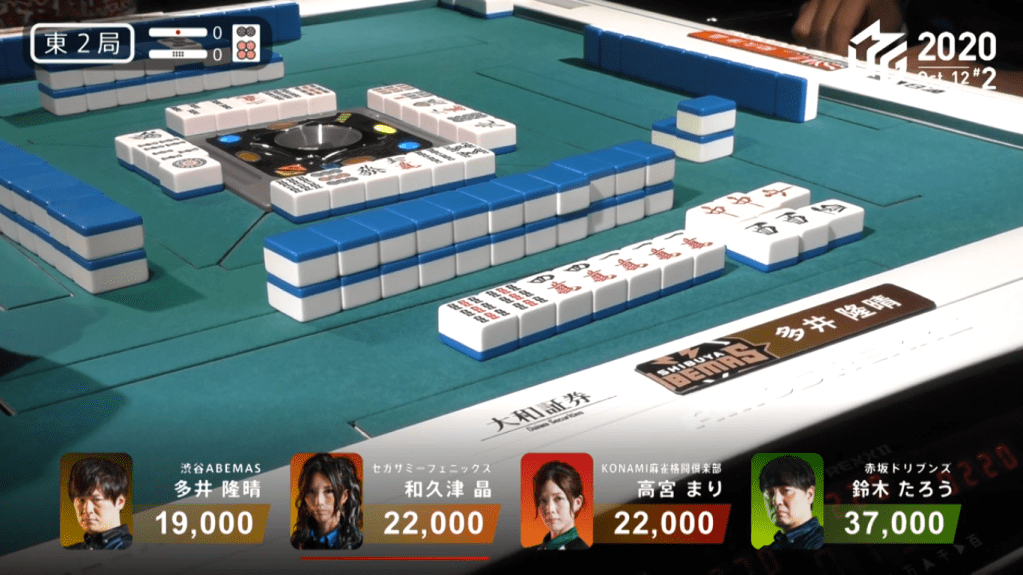
Trying to make up ground in E2-0, Ooi wins a Toitoi/Red Dragon off of Wakutsu for 5,200.
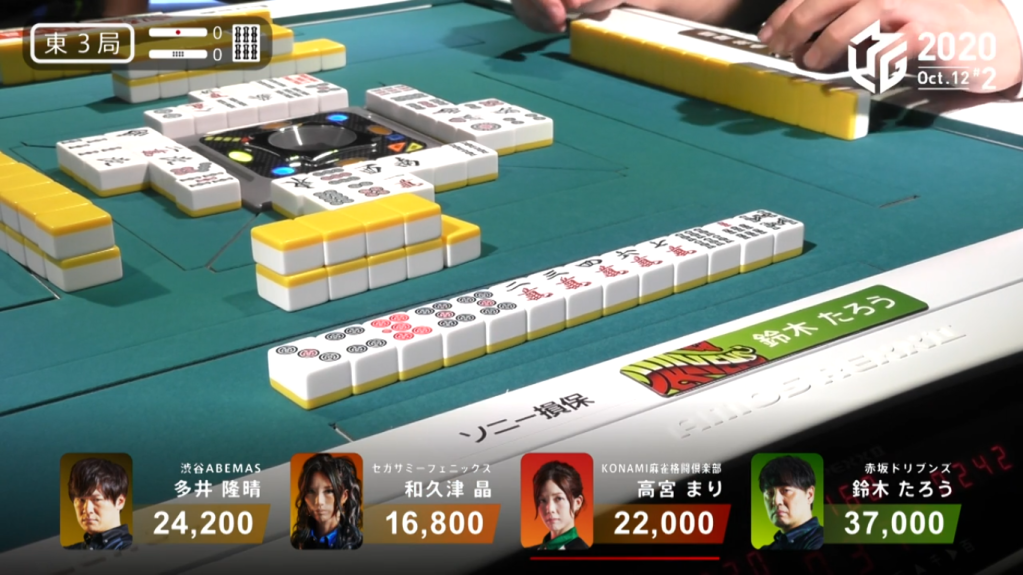
Feeling the pressure, Taro wins a Tanyao/Pinfu/Dora 1/Aka 1 mangan off of Wakutsu to increase his lead. in E3-0
In E4-0, Ooi kills Taro’s dealer hand with a cheap 1,300 point hand
Video: https://abema.tv/video/episode/444-7_s30_p24
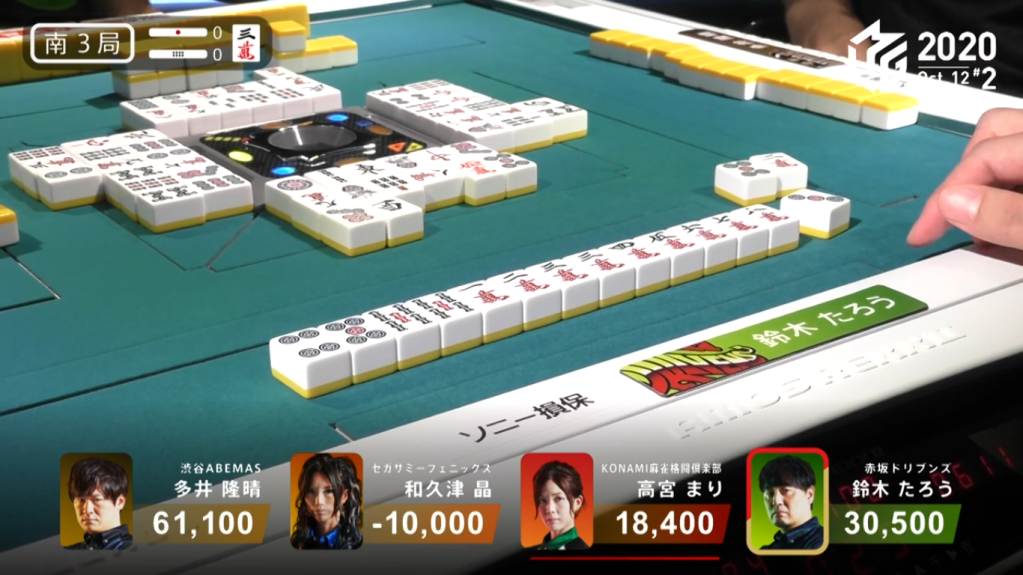
In S1-0 and Ooi as dealer, it was Ooi’s best time to strike. He starts the hand with two dora and one red dora, though not exactly a clear path to tanyao. On turn 3, Ooi draws another dora, giving him at least 5 han with a win. As Ooi hits a snag by drawing only honours, Takamiya calls riichi with a 58p ryanmen wait. With Ooi’s value, he continues to push, drawing a red 5m to bring his hand to a minimum dealer haneman. When Ooi gets to tenpai, he calls riichi on the 14p ryanmen wait. Ooi eventually wins the hand by drawing the 1p himself. Ooi wins with Riichi/Tsumo/Dora 3/Aka 2 for 6,000 all and Takamiya’s riichi stick. With this win, Ooi takes a 6,800 lead over Taro.
In S1-1 and S1-2, Ooi and Taro both gain points through ryuukyoku, but lose some through riichi calls.
Even though Ooi’s in the lead by 9,800, he doesn’t take his foot off the gas pedal. In S1-3, Ooi starts out with a 4-shanten hand. However, he manages to salvage the hand to become iishanten at the end of the 1st row. When Wakutsu calls riichi on a 147p wait in the middle of the 2nd row, Ooi continues to push his hand, even throwing a red 5m. In the middle of the 3rd row, Ooi gets to tenpai. With only two more draws for him, Ooi calls riichi on a 5-sided 13467p wait. Ooi’s first draw misses, but on the second draw, the haitei, Ooi draws the 4p. Ooi wins the hand with Riichi/Tsumo/Tanyao/Haitei/Ura 1 for 4000+300 all, along with 4 riichi stick to take a commanding 31,000 point lead.
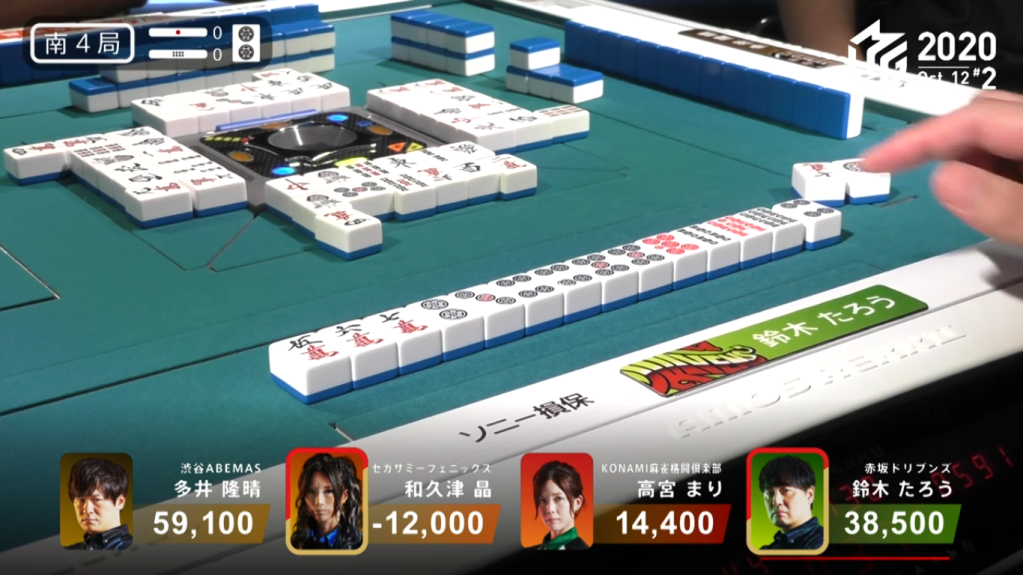
After losing his dealership from Takamiya’s mangan tsumo, Ooi continued to command the wheel in S2-0, winning a 2,600 hand to move the game forward.
In S3-0, it was Taro’s turn to drive. Being 30,600 points behind, Taro needed to win big to start the comeback before his dealer turn. In S3-0, Taro starts out his hand 2-shanten with an obvious ittsuu and a dora. In the first few turns, he draws few useful tiles. At the start of the 2nd row, Taro got to iishanten, but had to give up the ittsuu chance. In the middle of the 2nd row, Taro gets to tenpai and calls riichi on a 36p ryanmen wait for a mangan minimum hand. 5 turns later, Taro draws his winning 3p for Riichi/Tsumo/Pinfu/Dora 2 for 4000 all. With this win, Taro reduces the gap between him and Ooi by 10,000, making Ooi’s lead only 20,600.
Video: https://abema.tv/video/episode/444-7_s30_p25
In S4-0, Taro starts out 2-shanten and with two red dora. On turn 3, he draws a 2p dora, bring his hand up to a minimum mangan if he wins. At the start of the 2nd row, he gets to tenpai and calls riichi on a 1346p wait. If he wins on the 3p or 6p, he adds tanyao and pinfu to his hand for a haneman. If he wins on the 4p, he only adds tanyao, and if he wins on the 1p, he gets neither tanyao or pinfu. With Wakutsu deep in last at -12,000 she continues to push and calls riichi even after Taro’s riichi. However, Taro’s 4-sided wait wins out, with Taro drawing the 4p. Taro wins with Riichi/Tsumo/Tanyao/Dora 1/Aka 2 for 6000 all. With the win, Taro takes the lead from Ooi.
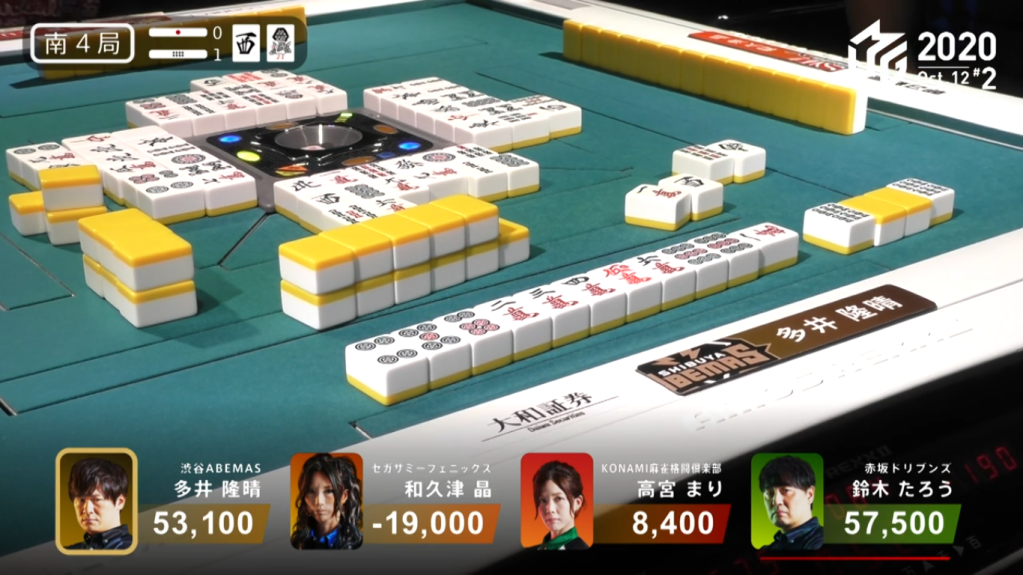
In S4-1, Ooi wants to win the hand and take the win away from Taro. Being 4,400 away from Taro, he needs a 3/40 general ron, a 2/40 direct hit or a 3/30 tsumo to take first. However, Ooi’s hand doesn’t start well, being 5-shanten and holding no value besides an isolated honour dora. As with any poor hand, Ooi proceeded efficiently and eventually got to iishanten at the start of the 2nd row. Drawing a red dora, he brings his hand up by a han, but still not enough. A turn later, he calls kan and draws a 6m to give him a 23456m shape. When Ooi reaches tenpai the turn after, he calls riichi on the 147m. This is a very big risk for Ooi, since he is in furiten from discarding the 1m near the beginning of the hand and Taro can let the hand go to ryuukyoku and still be first. However, the reward of first place is even greater. Luck was on Ooi’s side that day, for he won the hand by tsumo for Riichi/Tsumo/Dora 1/Aka 1 and 2000+100/4000+100. With that, the game was done and Ooi had won the game with 61,400 points and Taro in second at 53,400.
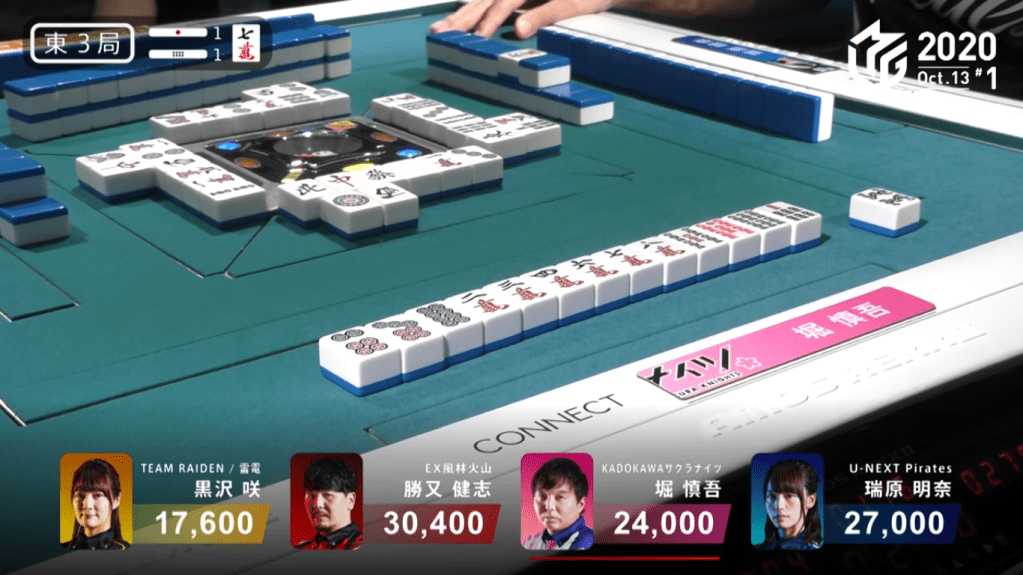
Hori’s First Win
October 13, Game 1
After Hori Shingo’s 3rd place in his first game, he looked to make a better impression on his second day.
Video: https://abema.tv/video/episode/444-7_s30_p26
In E3-1, Hori’s hand starts out 2-shanten with two dora and a chance at sanshoku. If combined with pinfu and another han, it would make a dealer haneman to take a commanding lead. On turn 5, Hori fills in a kanchan to earn pinfu and be in tenpai with a 58s wait. With yasume being mangan (Riichi/Pinfu/Dora 1/Aka 1) and takame being haneman (Riichi/Pinfu/Sanshoku/Dora 1/Aka 1), Hori stayed dama, hoping to win by surprise. A few turns later on turn 10, Hori draws the 8s takame to take a haneman and win 6000+100 all, plus a riichi stick from the last hand.
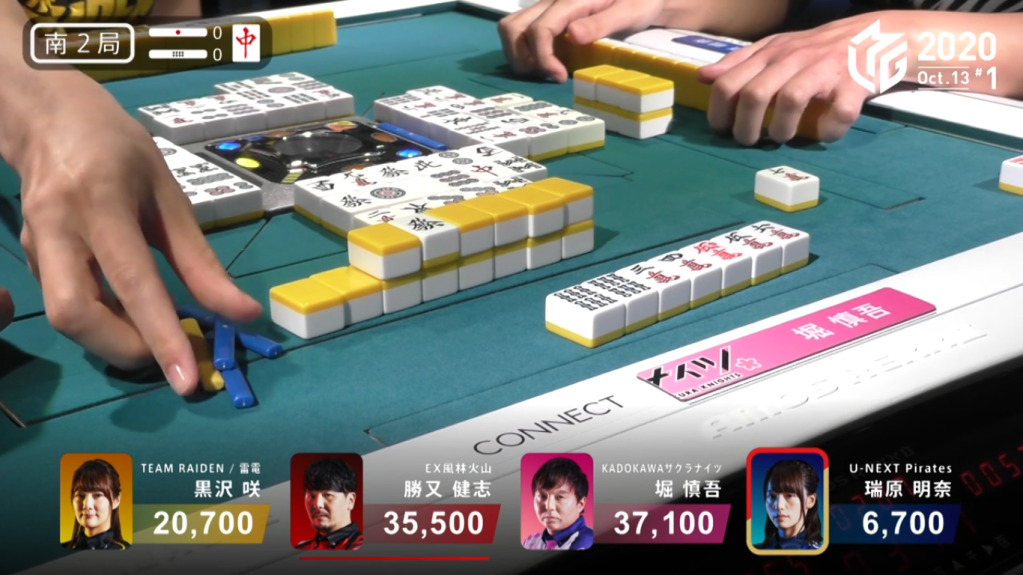
In S2-0, Hori starts out with two red dora, but 4-shanten. On turn 6, Katsumata calls pon on the red dragon dora and tenpai on the 14s, guaranteeing a mangan if he wins. However, Hori continues to push, calling chii to advance his hand to 2-shanten. Mizuhara also pushes with a 36m riichi. Even with this, Hori continues to push. In the middle of the 3rd row, Hori calls chii again to get to iishanten. The next turn, Hori draws to tenpai to wait on the 47m ryanmen. A few turns later, Kurosawa discards the 7m to give Hori the win. Hori wins the hand with Tanyao/Sanshoku/Aka 2 for 8000 and Mizuhara’s riichi stick.
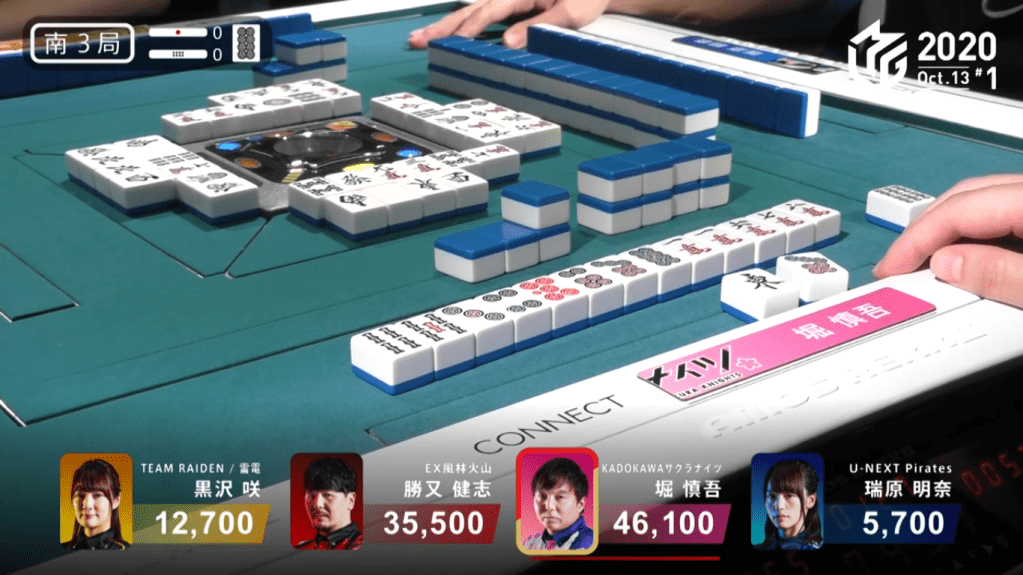
In S3-0, Hori starts out as dealer 2-shanten with a dora and a red dora. By turn 5, he has his hand set up with ryanmen at iishanten, aiming for a pinfu and riichi to get to dealer mangan. On turn 6, Hori calls riichi on a 36s ryanmen. Near the end of the 2nd row, Hori draws his winning 6s for Riichi/Tsumo/Pinfu/Dora 1/Aka 1 for 4000 all.
From these three hands alone, he was able gain enough points win the game, despite losing many points from tsumo loss.
Shortcut to Haneman
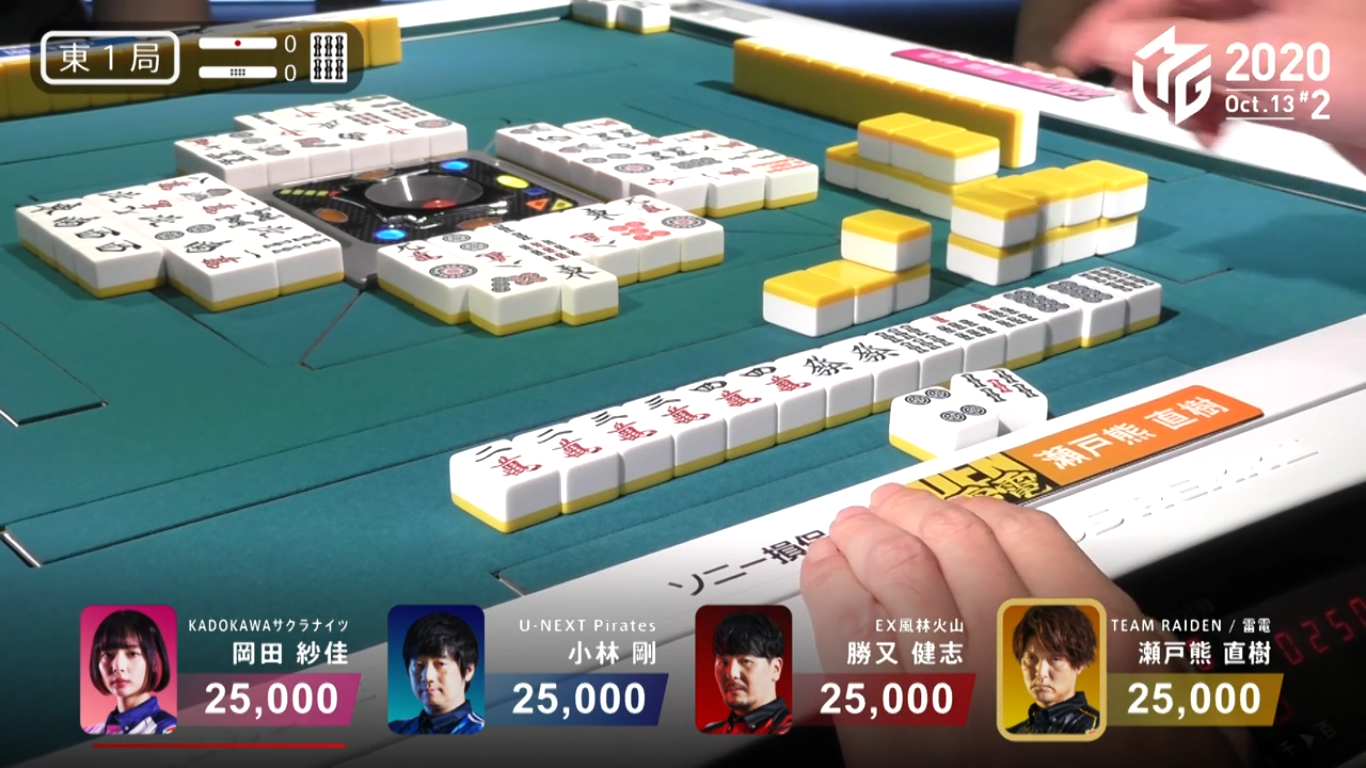
October 13, Game 2, E1-0
In E1-0, Setokuma starts out with a poor 4-shanten hand with no value, the worst position of the four players. As with any poor hand, he handled it by playing efficiently. Through this attempt at efficiency, he picked up pairs. With these pairs, his hand was guided closer and closer to chiitoi. It wasn’t until the start of the 3rd row that he gets to tenpai, calling riichi and waiting on the 6s dora for a guaranteed mangan. As it’s the dora, the expectation of the 6s coming out is low, meaning that a win will probably be by tsumo and for a haneman. Sure enough, Setokuma draws the 6s and wins with Riichi/Tsumo/Chiitoi/Dora 2 for 3000/6000.
Last Minute Tenpai
October 13, Game 2, E2-1
Video: https://abema.tv/video/episode/444-7_s30_p30
In E2-1 In the middle of the 3rd row, everybody is iishanten. The first to get to tenpai is Okada, who calls chii to have a yakuless tenpai. With 3 tiles left in the wall, Katsumata calls chii as well, getting to yakuless tenpai. With the number of tiles dwindling, Setokuma manages to get to tenpai with his last draw and two tiles left in the wall. However, he did something that no one else did: he called riichi. Even though he doesn’t have another draw, this move is perfectly legal in M-League rules. With the very last tile, Kobayashi has the chance to get to tenpai if he chooses the right tile. If he discards the 6p from the 667p shape, he gets to tenpai with a ryanmen, but deals the houtei to Setokuma. If he discards the 7p, he gets to tenpai with a shanpon and the hand goes to a draw. After taking more than 30 seconds to make his decision, Kobayashi discards the 7p to get to ryuukyoku safely. In only 8 tile draws, everyone went from noten to tenpai.
Setokuma Slaps Sasaki in South Round
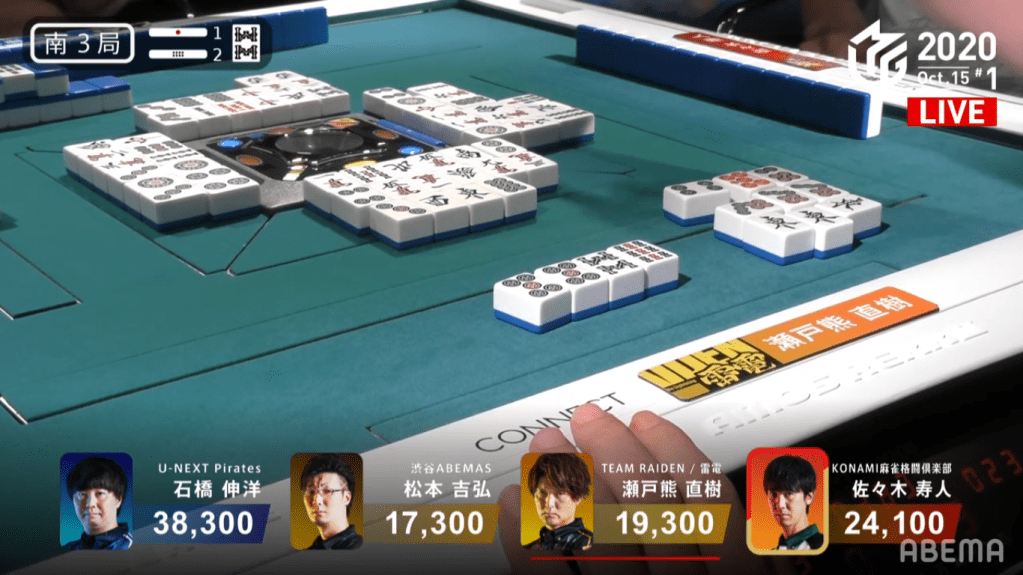
Video: https://abema.tv/video/episode/444-7_s30_p32
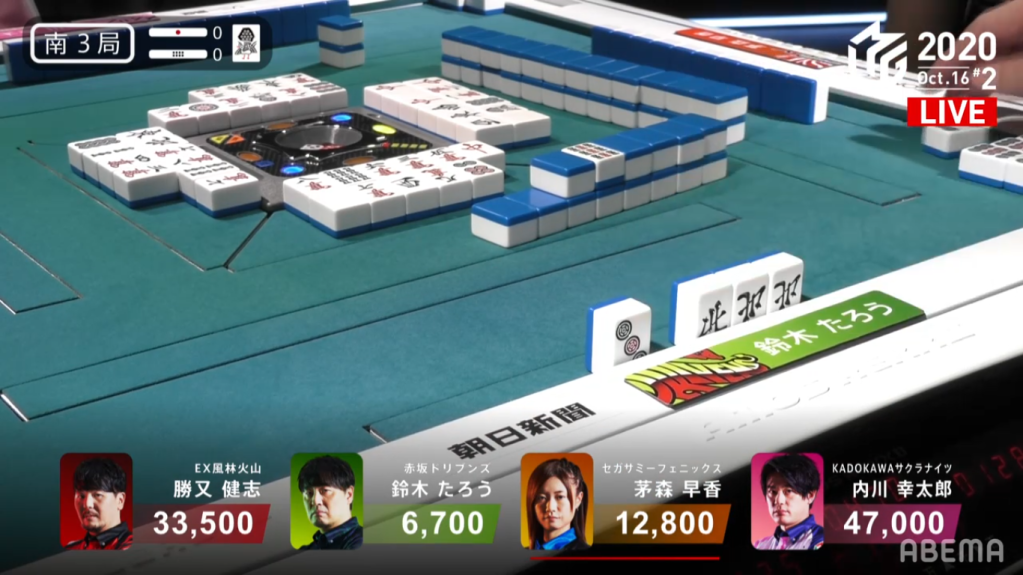
In S3-2, Setokuma is the dealer and in 3rd place after going from 41,100 down to 19,300. With a nice starting hand with a pair of easts, a dora and a red dora, Setokuma starts his conquest to take back the lead. On turn 3, he calls pon on the easts, giving him a yaku. A turn later, he calls pon on the 7p to get him to iishanten, and calls chii the turn after to get to a 5,800 point tenpai waiting on the 7s. Sasaki, who’s in 3rd and wanting a chance at 1st, gets to tenpai at the end of the 1st row calling riichi on a white dragon/6s shanpon wait. With a riichi from Sasaki and and an obvious tenpai from Setokuma, both Ishibashi and Matsumoto are forced to bail. In the middle of the 3rd row, Sasaki draws the 7s and deals into Setokuma for East/Dora 1/Aka 1 and 5,800+600 points, as well as two riichi sticks.
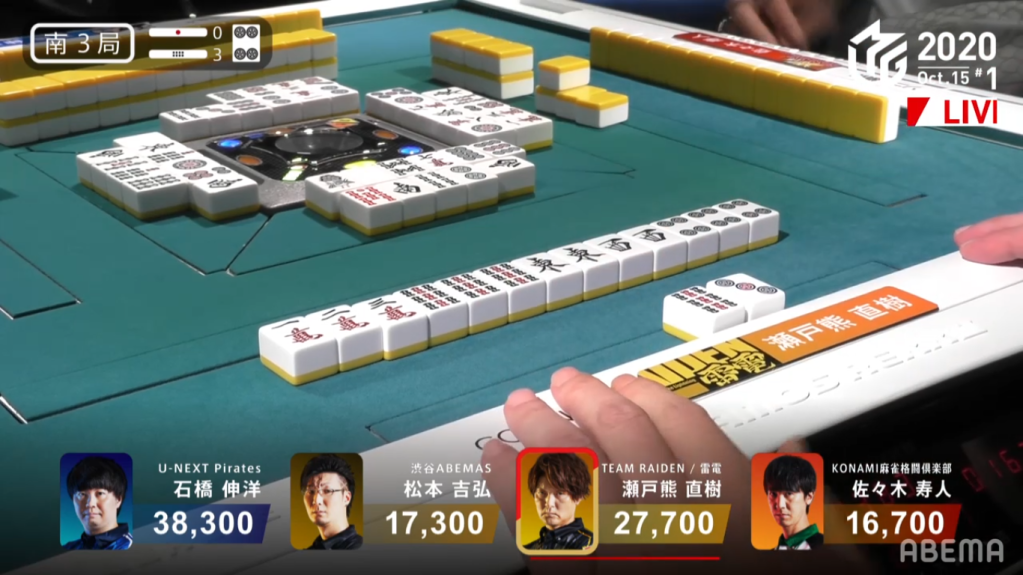
Video: https://abema.tv/video/episode/444-7_s30_p33
In S3-3, Setokuma starts out in a similar situation again, with a pair of easts, a dora and a red dora. On the first east discard, Setokuma denies the call because it can be used as a pair. The east pair becomes helpful as part of a shanpon when he draws a pair of wests. In the 2nd row, Setokuma draws a dora and another to make an ankou and gets him to tenpai on the east/west shanpon. Calling riichi, he becomes tenpai on a mangan minimum hand, enough to get to 1st. On the ippatsu turn, Sasaki discards the east and deals in to Setokuma. Setokuma deals Sasaki with another blow, this time with a Riichi/Ippatsu/East/Dora 3 for 18,000+300.
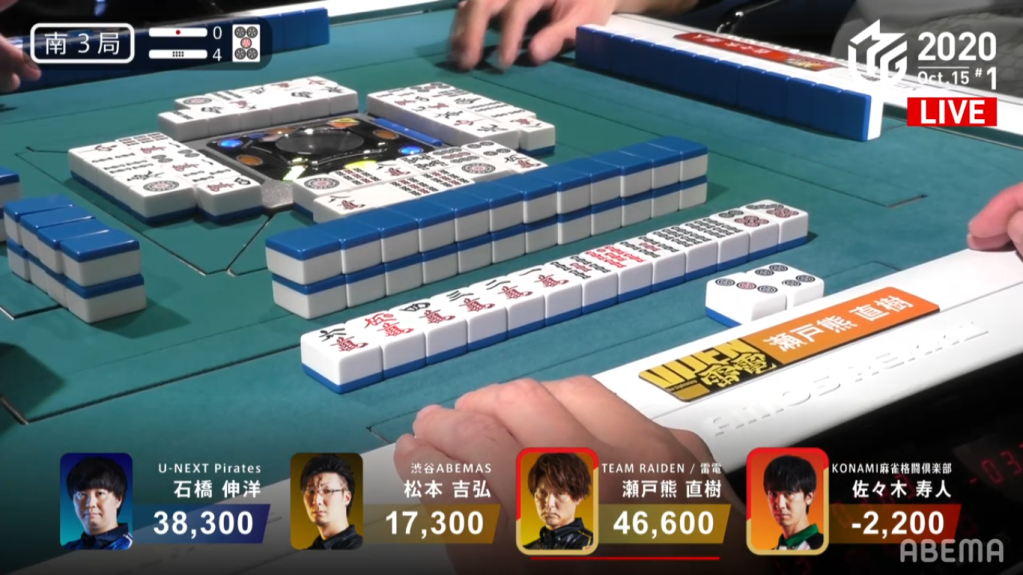
In S3-4, Setokuma starts with two red dora in his haipai. The ability to call is hindered by multiple terminals and honours in hand, but not impossible to deal with. Sasaki fares much better in this hand, starting out iishanten with a sanmenchan chance. Through the first row, Setokuma advances his hand to iishanten, while Sasaki’s hand stalls at iishanten. At the start of the 2nd row, Sasaki gets to tenpai and calls riichi on a 3p/west shanpon. With chances of both good value and good waits, Setokuma continues to push. When he gets to tenpai, he calls riichi as well, waiting on the 58p ryanmen. Two turns later, Sasaki draws and discards the 5p dora, giving Setokuma yet another win. Setokuma wins with Riichi/Dora 1/Aka 2 for 12,000+1200 and throws Sasaki even deeper in the hole.
In just three hands, Setokuma goes from 19,300 to 60,800 and Sasaki goes from 24,100 to -16,400, showing how only a few hands can change the course of the game.
Asakura’s Big Jump
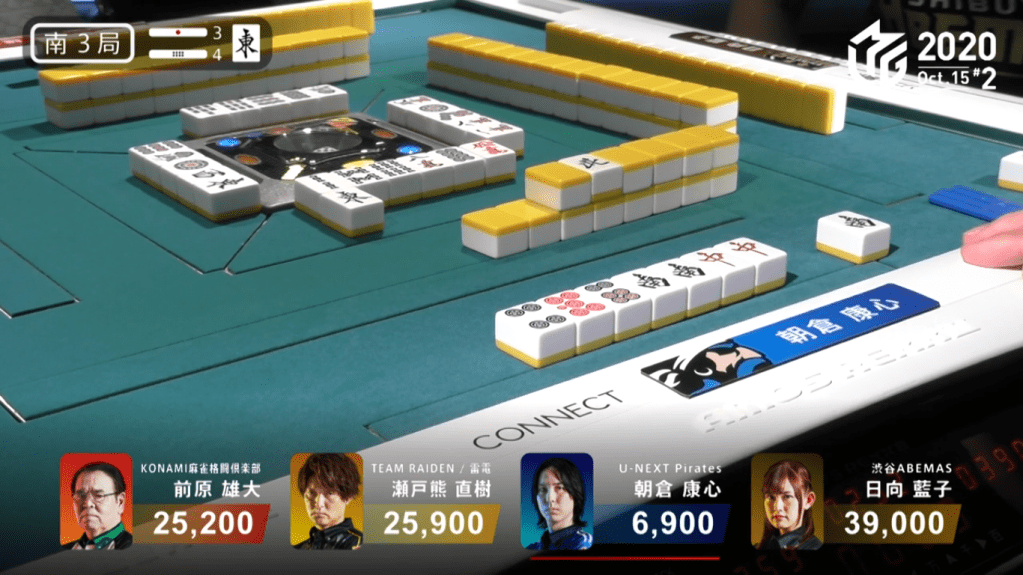
In S3-4, Asakura is in last with only 6,900 points. As dealer and with 4,200 in bonus sticks available, the stage is set for Asakura to make his comeback. His hand starts out with a pair of red dragon, north and 3p, and a sequence in pinzu, the path already being carved for honitsu. When the 3p gets discarded, Asakura calls pon, bringing his hand to 2-shanten. With his next draw, he gets to iishanten for at least a mangan. With a pon of the north, Asakura gets to tenpai on the south/red dragon shanpon. One turn later, Asakura draws the winning south for Honitsu/South/Aka 1. With 4000+300 all along with the three riichi sticks, Asakura catapults from 6,900 in 4th to 23,100 in 2nd. At the end of the game, he ends up in 2nd place, escaping what looked like an inescapable 4th because of a good dealer win.
Dora Tanki Never Fails
In E1-2, Kondo is the dealer after two hands going to ryuukyoku. He starts out with some very nice shapes, with two complete blocks and two ryanmen. His hand gets to tenpai fairly quickly, doing so on turn 5. With no pair, Kondo calls riichi waiting on the green dragon tanki. With no one wanting to go against a dealer riichi or deal the dora, Kondo would expect that the only way for him to win is by tsumo. After a long wait, Kondo finally draws the green dragon in the middle of the 3rd row. Revealing 1 ura dora, Kondo wins a Riichi/Tsumo/Dora 2/Aka 1/Ura 1 haneman for 6000+200 all.
No More Ura San
E1-0, Uchikawa starts his hand with a red dora and a hand geared towards tanyao. By turn 5, his closed hand becomes iishanten and by turn 6, his hand is tenpai with a chance at sanankou. Uchikawa calls riichi on a 2p/4s shanpon, holding a guaranteed 5,200 hand. Taro, who holds a hand with good shape and good value at iishanten, pushes his hand and discards the 2p. Uchikawa reveals a 4s ura dora indicator, which gives Uchikawa 3 ura dora from his 5s ankou. Uchikawa wins the hand with Riichi/Tanyao/Aka 1/Ura 3 for 12,000.
Kan! Ron!
Video: https://abema.tv/video/episode/444-7_s30_p39
In S3-0, the dealer Kayamori starts out with a dora and a red dora, while Taro starts out with a pair of green dragons and honitsu opportunity. When the green dragon is discarded, Taro calls it, getting a yaku. As Taro draws more honours, he discards his 56m block to commit to a pinzu honitsu. Taro later calls pon on the 4p to get to 2-shanten and the 9p for iishanten. As Taro waits to get to tenpai, Kayamori tries to get to tanyao. Kayamori draws a red dora to get to 2-shanten and calls the red 5m for iishanten, giving her all three of the red dora. Taro gets to tenpai right after by drawing a north, giving him a 25p ryanmen wait. When Taro draws another north, he has a decision to make. Since north is his seat, holding the north would give him an another han. Furthermore, the fact that he can see all of the 4p and none of the 2p means that the 2p is being used up as part of a pair or an ankou. Switching the wait from a 25p to a 3p tanki, Taro tries to call kan on the 4p. However, it is also Kayamori’s winning tile, meaning that she can call ron to chankan the tile for the win. In the first chankan ever in M-League, Kayamori wins the hand with Tanyao/Chankan/Aka 1 for 12,000 points.
Suzuki Taro’s Revenge
Video: https://abema.tv/video/episode/444-7_s30_p40
In S4-0, Taro is at -100 and 19,700 points behind Kayamori. All hope is not lost, however, as a baiman tsumo would be enough to get into 3rd. Taro’s hand starts out with a very good chance at it, holding two dora and two red dora at 2-shanten. With a highly probable riichi, all he needs is two more han along with tsumo to get to 3rd. Drawing a 6p for the red 57p block, Taro gets to tenpai with pinfu and calls riichi on the 14p ryanmen wait, meaning he only has to find one more han, whether through ippatsu or ura dora. With Hiyoshi commentating, he kept saying that there are still 7 of his winning tiles left in the wall that he can draw on his ippatsu. The ippatsu misses, but there was still hope if he gets ura. Turn after turn, the pressure increases, with Taro just looking to get his winning tile. At the start of the 3rd row, 6 draws after Taro called riichi, Taro finds the 4p and wins by tsumo. Revealing one ura dora, Taro wins the Riichi/Tsumo/Pinfu/Dora 2/Aka 2/Ura 1 for a 4000/8000 baiman. Taro gets out of the deep hole and takes 3rd place, winning 3rd place by just 300 points.
