
Highlights
Fujisaki’s Dora Kan
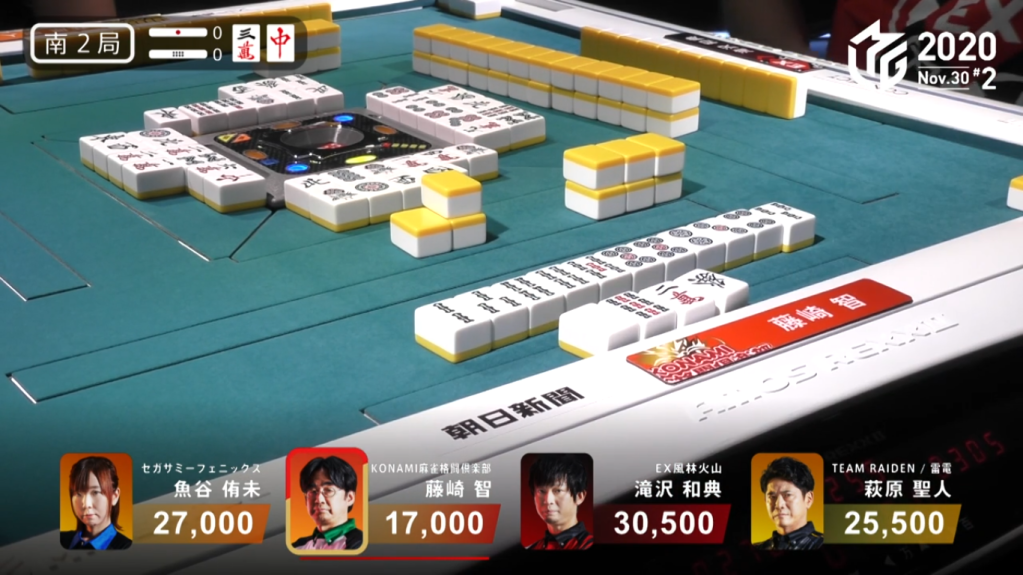
November 30, Game 2, S2-0
Video: https://abema.tv/video/episode/444-7_s30_p163
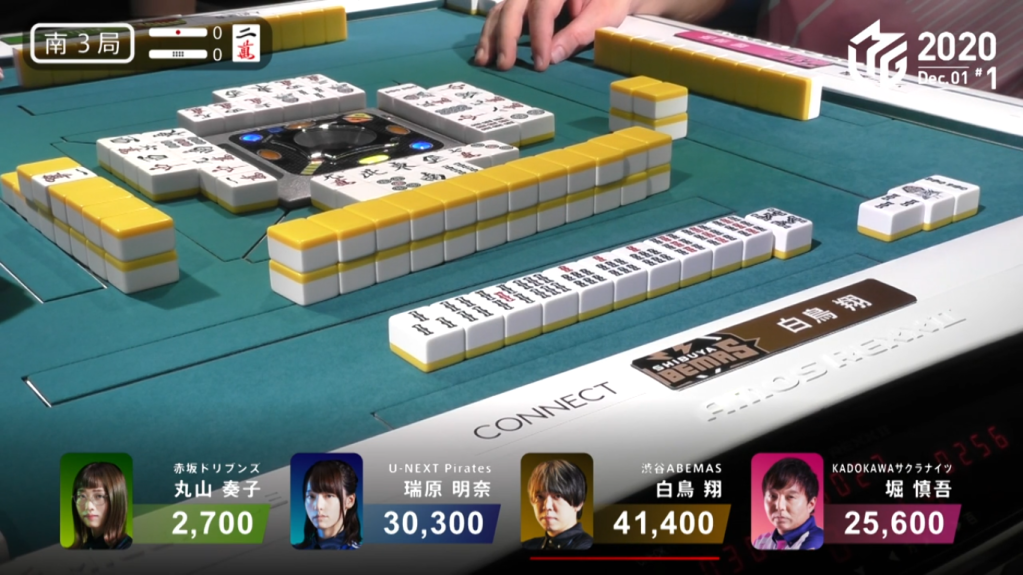
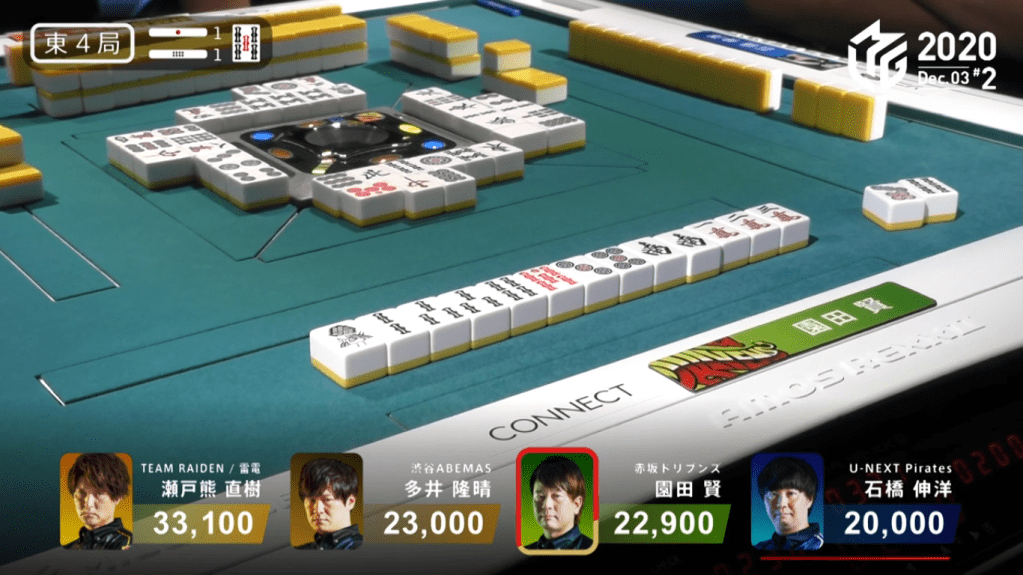
In S2-0, Fujisaki is in 4th place and looking to make his way up with his dealer turn. Fujisaki starts his hand out well, being 2-shanten and holding two dora. For the first four draws, his hand doesn’t advance, but on his 5th draw, he finds a third 3m dora to make it an ankou and bring him to iishanten. On his 8th draw, Fujisaki draws a fourth 3m dora and calls kan. With the kan, he brings his hand up to 5 han for a minimum of 12,000 points if he wins. In Fujisaki’s 1355p block, he discards the 1p, but draws 2p right after. With the potential to call for tanyao, Fujisaki takes the furiten risk and starts to discard a pair of wests to take the ryanmen iishanten. On his next turn, he draws the 4p and calls riichi to wait on the 36s ryanmen wait, guaranteeing 18,000 if he wins. Fujisaki draws the 3s on his very next draw to win with Riichi/Ippatsu/Tsumo/Tanyao/Dora 4 for 8,000 all. The hand catapulted him to 1st place and was the key factor to him winning the game.
With the win, he became the top player in November, earning 191.2pts in the month with a 3/1/0/0 record.
Dealer Speed
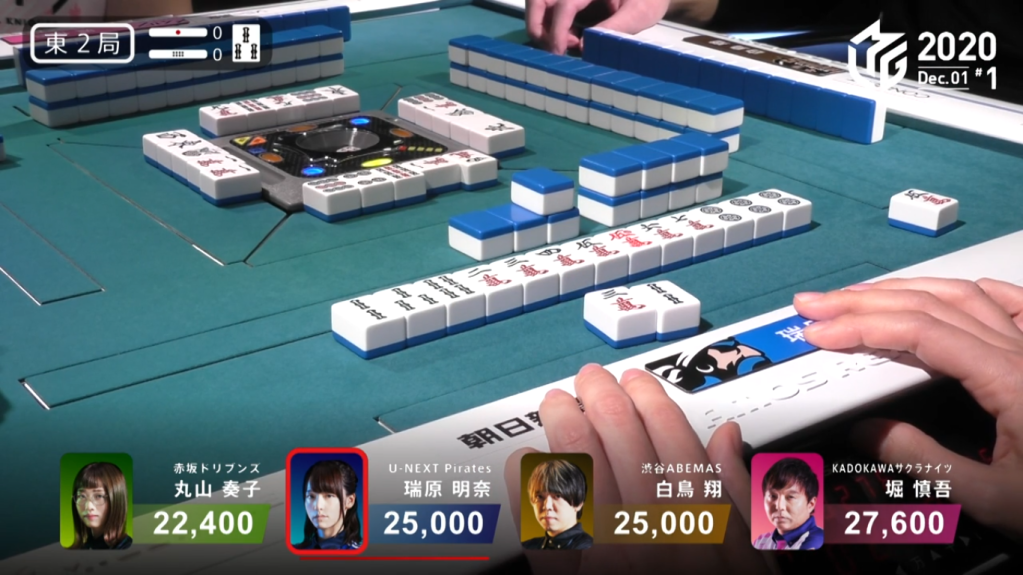
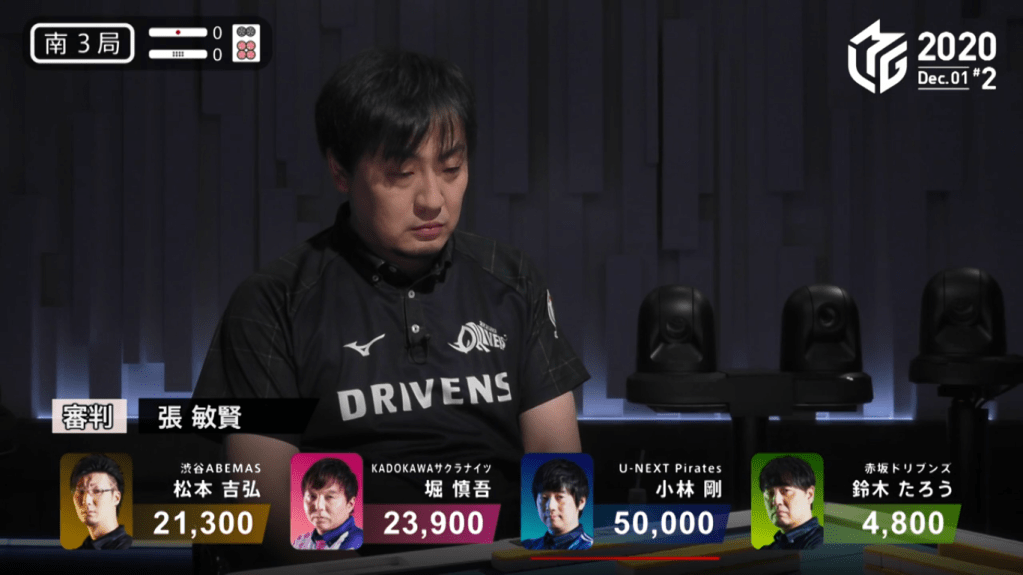
December 1, Game 1, E2-0
In E2-0, Mizuhara is the dealer with all her starting points intact. Mizuhara’s haipai starts out amazingly well, being iishanten with a dora, a red dora and a good tanyao possibility. On turn 2, she increases her ukeire count from 17 to 38 with a guaranteed good wait with whichever tile she gets to tenpai with. On turn 4, Mizuhara gets to tenpai and calls riichi on a 258m wait, holding a guaranteed mangan. On turn 6, she draws the 5m to win the hand. She wins with Riichi/Tsumo/Tanyao/Dora 1/Aka 1/Ura 1 for 6,000 all to catapult her up to 43,00 points.
ShiratoRinshan
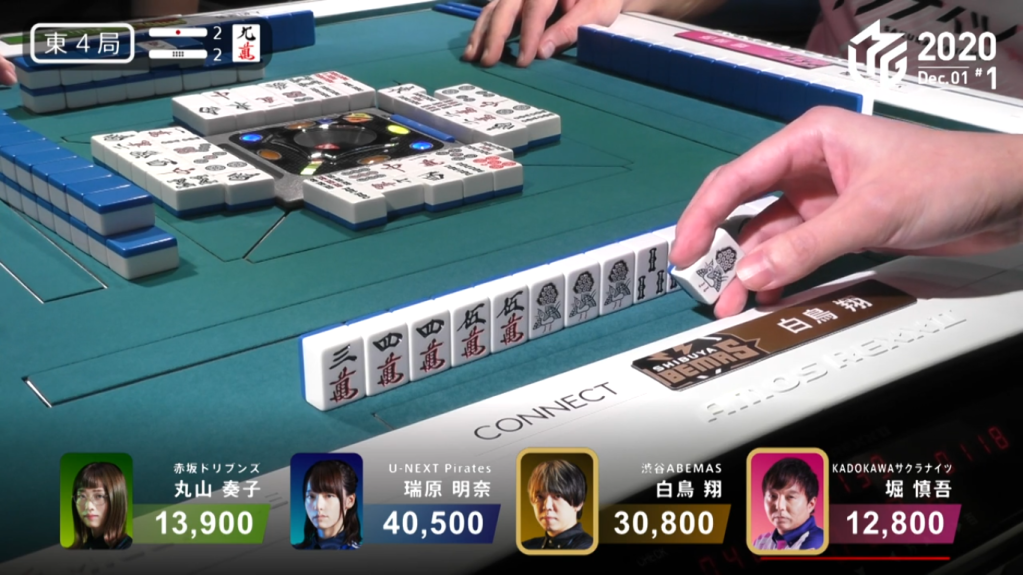
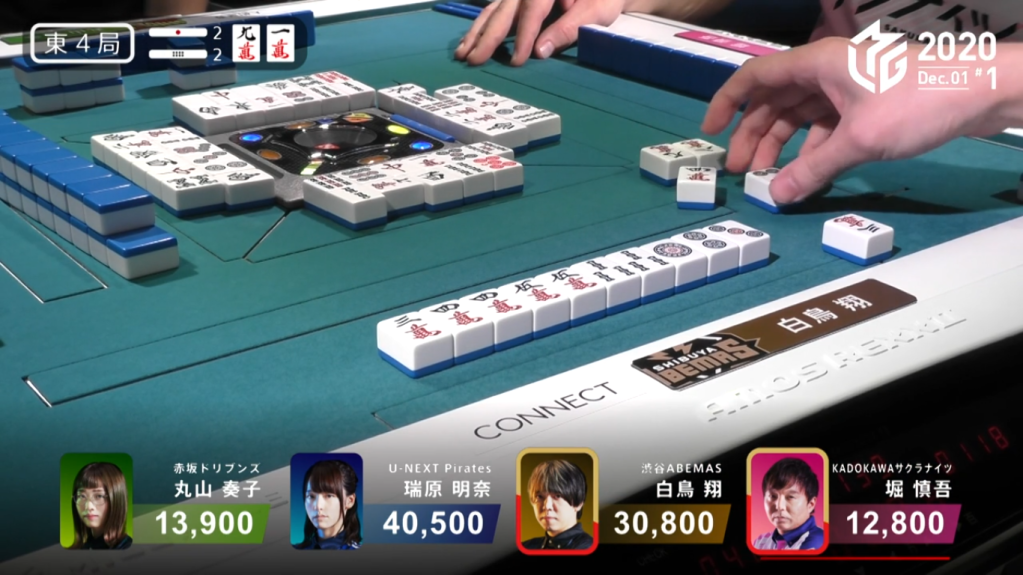
December 1, Game 1, E4-2
Video: https://abema.tv/video/episode/444-7_s30_p166
In E4-0, Shiratori is in 2nd place and looking to take the 2,600 in bonus points available on the table. Shiratori starts out with at 4-shanten with a decent potential for sanshoku. With all the points on the table, Maruyama calls early to advance her hand quickly. With Shiratori’s lack of calling ability, he waits patiently for tiles to come to him. Near the end of the 1st row, Shiratori is faced with another challenge, this time from a riichi call from dealer Hori. While discarding genbutsu and suji tiles, Shiratori eventually gets to tenpai and calls riichi on a 25m ryanmen wait near the middle of the 2nd row. With two riichi calls, Maruyama’s early attempt to advance quickly is just as quickly turned into a retreat. At the end of the 2nd row, Shiratori draws the 1s. Already having an ankou of 1s, Shiratori decides to call kan. Shiratori finds the 3m as the rinshan and wins the hand. Shiratori wins with Riichi/Tsumo/Rinshan/Iipeikou/Ura 2 for 3,000+200/6,000+200, plus 3,000 in riichi sticks to take the lead.
Pure as a White Bird
December 1, Game 1
In S3-0, Shiratori is in 1st place and the dealer. He starts his hand at 4-shanten with 8 souzu tiles and 4 honours. At the end of the 1st row, Shiratori calls chii on Mizuhara’s discarded 3s and becomes 2-shanten from chinitsu tenpai. On the next draw, he gets to chinitsu iishanten and a few turns later, he becomes tenpai, waiting on the 25s. He manages to improve his wait by making his fixed 9s pair to be an ankou, giving him a ryanmenten with nobetan 23568s wait. The very next turn, Shiratori draws the 2s to win the hand. He wins with Chinitsu for 4,000 all.

In S3-1, Shiratori starts with a clear chinitsu haipai, being 2-shanten and holding 11 manzu. On Mizuhara’s 4m discard, Shiratori calls chii to put him to iishanten. On Mizuhara’s next discard, she discards the 7m and Shiratori calls chii to get him to tenpai, waiting on the 7m. Within the first go-around of Shiratori’s tenpai, Maruyama discards the 7m to deal into Shiratori. Shiratori wins the Chinitsu hand for 12,000+300 points and brings his score up to 65,700.
Shiratori ends up winning the game with 64,700, making it the second highest final score of the season at that point.
Go Honba For Kobayashi Go
December 1, Game 2
In E2-0, Kobayashi wants to keep is 100% fourth place avoidance streak, but is facing off against Taro and Matsumoto, both of whom have a 100% fourth place avoidance streak as well. Kobayashi’s hand starts out at the dreaded 4-shanten for chiitoi, 5-shanten for a normal hand. His hand gets a little better through the first row, being 2-shanten for chiitoi and 3-shanten for a normal hand. Two turns later, Kobayashi draws his 5th pair and on the very next turn, Kobayashi gets to tenpai and stays dama on a 4p wait. At the end of the 2nd row, Kobayashi decides to lay a suji trap and call riichi, switching his 4p wait to a 7p wait. With no one able to get to tenpai safely, everyone decides to bail on their hand. The hand ends up going to ryuukyoku, with Kobayashi the only one tenpai.
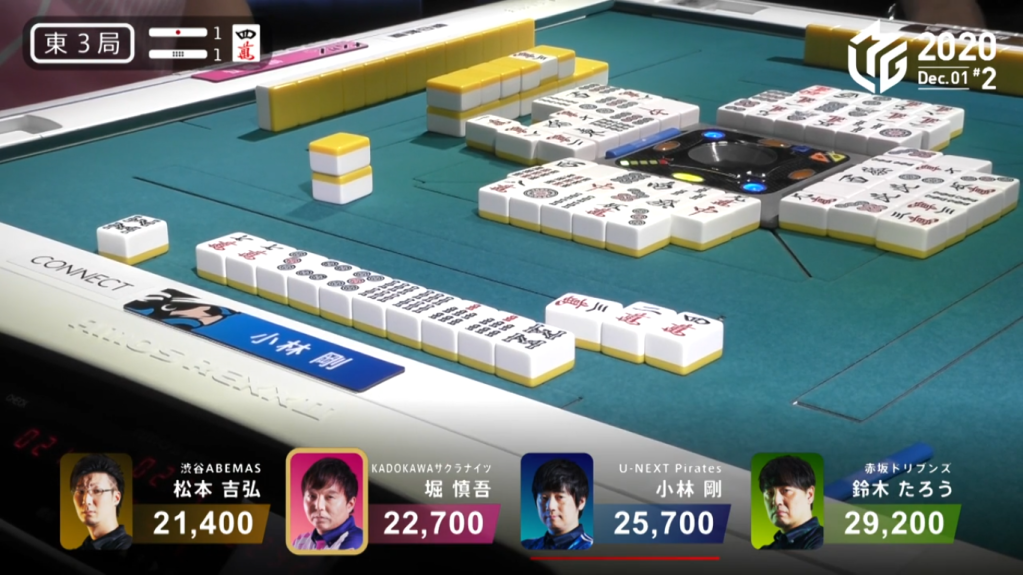
In E3-1, Kobayashi starts his dealership and looking to continue his point haul. Kobayashi starts his hand at 2-shanten with a dora in hand. By the end of the 1st row, Kobayashi’s hand hasn’t progressed at all, but his hand now allows him to call for tanyao if he wishes. As expected, Kobayashi does make a call, filling in a kanchan and putting him in a ryanmen-ryanmen iishanten. On Kobayashi’s next draw, he gets to tenpai, waiting on a 58s ryanmen wait. As Kobayashi waits for his winning tile, Hori calls riichi on a 2s tanki wait. It isn’t until late in the hand that the hand is resolved, with Kobayashi drawing the 8s to win with Tanyao/Dora 1 for 1,000+100 all.

In E3-2, Kobayashi starts with a 4-shanten hand with four 3m. Early in the 1st row, Taro tries to rush the hand, call twice to push his honitsu hand. At the start of Kobayashi’s 2nd row, he has miraculously turned his 4-shanten hand to tenpai. Still holding the four 3m, he calls kan. Not finding the winning tile in his rinshan, he calls riichi, waiting on an 8p/1s shanpon wait. On Matsumoto’s draw after Kobayashi’s riichi, Matsumoto gets to tenpai and tries to call riichi by discarding the 8p. Matsumoto instantly deals into Kobayashi’s hand for Kobayashi to win with Riichi/Ippatsu/Dora 1 for 9,600+600 points.

In E3-3, Kobayashi starts his hand at 4-shanten. On turn 3, he draws a white dragon pair and quickly calls pon on it at the first chance he can. By the end of the 1st row, Kobayashi is 2-shanten with one dora. A few turns later, Kobayashi calls chii to get to iishanten. Near the end of the 2nd row, Taro tries to catch Kobayashi in a bad place by calling riichi against his two open calls. With Kobayashi’s next draw, he gets to tenpai with a 69s wait. With every draw, Kobayashi just pushes his hand forward and eventually, Taro discards the 6s to deal into Kobayashi. Kobayashi wins the hand with White Dragon/Dora 1 for 2,900+900.
In E3-4, Kobayashi starts with a 4-shanten hand with a 1s ankou. Discarding terminals and honours, Kobayashi gets to 2-shanten by the end of the 1st row. After a few undesirable draws, Kobayashi advances his hand to iishanten near the end of the 2nd row. Near the start of the 3rd row, Kobayashi gets to tenpai and puts pressure on the table by calling a dealer riichi, waiting with a 58p ryanmen wait. As with any dealer riichi, his opponents were reserved and stopped advancing their hands. The hand goes to ryuukyoku with Kobayashi the only one tenpai.
In 5 hands, Kobayashi earns a net 24,300 points, making the dealer run one of the keys to his win.
Dead Hand
December 1, Game 2, S3-0
In S3-0, Taro is in 4th place and looking to find the 16,500 points he needs to get out of last. Taro starts out with good potential, holding three pairs of terminals and a lone 9s, giving him a honroutou or chinroutou chance. On Hori’s first discard, he discards the 9s and Taro calls pon. However, Taro doesn’t have the tiles to complete the pon. The game was temporarily stopped to come up with a ruling.
Because of the false declaration of pon and the inability to complete it, Taro’s hand was declared dead. With a dead hand, Taro is unable to make any calls (including riichi and winning calls), as well as having to declare himself noten if the hand goes to ryuukyoku. The hand ends up finishing with Kobayashi winning with Tsumo/Pinfu/Tanyao/Dora 2 for 4,000 all.
This isn’t the first time that Suzuki Taro has gotten himself into dead hand trouble. Last season, Taro ended up drawing another tile after drawing his first tile and ended up with a hand with too many tiles, resulting in a dead hand.
Chasing the Points
December 3, Game 1, S2-3
In E2-3, Asakura is in 2nd place and 3,900 in bonus points are up for grabs. Asakura starts out with a 3-shanten hand with a red dora. Through the first row, he picks up tiles to make his isolated tiles to ryanmen and by the end of the 1st row, he is iishanten for a basic pinfu hand. Despite 11 different tile types that can bring Asaskura to tenpai, he fails to find any of them over the next few turns. In the middle of the 2nd row, Murakami tries to scare the table with a dealer riichi, even though his wait is a 5m kanchan. On Asakura’s first draw after Murakami’s riichi, he gets to tenpai and calls a chasing riichi on a 58p ryanmen wait. As luck would have it for Asakura, Murakami’s ippatsu draw is the 5p, which instantly deals into Asakura. Asakura wins with Riichi/Ippatsu/Pinfu/Aka 1 for 8,000+900, plus three riichi sticks and Murakami’s stick to take the lead.
Hope Lives
December 3, Game 2, E1-0
In E1-0, Setokuma is the dealer and starts out with a 4-shanten chiitoi haipai, 5-shanten for a regular hand. By the end of the 1st row, Setokuma’s hand improves to a 2-shanten hand for both chiitoi and a regular hand. Holding a red dora, a regular dora and a pair of white dragons, Setokuma has the option to call to get himself a chance at mangan. However, his possible mangan is stymied by poor draws turn after turn. Through the 2nd row and most of the 3rd row, Setokuma is stuck at iishanten. On Setokuma’s second last draw, he draws the dora to get to tenpai holding mangan minimum hand with a 369p sanmenchan wait. On his last draw, Setokuma draws the 9p to win the hand. Setokuma wins with Tsumo/Iipeikou/Dora 2/Aka 1 for 4,000 all.
Taste of His Own Medicine
December 3, Game 2, E4-1
In E4-1, Sonoda is in 3rd place and starts out with a 2-shanten hand. On Sonoda’s 2nd draw, he gets to iishanten, but goes back to 2-shanten the next turn for a chance at sanshoku. On turn 4, Sonoda draws the red 5s dora. At the start of the 2nd row, Sonoda draws to tenpai and employs some of Ishibashi’s trickery. While calling riichi, Sonoda discards the red 5p to wait on the 4p, even though he could have discarded a regular 5p. Along with the red 5p, his 1p discard make 4p even more safe. Ishibashi doesn’t fall for the trick at first, succeeding in not dealing in his isolated 4p. However, when Ishibashi gets to tenpai, he tries to call riichi by discarding the 4p. Sonoda calls ron and wins the hand for Riichi/Dora 1/Aka 1 for 5,200+300.
The red 5p discard move is reminiscent of the Ishibashi Trap from last week. Ishibashi even tweeted that there was “copyright infringement” by Sonoda for doing the move.
Ishibashi Takame
December 3, Game 2, S1-0
In S1-0, Ishibashi is in 4th place right after he fell for the Ishibashi trap. He starts his hand with a 3-shanten and an ankou of 1s. By the end of the 1st row, Ishibashi is 2-shanten with pinfu prospects and a distant chance for sanshoku. Drawing a 6s near the middle of the 2nd row, Ishibashi becomes iishanten with a 678s sanshoku being close. The very next turn, Ishibashi gets to tenpai, calling riichi to wait on a 58p ryanmen, with 8p being the sanshoku takame. Right after Ishibashi calls riichi, Sonoda decides to go ahead and call a chasing riichi. However, on Ishibashi’s ippatsu draw, he finds his takame 8p. Ishibashi wins with Riichi/Ippatsu/Tsumo/Pinfu/Sanshoku for 3,000/6,000, along with Sonoda’s just-thrown riichi stick.
Faceoff
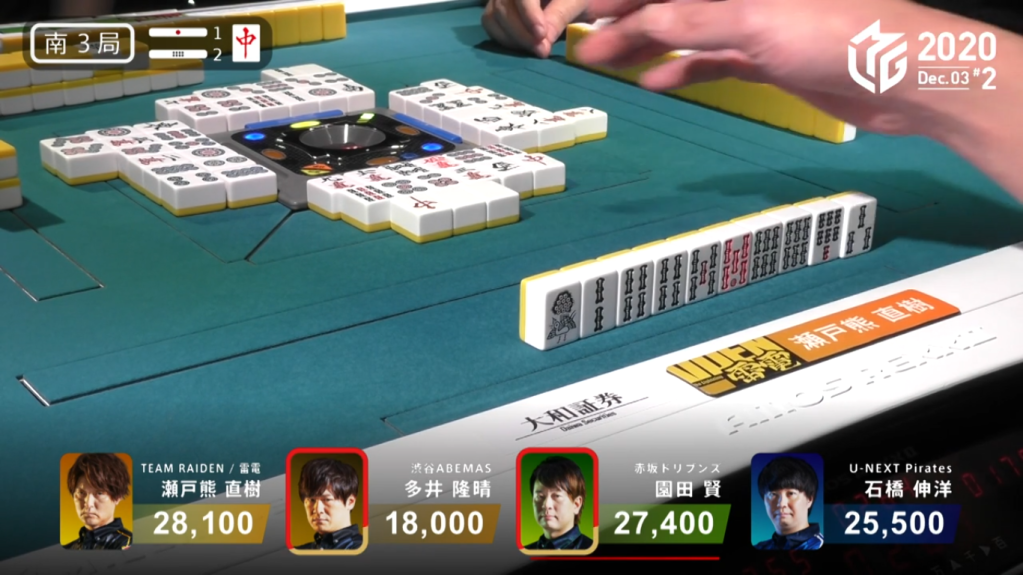
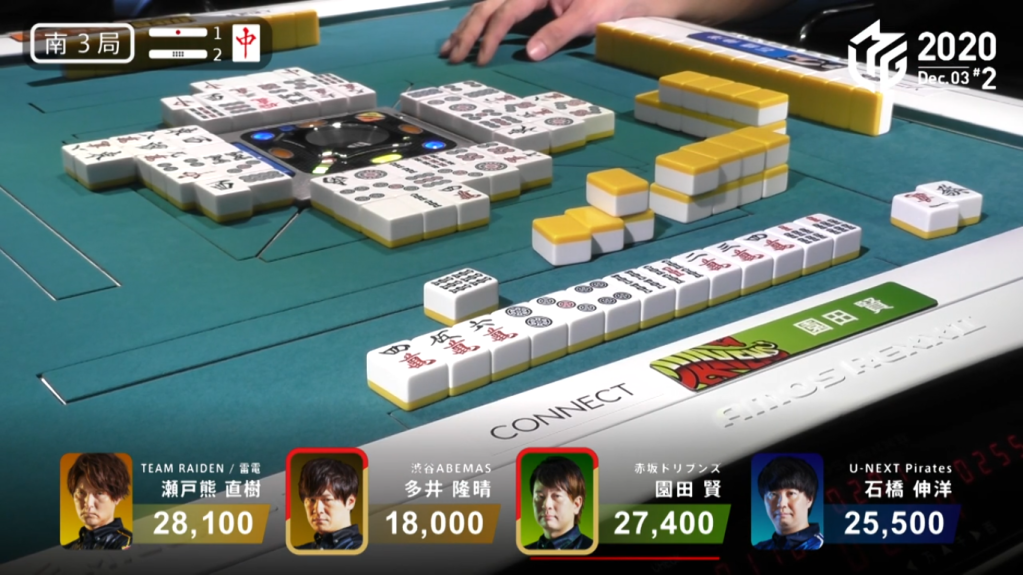
December 3, Game 2, S3-2
In S3-2, dealer Sonoda is in 2nd place and only 7,00 points behind 1st place. His hand starts out 2-shanten with ryanmen and ryankan shapes. As viewers, we can see Setokuma with very good honitsu mangan potential. By the end of the 1st row, Sonoda is still at 2-shanten, but holding onto only ryanmen shapes. In the middle of the 2nd row, Setokuma breaks the silence by calling pon to go straight for his honitsu mangan. At the end of the 2nd row, Sonoda get to tenpai and calls riichi on a 36s ryanmen wait. With Setokuma already in tenpai, he continues to forge forward, throwing the red dragon dora on the ippatsu turn. After Setokuma throws the red dora, Ooi gets to tenpai for sanshoku and calls riichi, waiting on the 2m. With three very dangerous hands on the table, Ishibashi bails on his iishanten to avoid falling to 4th. With the 2nd riichi, 1st place Setokuma decides to not pursue his hand and starts discarding his white dragon pair. However, on his next draw, he gets back to tenpai and has a wider 147s. The game is intense between the three tenpai players, but eventually Ooi draws the 6s and deals into Sonoda. Sonoda wins the hand for Riichi/Pinfu/Tanyao/Ura 1 for 12,000+600 and two riichi sticks.
The Final Stretch
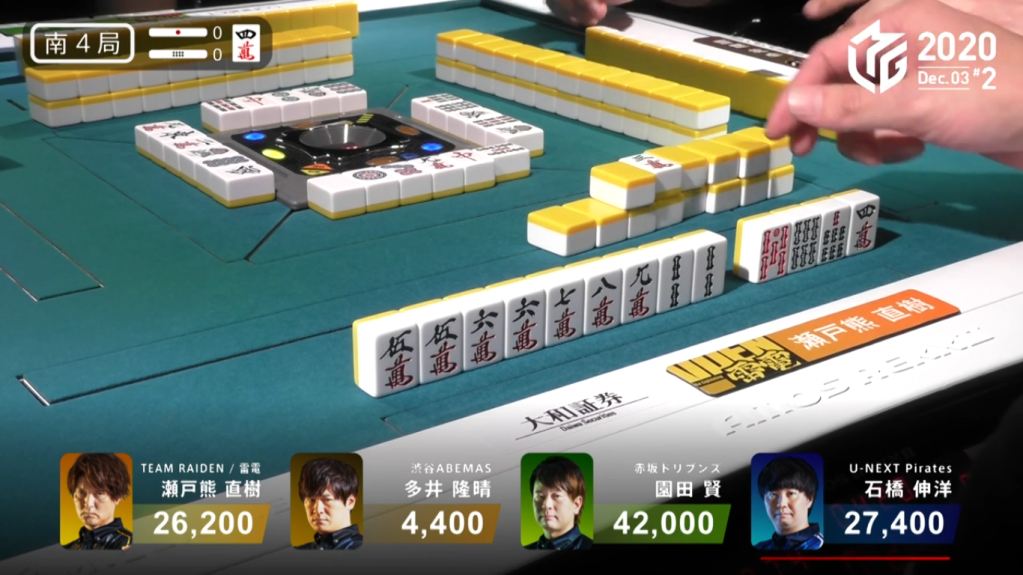
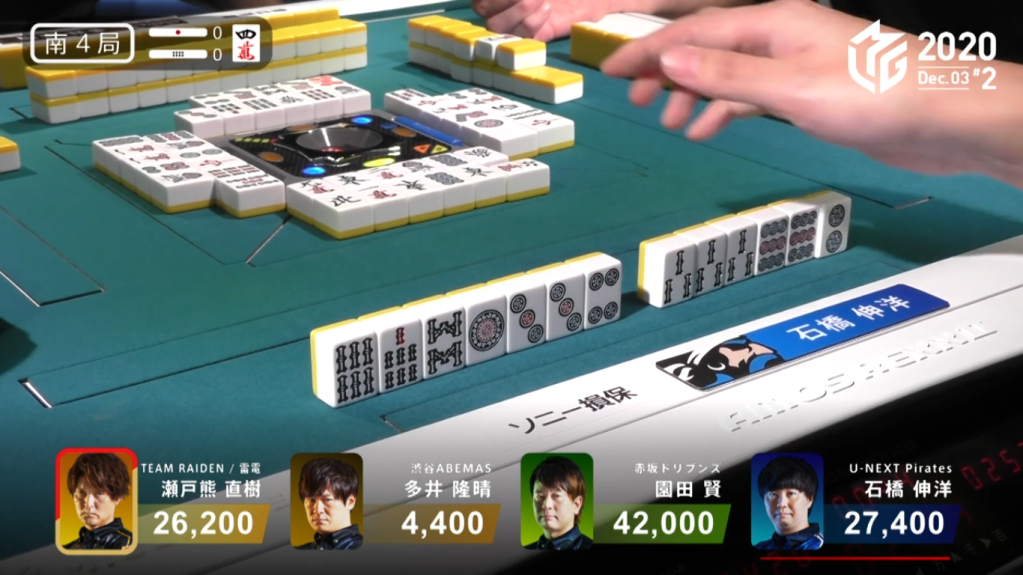
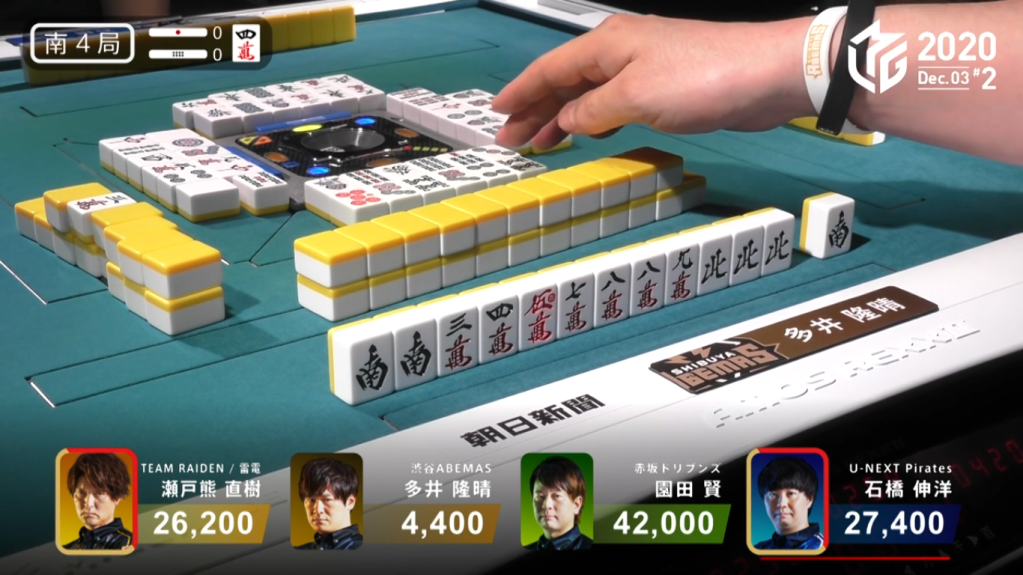
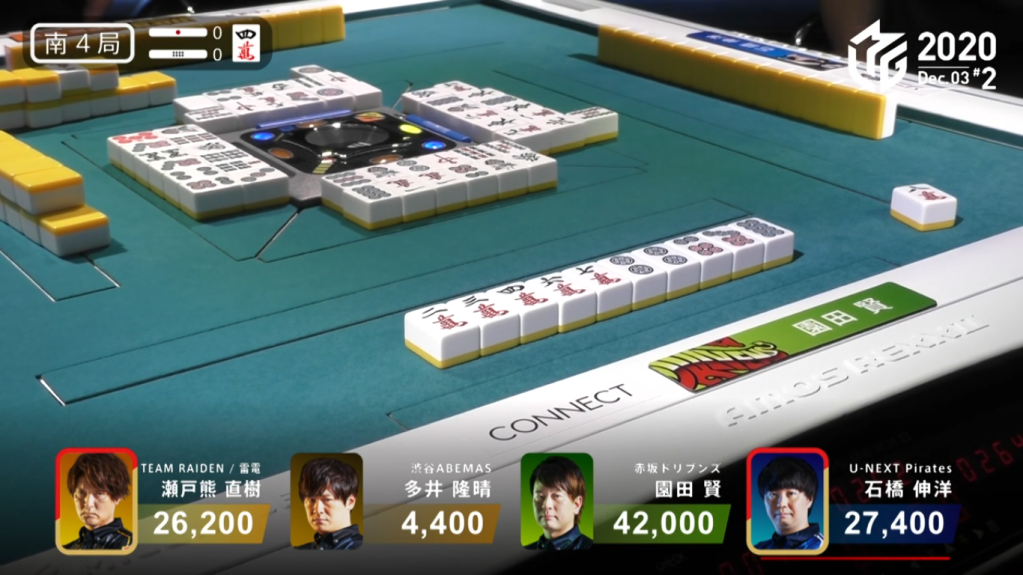
December 2, Game 2, S4-0
Video: https://abema.tv/video/episode/444-7_s30_p174
In S4-0, the scores are close and the game is intense. Ooi is in 4th place, but a haneman direct hit off Setokuma or Ishibashi, or a baiman tsumo is enough to get out of 3rd. Setokuma is in 3rd and looking to win any hand over 1,200 points to get into second. Ishibashi is the dealer in 2nd place, looking to take either small steps on his journey to 1st or one big mangan tsumo leap to get to 1st. Sonoda is in 1st and wanting the game to end quickly with a small hand.
(Let’s try a new format for this exciting hand…)
| Dec 3, 2020 Game 2, S4-0 | Ishibashi (Pirates) | Setokuma (Raiden) | Ooi (Abemas) | Sonoda (Drivens) |
|---|---|---|---|---|
| Score | 27,400 (Dealer) | 26,200 | 4,400 | 42,000 |
| Haipai | 4-shanten | 2-shanten for regular and chiitoi | 2-shanten, 1 dora | 2-shanten, 1 dora |
| Turn 4 | Forgos the chiitoi iishanten to lock in a normal hand iishanten | Has the option to go for tenpai, aims for 2-shanten honitsu | ||
| Turn 5 | Gets to iishanten with the 25p getting him to tenpai | |||
| Turn 6 | Draws the 4m dora and calls riichi waiting on the 47m. Drawing the 4m would get him to haneman for 1st place | Continues to push | Starts to bail by discarding the 5s from his 567s group | |
| Turn 11 | ↓ | Continues to push | Draws a 7m to get him to iishanten, discards the 1s suji | |
| Turn 12 | Draws the 2p, calls riichi to wait on the 25p ryanmen | ↓ | Draws the south, becomes haneman tenpai for Honitsu/South/Dora/Aka, waiting on the 8m | Calls chii on Ooi’s discarded 8s and gets to tenpai on a 58m wait |
| Turn 13 | Tenpai on 25p (Riichi) | Tenpai on 47m (Riichi) | Tenpai on 8m | Tenpai on 58m |
| Turn 13, Sonoda’s draw | Sonoda draws the 8m to win the hand for Tanyao/Sanshoku/Dora 1 for 1,000/2,000 | |||
| Payments | -2,000+(-1,000) | -1,000+(-1,000) | -1,000 | 4,000+2,000 |
| Final Score | 24,400 (2nd) | 24,200 (3rd) | 3,400 (4th) | 48,000 (1st) |
Just Another Day for Sasaki

December 4, Game 2, E4-0
Video: https://abema.tv/video/episode/444-7_s30_p178
In E4-0, Sasaki is the dealer in 2nd place holding a 3-shanten hand with a dora and a red dora. Holding a few ryanmen, the hand has potential for riichi and pinfu, giving a prospective dealer mangan. His hand develops very quickly, getting himself to iishanten by turn 3, but the unincorporated dora and a kanchan hurts his hand value potential. The good hand isn’t without troubles, however. Uotani, by turn 5, has already called twice, both of them being dragon calls. Near the start of the 2nd row, Sasaki is still at iishanten and has discarded the dora, but has gotten rid of his kanchan to secure pinfu. In the middle of the 2nd row, Sasaki gets to tenpai and calls riichi on a 47s wait for mangan minimum. The very next turn, Sasaki draws the 4s to bring his hand up to a haneman. Revealing the uradora, he adds two more han to his hand to bring the hand up suddenly to a baiman. Sasaki wins the hand with Riichi/Ippatsu/Tsumo/Pinfu/Tanyao/Aka 1/Ura 2 for 8,000 all to take a commanding lead.
The game ended up finishing with Sasaki in 1st place with 72,100 points, the highest single game point total so far this season. The game was Sasaki’s 7th win of the season, giving him more 1sts than Team Raiden and the Kadokawa Sakura Knights individually. Sasaki’s individual score went up to 367.9 for that game, higher than the team total of the EX Furinkazan, who are at the top of the standings.
