Highlights
70 Fu Open Hand
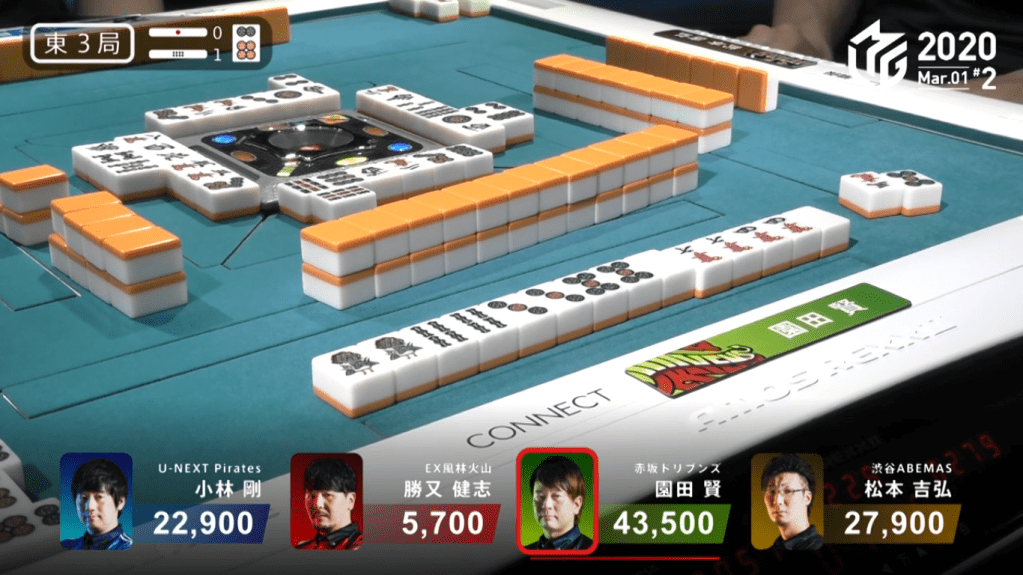
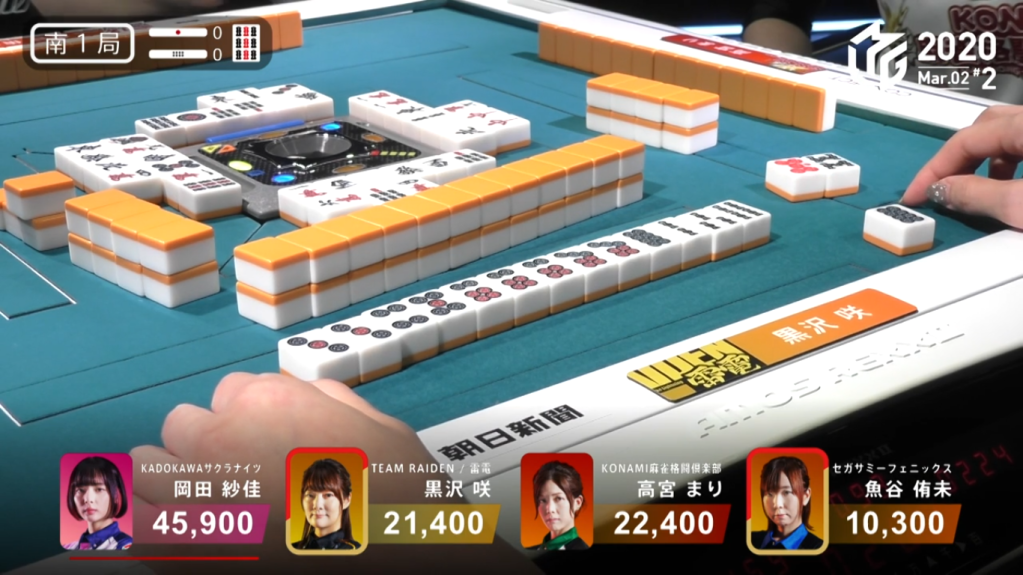
March 1, Game 1, S2-0
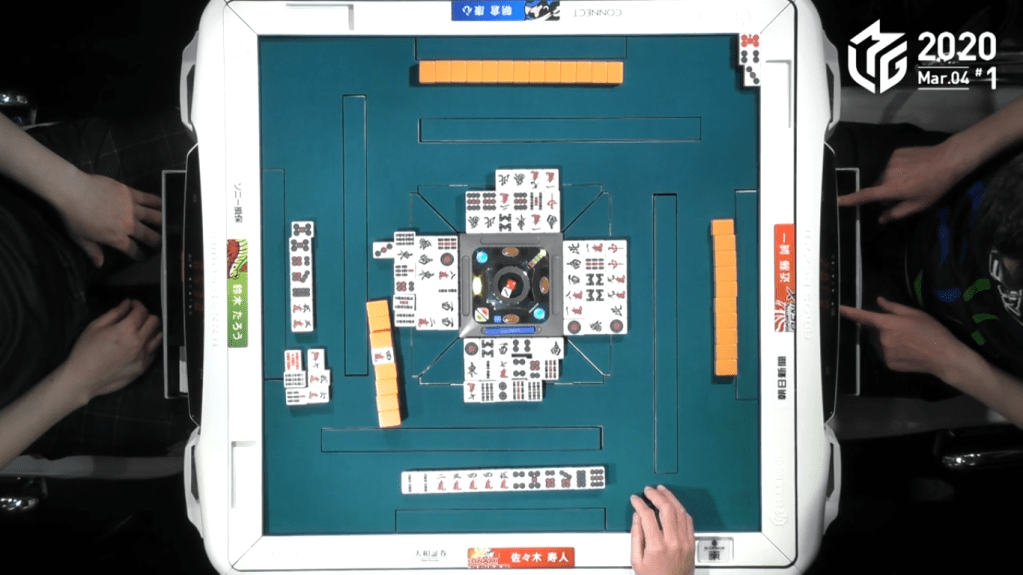
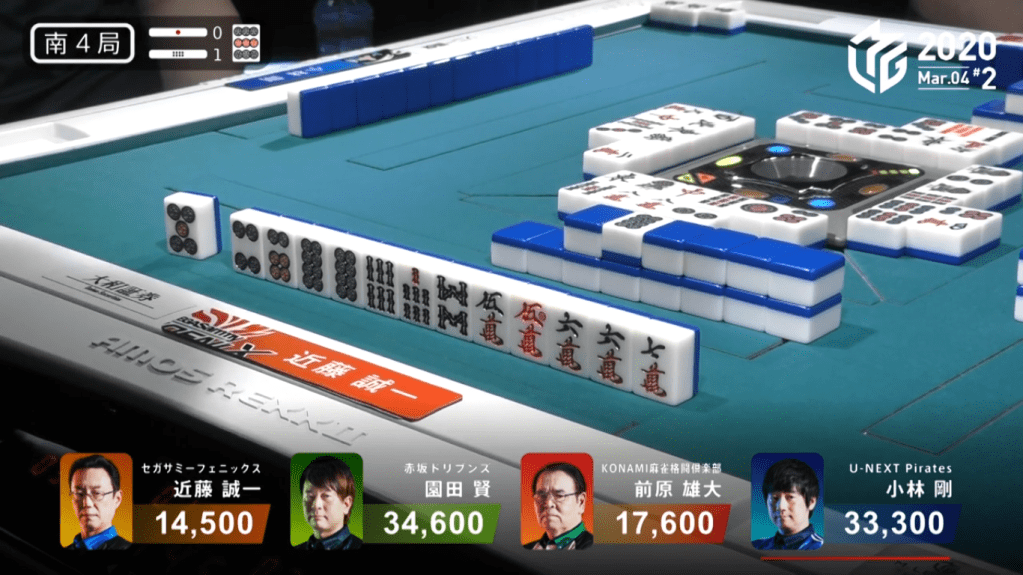
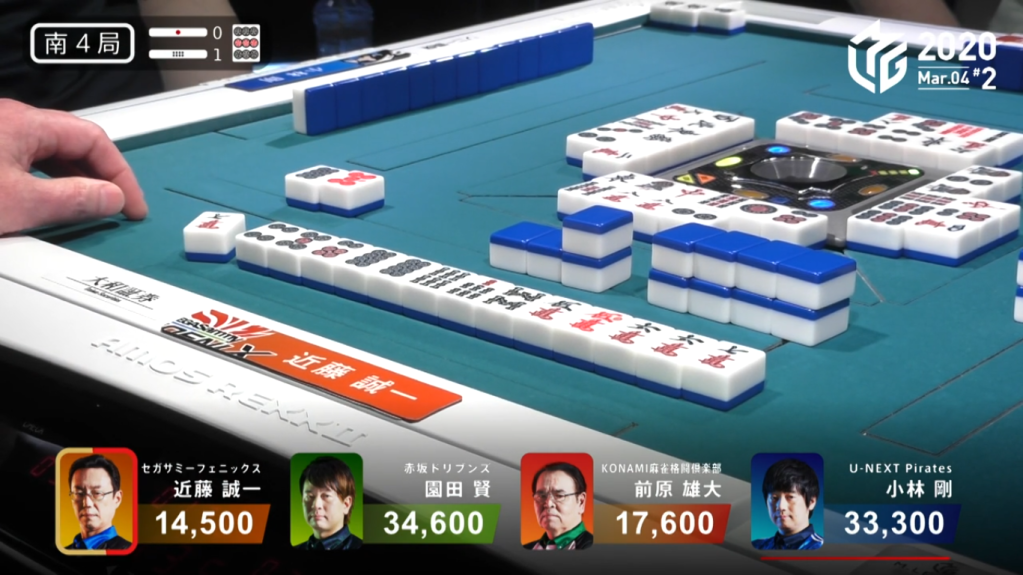
In S2-0, Matsumoto is the dealer and is 100 points away from 4th place. Matsumoto starts out with a 4-shanten hand with a red dora. On turn 3, he pairs up one of his lone yakuhai to give him a clear yaku objective and gets him to 2-shanten. By the end of the 1st row, Matsumoto has three ryanmen choices to go along with his callable green dragon. Drawing a third green dragon in the 2nd row, Matsumoto got himself to iishanten and called pon on the 9m to get to tenpai on a 58p ryanmen soon after. On his very next turn, he draws a 4th green dragon and calls kan. The rinshan misses and he continues the waiting game. The turn after that, he draws the 9m and calls kan. The rinshan misses again and he keeps waiting. Early in the 3rd row, Katsumata discards the 8p and deals into Matsumoto. For han, Matsumoto had a Green Dragon(1) and Red Dora 1. For fu, the calculation is a bit more harder. He gets the base for winning the hand (20), plus the fu from the closed kan of green dragon (32) and the fu from the open kan of 9m (16). Adding it all up and rounding it up to the nearest 10, Matsumoto’s hand is 70 fu (20+32+16=68, rounds to 70), a rarity for open hands.
The triggered multiple discussions online about memorizing 70 fu. The key progression for memorization is as follows:
6 -> 12 -> 23 -> 34 -> 45 -> 68 (notice the cascading 12, 23, 34, 45)
For tsumo:
- 600/1,200 = 1h/70f non-dealer tsumo
- 1,200 all = 1h/70f dealer tsumo
- 1,200/2,300 = 2h/70f non-dealer tsumo
- 2,300 all = 2h/70f dealer tsumo
For ron:
- 2,300 = 1h/70f non-dealer ron
- 3,400 = 1h/70f dealer ron
- 4,500 = 2h/70f non-dealer ron
- 6,800 = 2h/70f dealer ron
Sonoda’s Streak
March 1, Game 2
In E2-1, Sonoda is in 3rd place at an even 25,000. Sonoda starts out with a 2-shanten hand with an embedded dora. Though his first 5 draws were a flop he manages to get to iishanten with a guaranteed pinfu on the 6th draw. In the middle of the 2nd row, Kobayashi challenges Sonoda by calling riichi on a 36p ryanmen wait. At the end of the 2nd row, Sonoda gets to tenpai and stays dama on a 69p ryanmen wait. A turn later, after seeing Katsumata call a chii, Sonoda chased with a riichi on his 36p ryanmen wait. Two turns later, Sonoda draws the 6p to win the hand. Sonoda wins with Riichi/Tsumo/Pinfu/Dora 1 for 1,300+100/2,600+100, plus Kobayashi’s riichi stick.
In E3-0, Sonoda is 400 away from 1st place and starts out with a 2-shanten hand for both a standard hand and chiitoi. The hand quickly gets to iishanten on turn 2 and on turn 6, Sonoda gets to tenpai and calls riichi on a 69m ryanmen wait. With such an early riichi from the dealer, all three of his opponents bail their hands. In the middle of the 2nd row, Sonoda draws the takame 9m to win the hand. Sonoda wins with Riichi/Tsumo/Pinfu/Iipeikou/Aka 1 for 4,000 all to take the lead.
Video: https://abema.tv/video/episode/444-7_s30_p413
In E3-1, Sonoda starts out with a hand that is 4-shanten from a standard hand and 2-shanten for chiitoi. On turn 3, Sonoda draws his 5th pair to get to iishanten. With Katsumata trying to get out of last, he calls twice to get to tenpai, with the second call being on the dora. Even with the quick and expensive calling from Katsumata and the usual slow pace of chiitoi hands, Sonoda gets to tenpai at the start of the 2nd row and calls riichi on a white dragon tanki. Two turns later, Sonoda draws the white dragon to win the hand. Revealing two ura dora, the shortcut to haneman lives up to its name. Sonoda wins the hand with Riichi/Tsumo/Chiitoi/Ura 2 for 6,000+100 all.
Over the three hands, Sonoda earned a total of 36,800. With the three hands, it helped Sonoda take 1st place in the game and helped the team close the gap between them and the 7th place team, the U-Next Pirates.
Yakuman Tenpai?!?
March 2, Game 1, E3-1
Video: https://abema.tv/video/episode/444-7_s30_p416
In E3-1, Wakutsu is in last place and 13,500 behind 1st place dealer Setokuma. Wakutsu starts out with 9 different terminals and honours, with one of them already paired up. Having no clear path to any standard yaku besides chanta and junchan, Wakutsu starts out by discarding a red 5s. When she draws a red dragon on the 2nd turn, she discards a 3m from a 13m block to confirm the pursuit for kokushi. On turn 5, Wakutsu draws the 9m to put her iishanten for kokushi, waiting for either the 9p or the green dragon to get to tenpai. It took a long time, but Wakutsu managed to draw the green dragon near the end of the 2nd row and got to tenpai on the 9p. Even with the possibility of kokushi looming, Sawazaki manages to get to tenpai immediately after on a 3m kanchan by discarding the dora green dragon. The very next turn, Sawazaki did the bold move of calling riichi. With the riichi, it put the rest the players on edge.
With the 3m a suji tile against Sawazaki, Setokuma discards it and deals into Sawzaki to give Sawzaki the win and kills Wakutsu’s yakuman. Sawazaki wins the hand with Riichi/Ippatsu/Iipeikou for 5,200+300.
Tense Riichi Battle
March 2, Game 1, S4-0
Video: https://abema.tv/video/episode/444-7_s30_p417
In S4-0, the scores are close near the top. 2nd place Setokuma is 12,700 behind dealer Sawazaki and 3rd place Maehara is 14,200 behind Sawazaki. Dealer Sawazaki starts out 3-shanten with two dora, Maehara and Setokuma are also 3-shanten while Wakutsu is 2-shanten. Naturally by being the closest to tenpai, Wakutsu gets to tenpai first and calls riichi on a 8m kanchan on turn 4. Even though the hand is only worth mangan and doesn’t get her out of 4th place, any amount points is important for the road to the playoffs.
Two turns later, Setokuma gets to tenpai and calls riichi on a 25p ryanmen wait. If Setokuma wins the hand by tsumo, it would be enough for mangan and surpass Sawazaki because of Wakutsu’s riichi stick.
Near the start of the 2nd row, Maehara has the chance to chase with riichi only and, after around 55 seconds, takes it to wait on a 8s/6m shanpon wait.
On Sawazaki’s draw during Maehara’s ippatsu turn, Sawazaki gets to tenpai, but discards the wrong tanki and ends up dealing into Maehara with his 6m discard.
Maehara wins the hand with Riichi/Ippatsu for 2,600, plus the two other riichi sticks on the table to take 2nd place.
No More Ura San
March 2, Game 2, S1-0
Video: https://abema.tv/video/episode/444-7_s30_p418
In S1-0, Kurosawa is in 3rd place and 24,500 behind the lead. Kurosawa starts out with a 3-shanten hand with a clear route to a pinzu honitsu. Because of the potential for a good pinfu and tanyao hand, she leaves her options open for a chinitsu hand by discarding honours first. On turn 4, she draws to 2-shanten while still retaining the chinitsu potential. On turn 6, she creates a ryanmen is souzu to put her to iishanten and ruins her chance for chinitsu. At the start of the 2nd row, she gets to tenpai and calls riichi on a 58p ryanmen wait, with the 8p giving iipeikou to bring the hand up to mangan. During the ippatsu turn, Uotani chases Kurosawa by calling riichi on a 25m ryanmen wait. Both Takamiya and Okada stay out of and let the battle play out. In the middle of the 2nd row, Kurosawa draws the takame 8p to win the hand. Revealing the 5p as the dora indicator, it makes the three 6p in Kurosawa’s hand dora. Kurosawa wins the hand for Riichi/Tsumo/Pinfu/Tanyao/Iipeikou/Ura 3 for a surprising 4,000/8,000 hand. With Uotani’s riichi stick, Kurosawa took the lead away from dealer Okada with the one hand.
Taro’s Upward Trend
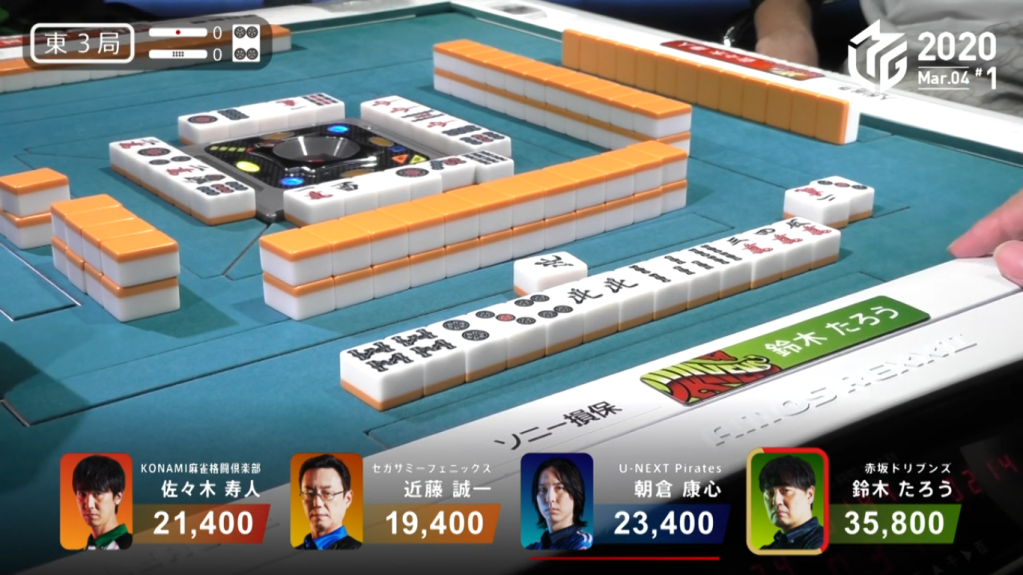
March 4, Game 1
Before the game began, the Drivens were in 7th place in the standings, just below the semifinals cutoff. Playing against the 4th, 5th and 8th place teams, it was crucial for them to get a good result in this game.
In E1-0, a simple called tanyao hand from Taro and a riichi from Asakura brought the hand to a draw, with Taro and Asakura both getting 1,500 points.

In E2-1, Taro starts out with a 2-shanten hand with two red dora. Through the first row, taro picks up a lot of useful tiles and gets to iishanten by the end of the 1st row. In the middle of the 2nd row, Taro gets to tenpai and calls riichi on a 36p/3m wait. Taro didn’t have to wait long for his hand to be completed, as he draws the winning 3p two turns later. Taro wins the hand with Riichi/Tsumo/Aka 2 for 2,000+100/4,000+100, plus Asakura’s riichi stick from last hand.
In E3-0, Taro starts out with a 4-shanten hand with a single dora for value. On turn 2, he fills in a penchan to greatly improve his hand possibilities. By turn 4, Taro is already iishanten. On turn 5, he gets to tenpai and calls riichi on a difficult-to-defend 8s/north shanpon. Within two turns, the north easily came out of Kondo’s hand to give Taro the win. Taro wins the hand with Riichi/Dora 1/Ura 1 for 5,200.
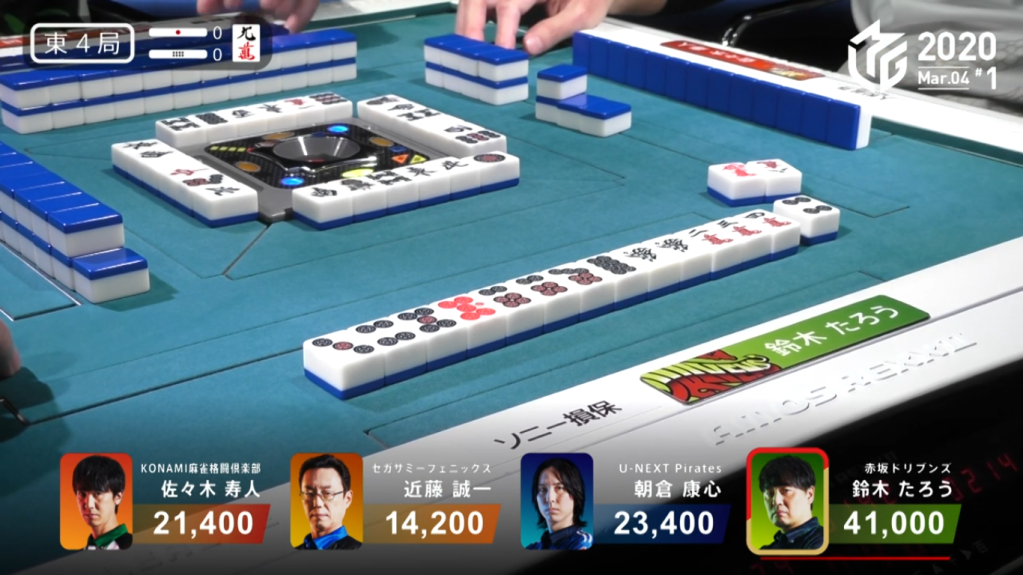
In E4-0, Taro starts out as the dealer with a 4-shanten hand and a lot of isolated honours. Throughout the first row, Taro managed to get rid of many of these isolated terminals and honours and picked up a few ryanmen and completed sets. By the end of the first row, Taro was able to get to tenpai and call riichi on a 47p ryanmen wait. Taro was quickly able to find the tile he wanted, as he draws the 4p on his ippatsu turn. Taro wins the hand with Riichi/Ippatsu/Tsumo/Aka 1 for 4,000 all. With this hand, it put Taro over the 50,000 mark.
In E4-1, Taro starts out with a 4-shanten standard hand with a pair of white dragons and wests, along with an isolated dora. Very early on at the 4th turn, Taro was faced with a riichi by Sasaki on a 36m ryanmen wait. Even with the riichi and discarding the honour pairs, Taro was able to shape his hand into a hand with winning potential with two calls and a bit of patience, Taro was able to get his hand to tenpai by the middle of the 3rd row. The hand ended up going to ryuukyoku with Sasaki and Taro both in tenpai.
Over the first 5 hand of the game, Taro was able to get 29,500 points to get him to 54,500 points, a commanding lead in such an important game.
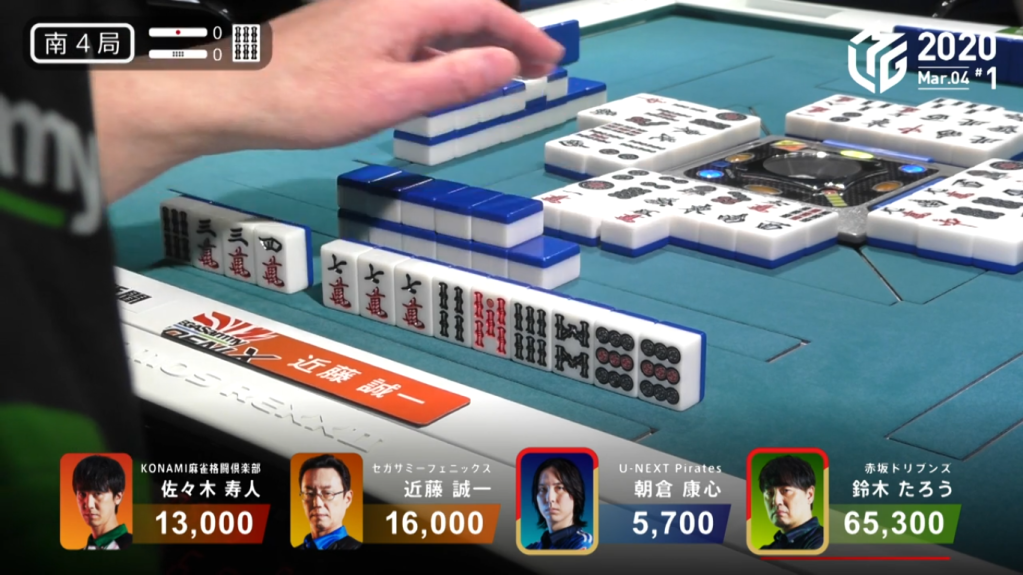
Kondo’s 7m Special
March 4, Game 1, S2-0
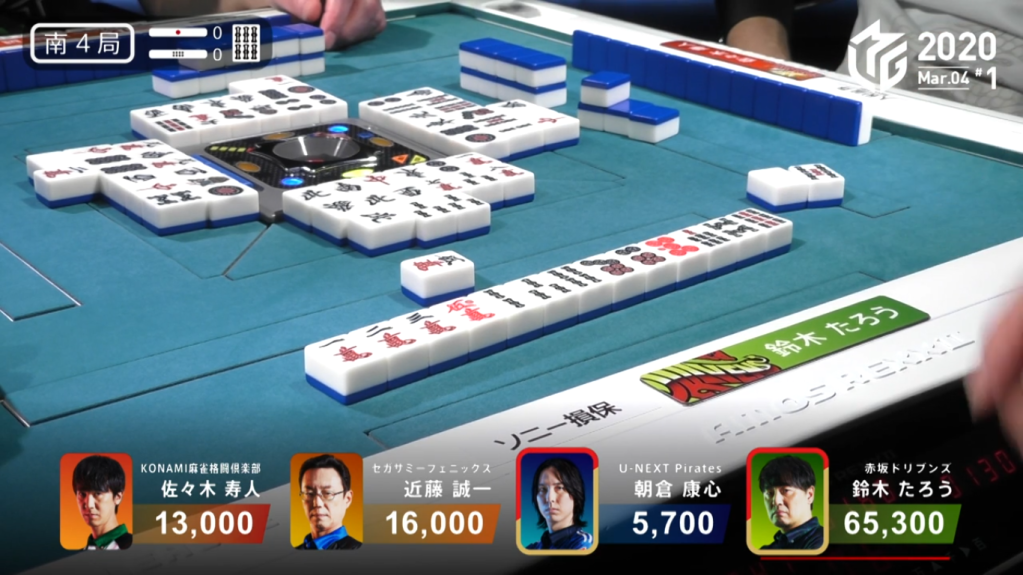
In S2-0, Kondo is in 4th place, 14,200 behind 3rd place and the dealer. He starts out with a 4-shanten hand with two red doras and a pair of souths. By the end of the 1st row, Kondo is only 2-shanten and still looking to make his south pair a triplet. Around the same time, Sasaki gets to tenpai and calls riichi on a 25p ryanmen wait. With Kondo in last place, he continues to push his hand. Kondo calls pon on the 8s to get to iishanten and a south wind draw the very next turn gets Kondo to tenpai on a 47m ryanmen wait. When Sasaki discards the 4th south in the middle of the 2nd row, Kondo has the option to call kan. Kondo seizes the opportunity to get some extra points and calls a rare daiminkan.
With Kondo’s rinshan draw, he finds the 7m to win the hand. Kondo wins with South/Rinshan/Aka 2 for 4,000 all, along with Sasaki’s riichi stick. With the hand, he got enough points to catapult him to tie Sasaki for 2nd place.
Skipping the Ron
March 4, Game 1, S4-0
Video: https://abema.tv/video/episode/444-7_s30_p422
In S4-0, Asakura is in 4th place and 7,300 behind 3rd place Sasaki. Asakura starts out with a 3-shanten hand with no value to be found. In the first row, he pairs up the red dragon and gets himself to 2-shanten. Early in the 2nd row, Asakura discards the red dragon pair in favour of finding more value in tanyao and pinfu options. For Asakura, the tanyao gamble seemed to work as he got a guaranteed tanyao and a chance at iishanten by the end of the 2nd row. The dealer and clear 1st place Taro tries to ruin Asakura’s chances of a comeback by calling riichi on a 5m tanki. Soon after, Asakura gets to tenpai on a 5m kanchan wait.

If Asakura calls riichi and calls ron, it would only be worth 2han/40fu, which is not enough to get to 3rd. However, if Asakura calls riichi and wins by tsumo it would be three han (Riichi/Tsumo/Tanyao) and he would get 40 fu (Winning base [20], two ankou of inside tiles [4×2], kanchan wait [2] and win by tsumo [2], 32 rounds to 40). Since a 3han/40fu hand is worth 1,300/2,600, it would give Asakura a 6,500 gain on Sasaki (5,200 earned by Asakura, 1,300 lost by Sasaki). Add to that the 1,000 from Taro’s riichi stick and it gives Asakura enough points to take 3rd.
Two turns after the riichi from Asakura, Kondo is left in a bind where he doesn’t have any safe tiles. Looking at the board, Kondo decides to discard the 5m.
Because Asakura is in front of Taro in turn order, Taro would be headbumped and only Asakura would win the hand. However, because of Asakura’s urgent need to win by tsumo, Asakura doesn’t even say ron and lets the win go to Taro. Taro wins the hand with Riichi/Aka 2 for 7,700, plus Asakura’s riichi stick. This high-level play allowed Asakura to play one more hand and have a better chance to get to 3rd because the point difference was so much closer.
Kondo’s 7m Special (Again?!?)
March 4, Game 1, S4-2
Video: https://abema.tv/video/episode/444-7_s30_p423
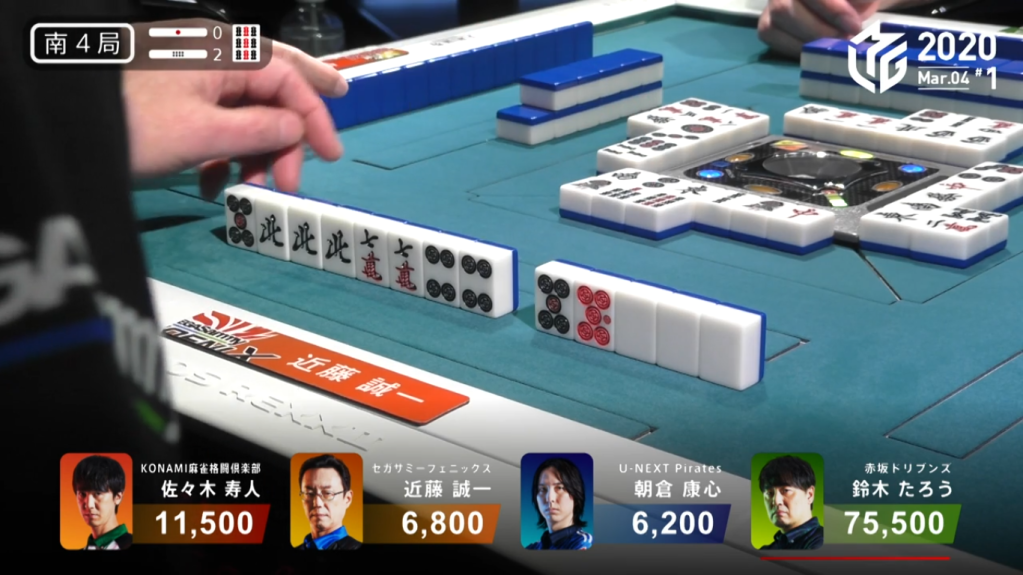
In S4-2, Kondo is in 3rd place and 600 points away from falling into 4th place. Kondo starts out with a 3-shanten hand with a single dora for value. Through the first row, Kondo kept on making pairs, going from 2 to 3 to 4 by turn 4 and turning one of those pairs into an ankou by turn 5. On turn 6, Kondo created another ankou to put him 2-shanten away from suuankou tanki. Near the start of the 2nd row, Kondo gets another pair to put him iishanten from suuankou with an option to call for toitoi tenpai if he wants to. The very next turn, Kondo makes another ankou and gets to tenpai on a 7m/4p shanpon for suuankou if he wins by tsumo. Already having a guaranteed haneman, Kondo stays dama.
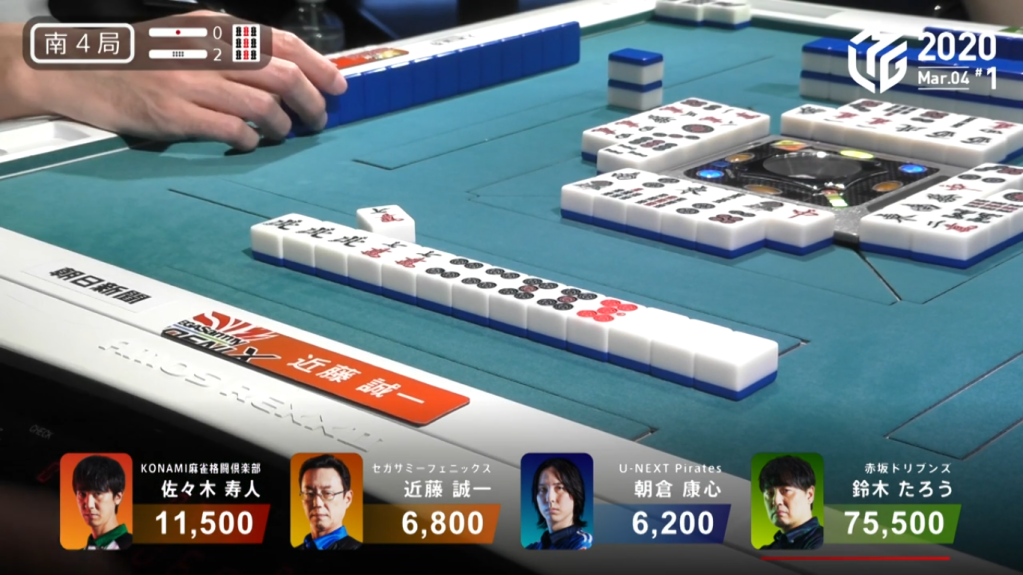
With Taro trying to continue his rout and going efficiently, Taro discards the 7m at the end of the 2nd row and deals into Kondo. Kondo wins the hand with Toitoi/White Dragon/Sanankou/Aka 1 for 12,000+600. With the win Kondo went from 3rd to 2nd and got his team some well-needed points.
Kondo’s 7m Special (Again!?!)
March 4, Game 2, S4-1
Video: https://abema.tv/video/episode/444-7_s30_p424
In S4-1, Kondo is in 4th place and 3,100 behind 3rd place Maehara. Kondo starts out with a 4-shanten hand with sanshoku being the only conceivable significant value in the hand. Through the first row, Kondo filled got rid of the slow honours and terminals to try to give the hand tanyao. By the end of the 1st row, Kondo is iishanten with a red dora and tanyao guaranteed. Keeping his hand flexible, he can also add pinfu and/or riichi to the hand to sufficiently surpass Maehara. In the 2nd row, Kondo adds iipeikou flexibility while Maehara rushes his hand by calling a pon on the green dragon. In the middle of the 2nd row, Kondo gets to tenpai on a 47m wait. If Kondo were to stay dama, he would already get to 3rd place with the Pinfu/Tanyao/Aka 1 hand. However, if everything lines up right with riichi, Kondo can actually get to baiman with a Riichi/Ippatsu/Tsumo/Pinfu/Tanyao/Iipeikou/Aka 1/Ura 1, enough to catapult him to 1st place. With the need to get any points to get to the semifinals and the very small but possible chance to take top spot, Kondo calls riichi on the 47m ryanmen.
In an absolutely insane alignment, Kondo draws the 7m on his ippatsu turn to win the hand. Revealing an uradora, the prophecy is complete and Kondo wins the game. Sexy Seiichi (the nickname that Kondo was given in the previous game) wins the hand with Riichi/Ippatsu/Tsumo/Pinfu/Tanyao/Iipeikou/Aka 1/Ura 1 for 4,000+100/8,000+100 all to take 1st place by 300 points.
This win is reminiscent of Maruyama’s S4 Baiman to go from 4th to 1st in 2019
Three Riichi Battle
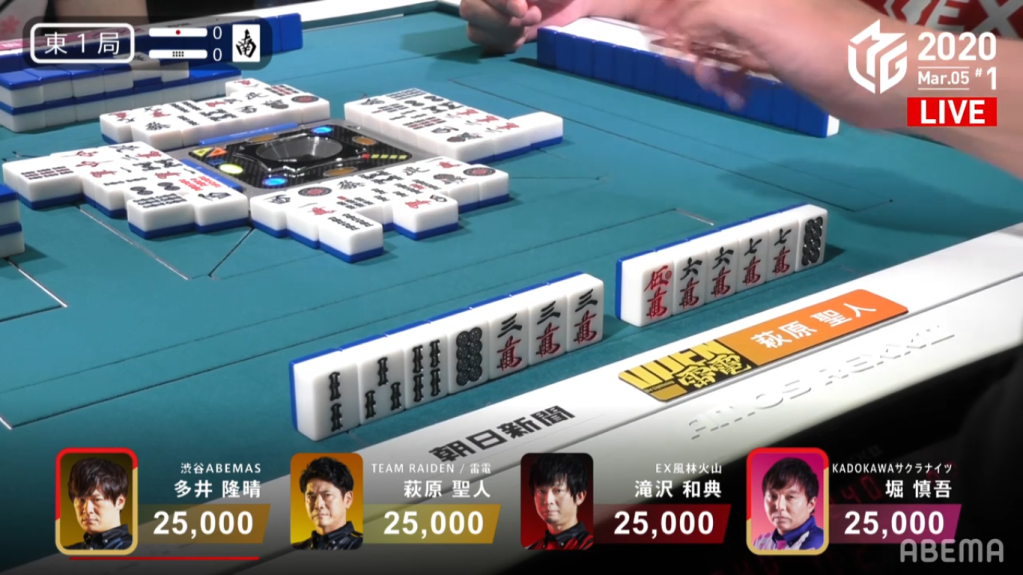
March 5, Game 1, E1-0
In E1-0, Ooi is the dealer with two dora and a red dora at 2-shanten. Facing off against Ooi is Hagiwara at 2-shanten, Takizawa at 3-shanten and Hori at 2-shanten. Through the first row, all of the players developed their hands well. The first of them to get to tenpai is dealer Hori, who does so on turn 5 with a 2p kanchan wait.
With Hori having two dora as well, he pushes his hand and eventually gets to tenpai on an 8p kanchan wait.
Miraculously, Hagiwara is able to avoid both of the riichi calls and gets to tenpai himself. With two other riichi calls on the table, Hagiwara decides to be the third riichi and waits on a 58m ryanmen wait.
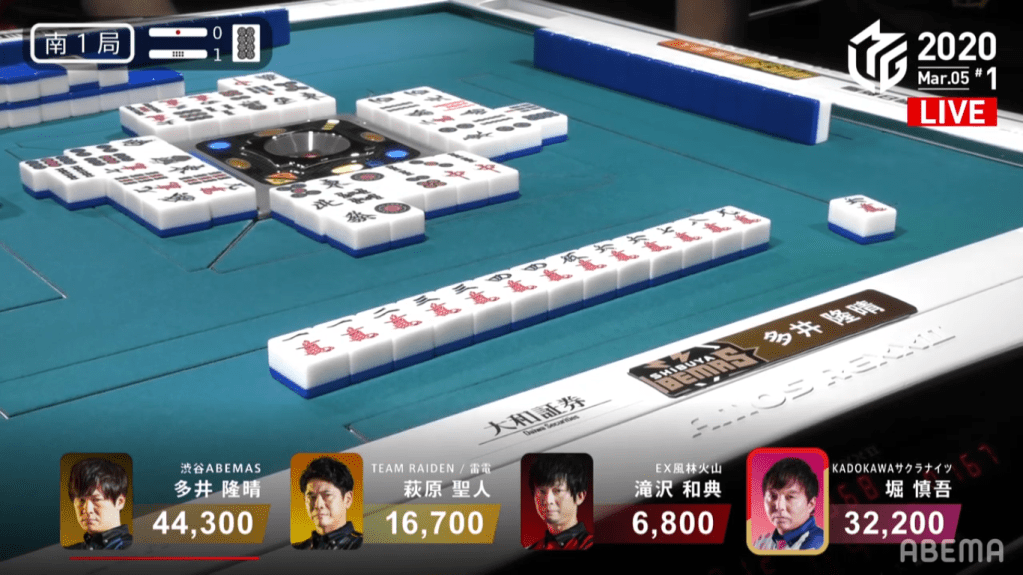
While still on Hagiwara’s ippatsu turn, Ooi draws the 8m and deals into Hagiwara. hagiwara wins the hand with Riichi/Ippatsu/Tanyao/Aka 1 for 8,000, plus Ooi’s and Takizawa’s riichi stick.
Closed Chinitsu
March 5, Game 1, S1-1
Video: https://abema.tv/video/episode/444-7_s30_p427
In S1-1, Ooi is the dealer and 8 manzu and a pair of red dragons in his starting hand. By turn 2, Ooi was already iishanten for a non-honitsu chiitoi hand. However, he aims for the higher-value and more flexible honitsu by turn 4. In the middle of the 2nd row, Ooi successfully converts his hand back to iishanten with honitsu. Two turns later, he draws another manzu but isn’t in tenpai, so he starts to discard his red dragon pair to go for chinitsu. The very next turn, he gets to tenpai on a 1m/6m shanpon wait. While Ooi waits for his winning tiles, Hori gets to tenpai near the start of the 3rd row and calls riichi on a 58p ryanmen wait. Immediately after the riichi, Ooi draws his winning 6m to win the hand. Ooi wins with Chinitsu/Tsumo for 6,000+100 all, plus Hori’s riichi stick.
