Highlights
3s
November 28, Game 1, E4-0
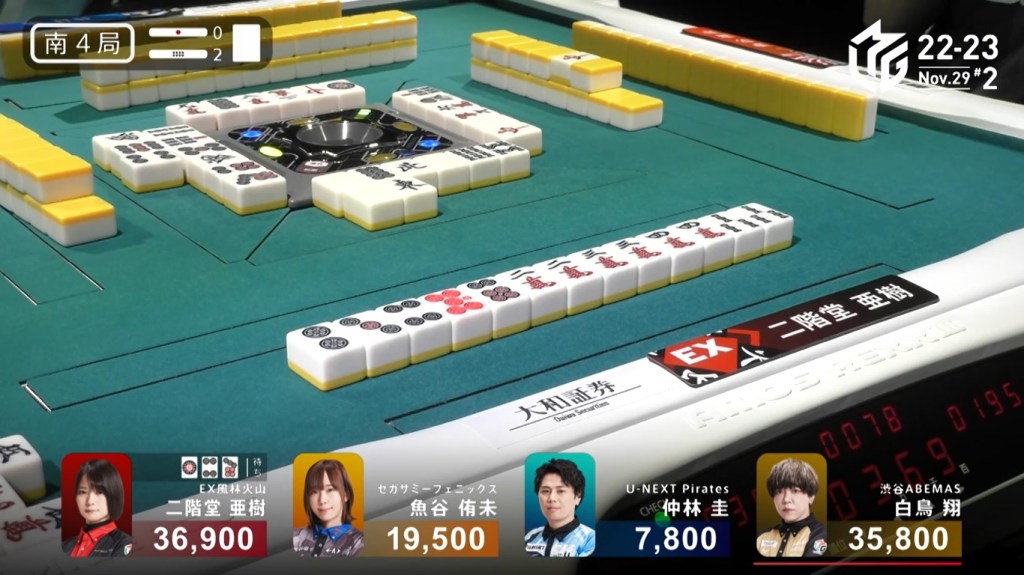
In E4-0, Takizawa is the dealer and only 800 behind 1st place. He starts out the hand 3-shanten with a pair of 5m dora for value. In the latter half of the first row, Takizawa hand slowly and quietly turns into a pairs hand, going from 2 pairs to 5 pairs by turn 6. On turn 8, Takizawa draws a 6th pair and waits dama on a 3s tanki, guaranteed to be at least a mangan. In the middle of the 2nd row, Hori discards the 3s and deals into Takizawa. Takizawa wins the hand with Tanyao/Chiitoi/Dora 2 for 12,000, taking the lead.
Clutch Draw
November 28, Game 1, S3-1
Video: https://abema.tv/video/episode/444-14_s10_p713
In S3-1, Murakami is the dealer and 5,700 behind 3rd place, hoping to continue the momentum after his 7,800 win the previous hand. Drawing the 3s dora on the very first turn, he starts out 2-shanten with a dora and a red 5m. On turn 2, he creates a 678s sequence to get to iishanten and confirms tanyao with his discard. On turn 4, Murakami draws a 6p. With a 678 in manzu and souzu, all he needs is a 7p to complete the potential sanshoku. On turn 6, he draws the 7p. With a riichi call, Murakami discards a dora and waits on a 58m nobetan. With the wait, only the 5m would give him sanshoku. The 2nd row was a bust, but in the middle of the 3rd row, Murakami draws the takame 5m to win the hand. Murakami wins with Riichi/Tsumo/Tanyao/Sanshoku/Aka 1/Ura 1 for 6,000 all, moving him into 3rd place and putting him just 5,600 from the lead.
Kondo Time
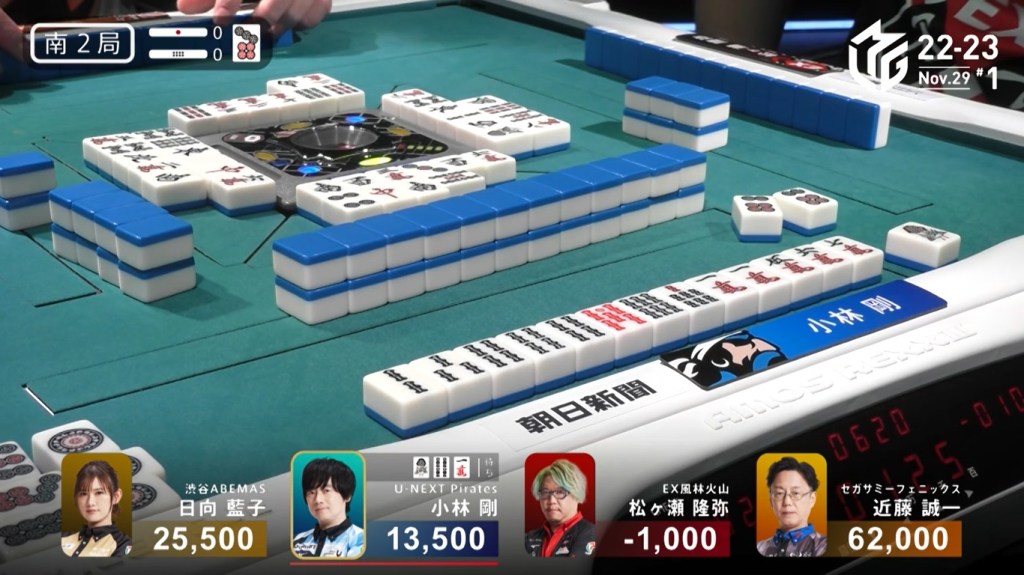
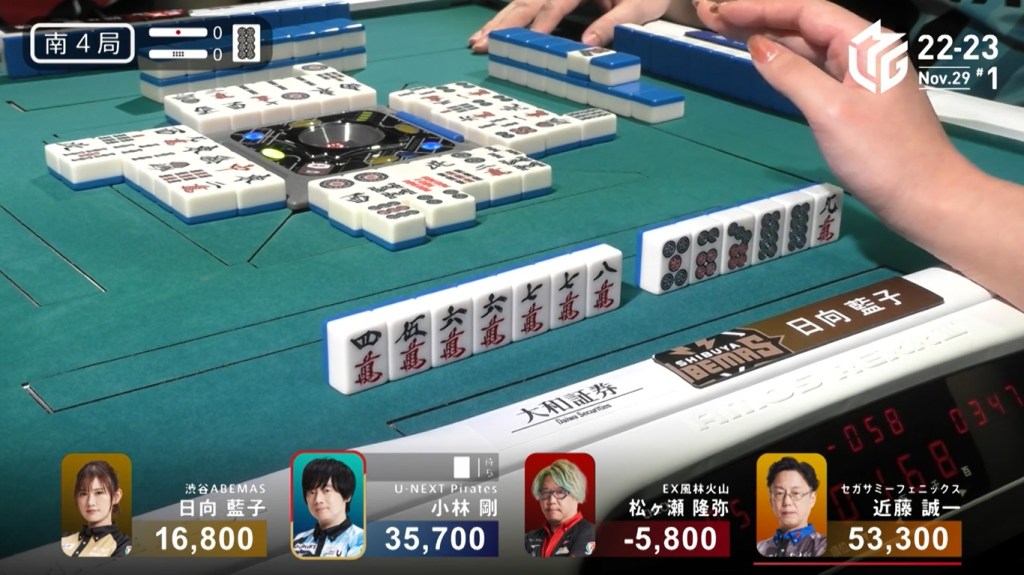
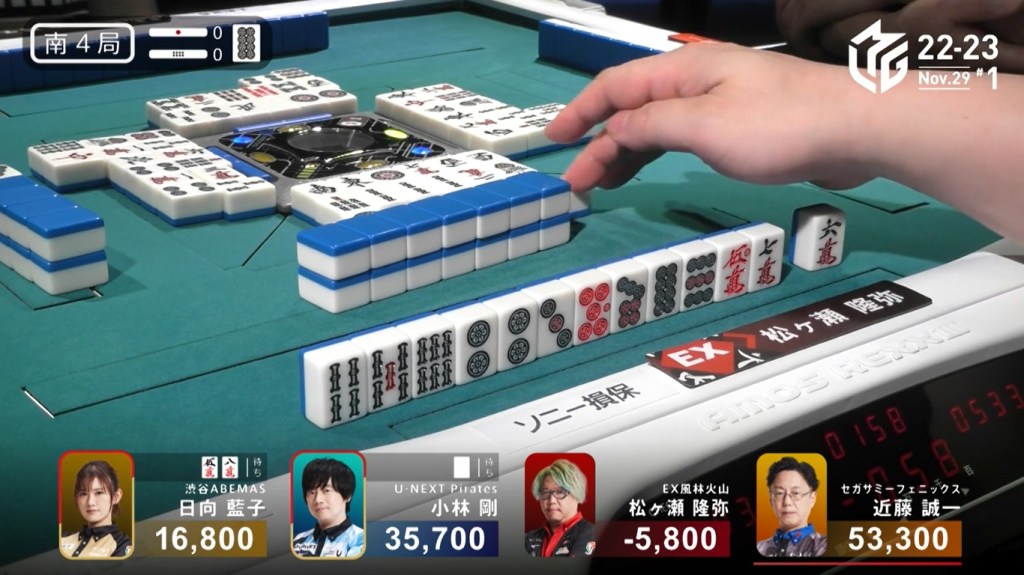
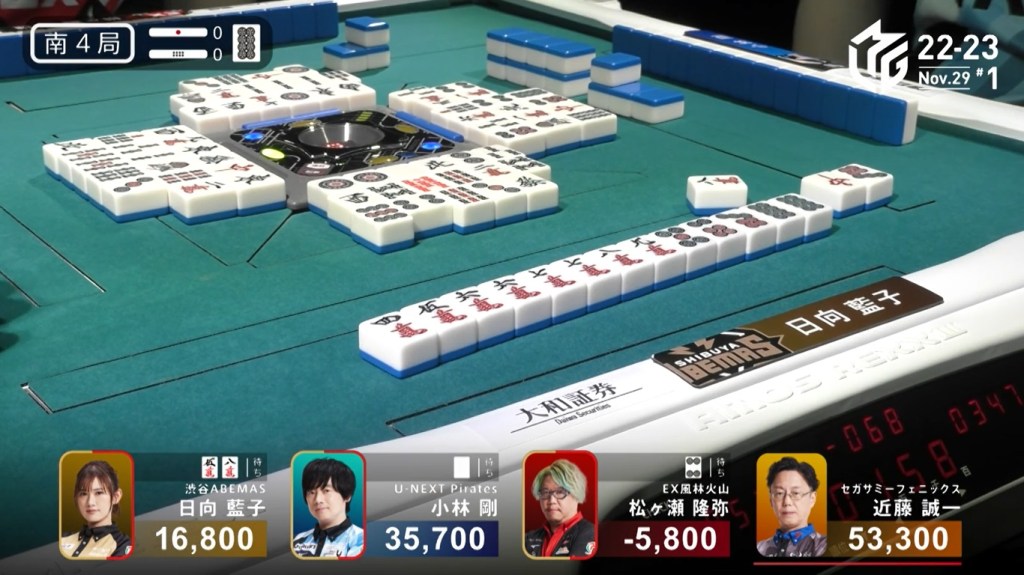
November 29, Game 1
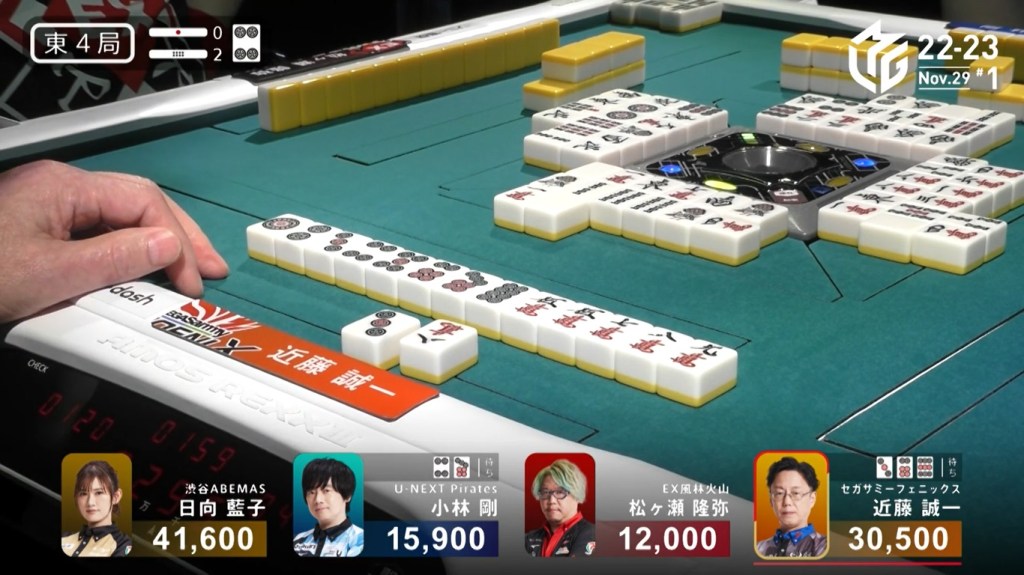
In E4-1, Kondo is the dealer and sitting in 3rd place, 6,100 behind 2nd. He starts out 4-shanten with a dora 5p and a pair of red dragons. Besides creating a double east pair, the first row doesn’t get very far, only getting to 3-shanten. In the 2nd row, Kondo shifts his hand to honitsu. He fills in a kanchan, calls pon on the 2p and calls a chii to get to tenpai on a red dragon/east shanpon before the end of the row. A few turns later, Matsugase throws the red dragon trying to get to tenpai on a 369p and deals into Kondo. Kondo wins the hand with Honitsu/Red Dragon/Dora 1 for 12,000+300, moving Kondo into 2nd place.
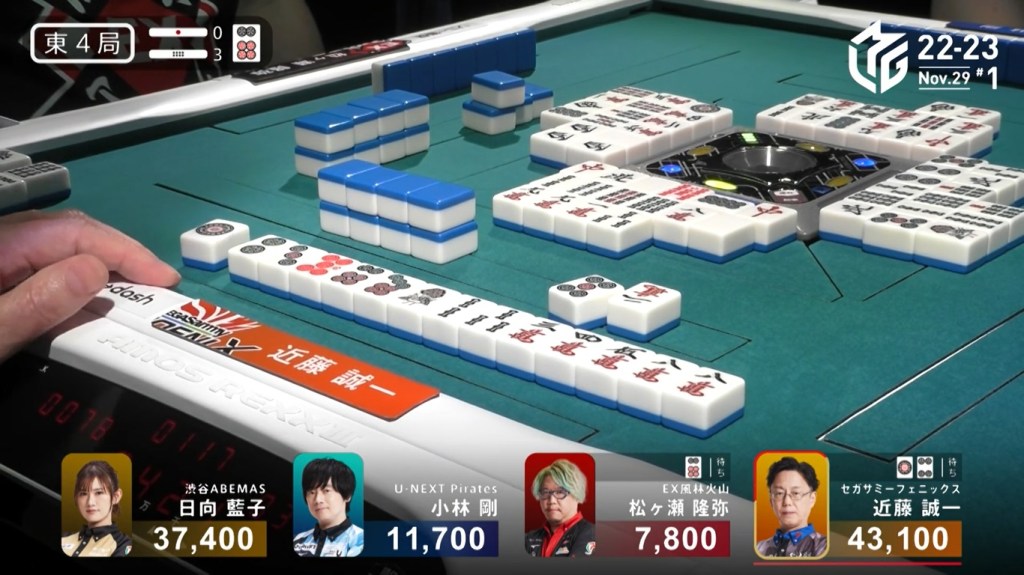
In E4-2, Kondo is in 2nd place and 11,100 behind 1st place Hinata, just a mangan away from 1st. Kondo starts out with an annoying 3-shanten hand with two penchans and a kanchan. In the first four turns, Kondo creates and completes a ryanmen and fills in a penchan putting him iishanten. At the end of the row, he creates a ryanmen. After a few turns of waiting, Kondo finally got to tenpai at the end of the 2nd row and calls riichi on a 369p wait. Hinata, who had been tenpai for a few turns on a chiitoi, is forced to fold, giving Kondo an easier path to another honba. However, Kobayashi tries to disrupt Kondo’s dealership by advancing his own hand. Near the start of the 3rd row, Kobayashi gets to tenpai on a 3p kanchan and later on a furiten 4p/7p shanpon. Kobayashi’s tenpai is short-lived, as Kondo draws the 6p in the middle of the 3rd row to win the hand. Kondo wins with Riichi/Tsumo/Pinfu/Dora 1/Ura 1 for 4,000+200 all, putting him into 1st place.
Video: https://abema.tv/video/episode/444-14_s60_p721
In E4-3, Kondo starts out with a good 2-shanten hand with two red fives, a 6p dora and two ryanmens. His hand advances very quickly and he call riichi on turn 5 on a 14p ryanmen. Even though he threw one of his red fives, he is tenpai for mangan. Despite the early riichi, Matsugase pushes his hand. Matsugase makes an ankou, makes a call and gets to tenpai on a 6p tanki in the middle of the 2nd row. With Hinata and Kobayashi folding, it was a tsumogiri battle between Kondo and Matsugase. In the middle of the 3rd row, Kondo draws the 1p and wins the hand. Flipping one uradora, Kondo wins the hand with Riichi/Tsumo/Pinfu/Dora 1/Aka 1/Ura 1 for 6,000+300 all, pushing him above 60,000.
Go! Go! Go!
November 29, Game 1
In S1-1, Kobayashi is sitting in 4th place after dealing into Hinata less than 4 turns into S1-0. He starts out 4-shanten with a red 5s and a pair of dora easts. Unfortunately for Kobayashi, the east is neither the round wind nor seat wind, forcing him to aim for riichi. The 1st row is average for him, getting him to 2-shanten with no additional value. At the start of the 2nd row, Kobayashi creates a pair of 8p, opening up the possibility to make the east dora an ankou. The rest of the 2nd row fails to give him anything, so he chooses to secure the easts as a pair and pare down the 8p pair to a 7p kanchan. In the 3rd row, his hand is still slow. In the middle of the 3rd row, after many turns of waiting, Kobayashi gets to tenpai. With no yaku and a holding mangan potential, Kobayashi calls riichi and waits on a 7p kanchan. Even with only two more draws, Kobayashi thinks he can win. On Kobayashi’s very next draw, he finds the 7p and wins the hand. Kobayashi wins with Riichi/Ippatsu/Tsumo/Dora 2/Aka 1 for 3,000+100/6,000+100.
Video: https://abema.tv/video/episode/444-14_s80_p719
In S2-0, Kobayashi is the dealer in 3rd place and 12,000 behind 2nd. He starts out 3-shanten with a red 5s and multiple ryanmens, almost guaranteed to have a good wait. From the start, Hinata tries to stop Kobayashi by making two quick calls, one of them being yakuhai. Kobayashi speed is equal, however, getting to iishanten in the middle of the 1st row. Soon after, Hinata makes a third call to get to iishanten as well. At the end of the 1st row, Kobayashi gets to tenpai, staying dama on a 36s ryanmen.
Half of his waits are gone, so he looks to either sneakily win or improve the hand somehow. He also keeps an eye on Hinata who has three calls. As the audience takes a look at her hand, she is still iishanten. As the 1st row become the 2nd row, Kobayashi still waits and Hinata is still stuck at iishanten. In the middle of the 2nd row, Kobayashi switches to a 147s wait and calls riichi. On Kobayashi’s very next draw, he finds the 1s and wins the hand. Kobayashi wins with Riichi/Ippatsu/Tsumo/Aka 1 for 4,000 all, putting him in 2nd place.
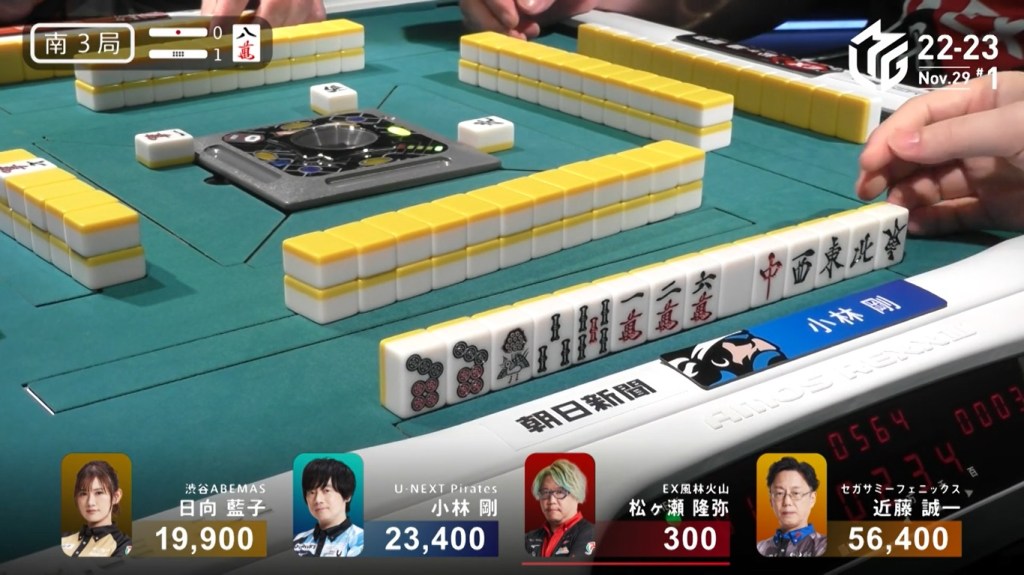
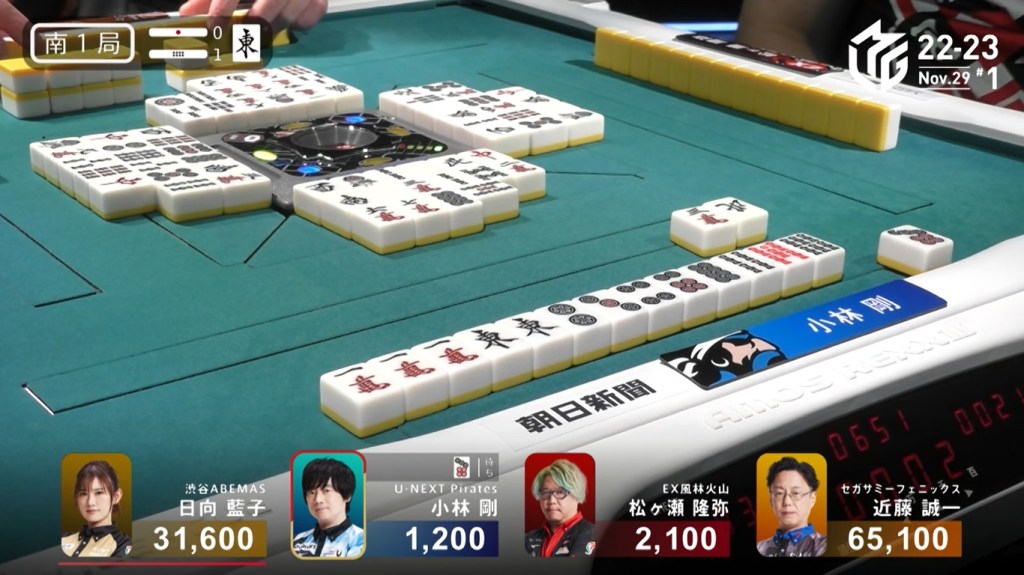
Skipping to S3-1, Kobayashi is in 2nd place and holding a small 3,500 lead over Hinata. He starts out with an annoying 4-shanten hand with no value or good shapes at all. With almost every turn, his hand changes.
– On turn 3, he gets a pair of red dragons, giving him a potential calling option.
– On turn 5, Kobayashi gets a 4th pair, putting him 2-shanten for chiitoi.
– On turn 6, he gets his 5th pair, putting him iishanten.
– On turn 7, he draws his 6th pair and waits dama on a 2m tanki.
– On turn 8, he switches to a dora 8m tanki, still dama.
– On turn 9, he switches again and calls riichi on a south tanki.

With the south being once-cut, his wait is primed for winning. At the end of the 2nd row, Kobayashi draws the south and wins the hand. Flipping two uradora, Kobayashi completes the shortcut to haneman. Kobayashi wins with Riichi/Tsumo/Chiitoi/Ura 2 for 3,000/6,000, putting him within 17,600 of 1st place Kondo.
100 Points
November 29, Game 1, S4-0
Video: https://abema.tv/video/episode/444-14_s50_p715
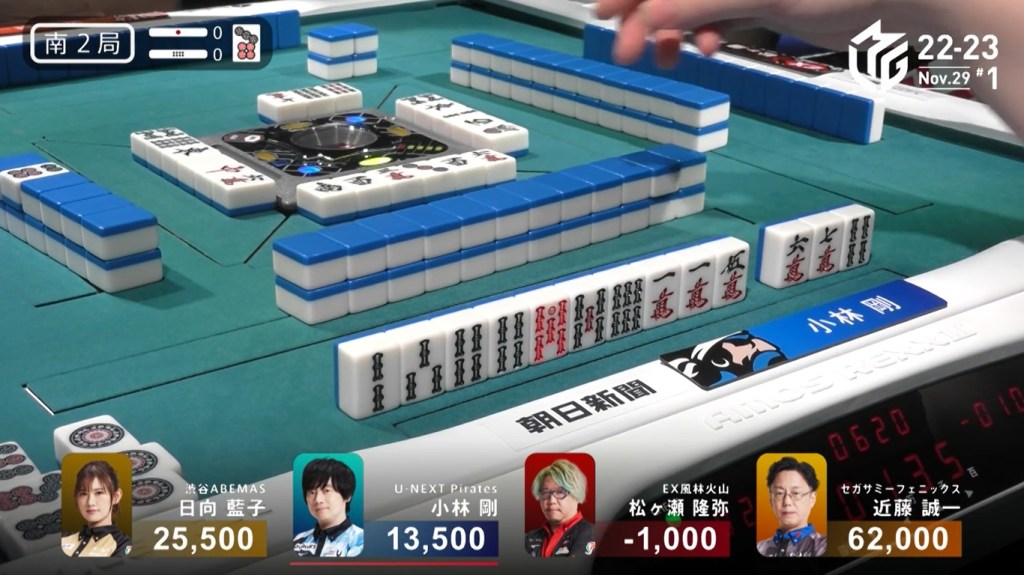
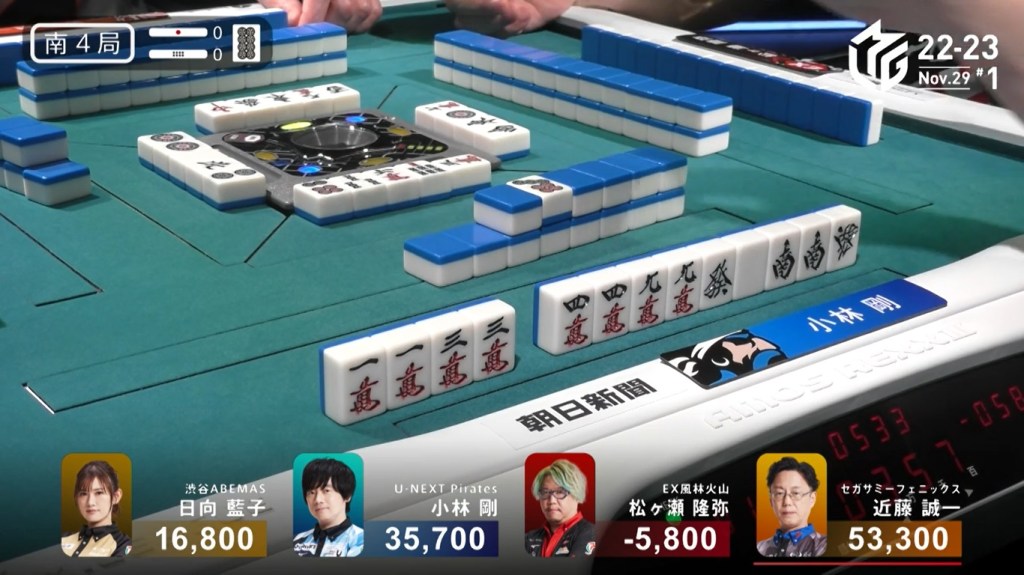
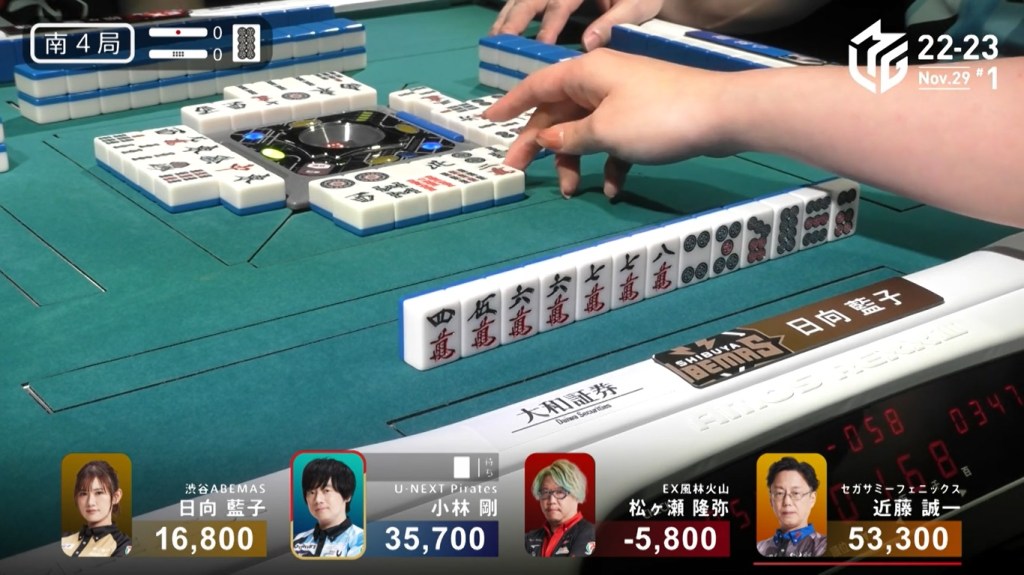
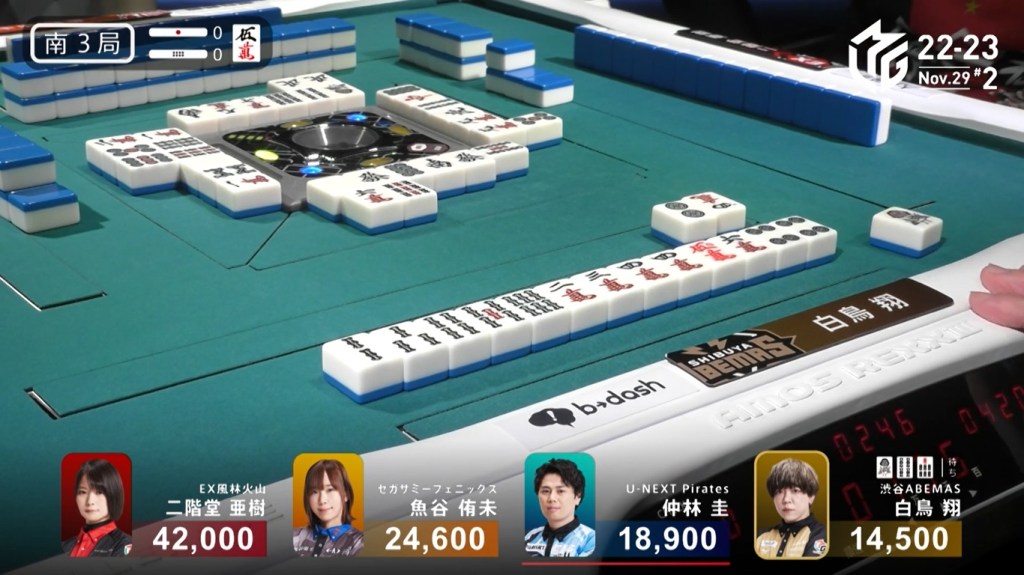
In S4-0, Hinata is 18,900 behind 2nd place Kobayashi, while Kobayashi is 17,600 behind 1st place dealer Kondo. For Hinata, she needs at least a baiman tsumo or a haneman direct hit. For Kobayashi, he needs a haneman tsumo. From the start, we see Hinata at 4-shanten with no value, while Kobayashi is 2-shanten for chiitoi (3-shanten for a standard hand) with a very clear honitsu with a pair of souths. By turn 2, Kobayashi’s hand only has manzu and honours. On turn 3, Kobayashi draws a 1m pair and gets to iishanten. On turn 5, Kobayashi draws a pair of green dragons to get to tenpai. To give himself time to tsumo it, he calls riichi and waits on a white dragon tanki.
When looking at Hinata’s hand, it’s still a mess. However, it’s 3-shanten with two ryanmens, so there’s still some hope. As Hinata throws safe tiles, her hand begins to take shape. Throw one-chances and sujis, Hinata still advances to 2-shanten. In the middle of the 2nd row, Hinata gets to iishanten. A turn later, Hinata gets to tenpai on a 47m nobetan. With one dora as its only value, Hinata stays dama to try to get more value.
At the start of the 3rd row, Hinata draws a dora 8p. Instead of taking the odd 7889p shape for an 8p tanki, Hinata starts to break her 789p sequence to secure her 8p pair. to improve her wait. A turn later, she gets to the desired better wait and calls riichi on a 58m ryanmen. If she draws her winning tile on the ippatsu turn and finds two uradora, she would move into 2nd. Alternatively, she can hit Kobayashi directly with either two uradora or ippatsu with an uradora to take 2nd.
The game is late and there aren’t too many draws left. Near the middle of the 3rd row, Matsugase gets to tenpai, unfortunately without a yaku. He had been sitting mainly under the radar and not posing a threat, being 22,600 behind Hinata. With his hand right now, he has two red fives and an 8p dora. If he calls riichi, his only hope to advance is to hit Hinata directly, either with two uradora or on the ippatsu turn with one uradora. Since points are valuable and a small chance is still a chance, Matsugase calls riichi and waits on a 4p kanchan.
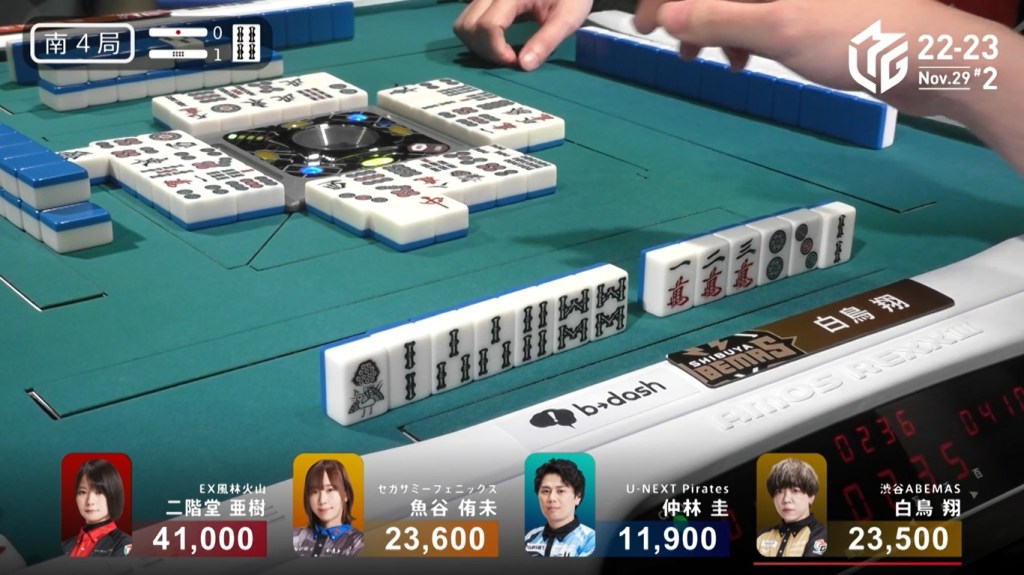
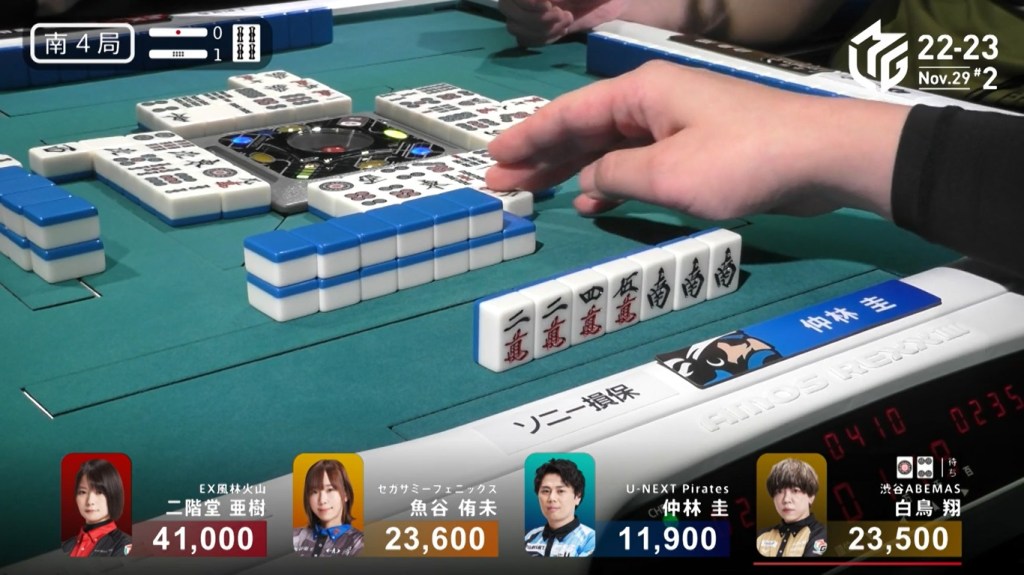
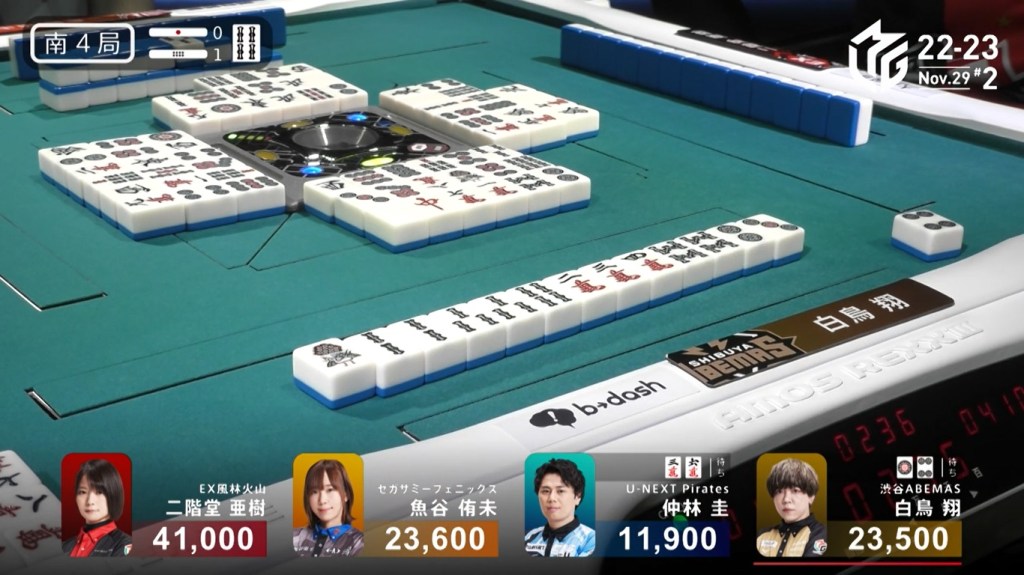
With Matsugase’s riichi, the dynamic has changed. With the winner receiving two riichi sticks, the threshold has lowered. Most notably, Hinata can now hit Kobayashi directly with a mangan and move into 2nd place. Hinata avoids Matsugase’s ippatsu turn, providing some relief to Abemas fans. With each draw, there’s a chance of a big win or a disaster. 8 tiles left. 5 tiles left. With 4 tiles left, each player has one more draw. On Kobayashi’s draw, he draws the 8m and deals into Hinata. Hinata wins the hand with Riichi/Pinfu/Dora 2 for 8,000 plus two riichi stick.
With Kobayashi losing 9,000 (mangan + riichi stick) and Hinata winning 10,000 (mangan + 2 riichi sticks), she overcomes the 18,900 gap to win by 100 points.
Shiratori
November 29, Game 2
In S2-0, Shiratori is in 4th place and 14,400 behind 3rd place. If he wants to keep his perfect 4th-place avoidance record alive, he has a lot of work to do. He starts out 3-shanten from the start, only missing a 3m for ittsuu. Creating a kanchan and drawing a pair, Shiratori gets to iishanten on turn 4. On turn 5, Shiratori fills in the kanchan and calls riichi on a 3m penchan. If everyone trying to avoid the riichi, Shiratori only has to wait. Near the end of the 2nd row, Shiratori draws the 3m and wins the hand. Shiratori wins with Riichi/Tsumo/Ittsuu for 2,000/4,000.
In S3-0, Shiratoi sits 4,400 behind 3rd place and 10,100 behind 2nd place. He starts out 3-shanten with a hand likely to get tanyao. On turn 2, he gets to 2-shanten. On turn 3, he draws the red 5m double dora to get to iishanten. At the end of the 1st row, Shiratori gets to tenpai and calls riichi on a 147s sanmenchan. With his riichi, is guaranteed to be at least a mangan. In the middle of the 2nd row, Shiratori draws the 1s and wins the hand. Shiratori wins with Riichi/Tsumo/Pinfu/Dora 1/Aka 1 for 2,000/4,000, getting to within 100 of 2nd place.
Video: https://abema.tv/video/episode/444-14_s50_p716
After going to a draw in S4-0, Shiratori’s dealership continues in S4-1. He starts out 2-shanten with a dora 4s, a ryanmen and a penchan. Early on, Shiratori exchanges his penchan for a kanchan and fills it in on turn 4 to get to iishanten. Through the rest of the 1st row and the whole 2nd row, Shiratori’s draws kept missing. Near the middle of the 3rd row, Shiratori finally gets to tenpai and waits dama on a 14p ryanmen. If he wins on the 4p, he would get sanshoku as well.
While Shiratori waits, 4th place Nakabayashi pushes his hand. Needing a mangan tsumo to get to 3rd, he had already started advancing earlier by calling on on the red dragon. Aiming for honitsu and holding an ankou of souths, Nakabayashi’s path was set. Soon after Shiratori got to tenpai, Nakabayashi made a call to get to tenpai on a 36m ryanmen.
On Shiratori’s very last draw, he found the last 4p and wins the hand. Shiratori wins the hand with Tsumo/Pinfu/Sanshoku/Dora 1 for 4,000+100 all, putting him within 1,100 of 1st.
Closing the Game
November 29, Game 2, S4-2
In S4-2, Aki is in 1st and holding a narrow 1,100 lead. Wanting to end in the game in 1st place, Aki starts the hand with a strong 2-shanten with a ryanmen, a sanmenchan and a kanchan. Just after Aki’s 1st discard, 2nd place Shiratori made his presence known by calling pon on the north, aiming for honitsu. On turn 3, Aki completes the ryanmen to get to iishanten. Soon after, Shiratori makes a call to get to iishanten himself. On turn 5, Aki switches her kanchan for a ryanmen. In the 2nd row, Aki gets to tenpai and waits dama on a 147p sanmenchan. Soon after, Shiratori discards the 4p and deals into Aki. Aki wins the hand with Pinfu/Tanyao/Iipeikou/Aka 1 for 8,000+600, securing her thirdwin in as many games.
Abemas Ahead

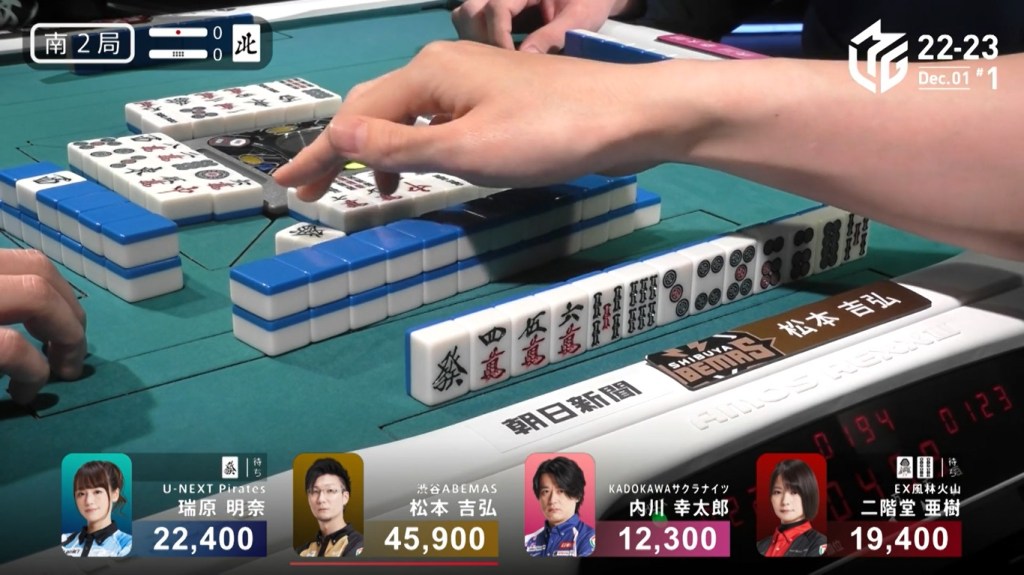
December 1, Game 1
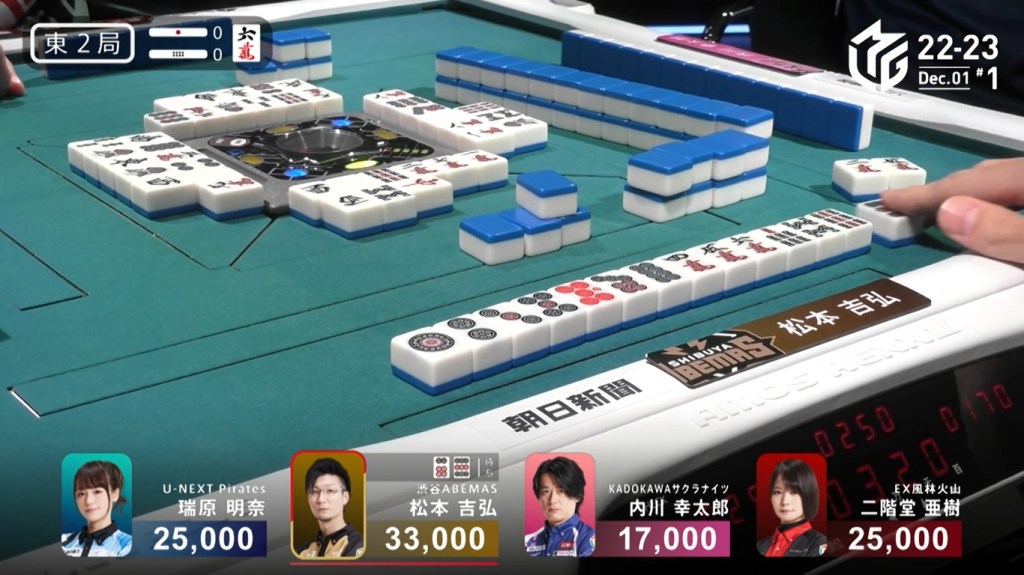
In E1-0, Matsumoto is sitting in the south seat with the Abemas sitting just a 1st away from being over 50,000. He starts out the hand 3-shanten with a pair of white dragons and a floating 3m dora. After an early double east call from dealer Mizuhara, Matsumoto draws a pair of green dragons. In the middle of the row, Matsumoto throws the 8m, which Mizuhara calls to get to iishanten. Mizuhara discards the green dragon, which Matsumoto calls to get to iishanten. Before the end of the row, Matsumoto is the first to get to tenpai, drawing a white dragon ankou and waiting on a 36p ryanmen for mangan. Two turns later, Uchikawa discards the 6p and deals into Matsumoto. Matsumoto wins the hand with Green Dragon/White Dragon/Dora 2 for 8,000.
In E2-0, Matsumoto is now the dealer and starts out 3-shanten with a pair of red dragons and a floating red 5p. As we look around the table, we see Aki holding a pair of red dragons, making a yakuhai pon unlikely for either of them. After getting rid of a penchan and making ryanmens, Matsumoto is 2-shanten at the end of the 1st row, guaranteed to have a good wait. On turn 7, he gets to a ryanmen-ryanmen iishanten. In the middle of the 2nd row, he pairs up the 5p, incorporating the red 5p and allowing him to pursue pinfu. Aki calls pon on the red dragon, putting her iishanten. On Matsumoto’s next draw, he gets to tenpai and calls riichi on a 69p ryanmen. On Matsumoto’s ippatsu draw, he finds the 9p and wins the hand. Matsumoto wins with Riichi/Ippatsu/Tsumo/Pinfu/Dora 1/Aka 1 for 6,000 all.
In just two hands, Matsumoto was able to more than double his score and hold a more than 30,000 lead over 2nd place.
Pivotal
December 1, Game 1, S2-0
In S2-0, Mizuhara is in 2nd place and 23,500 behind 1st place Matsumoto. She had been slowly gainng points, going from 13,800 in E3-1 to 22,400 at the start of this hand. However, her dealership has already passed, meaning her time is limited to make a comeback.
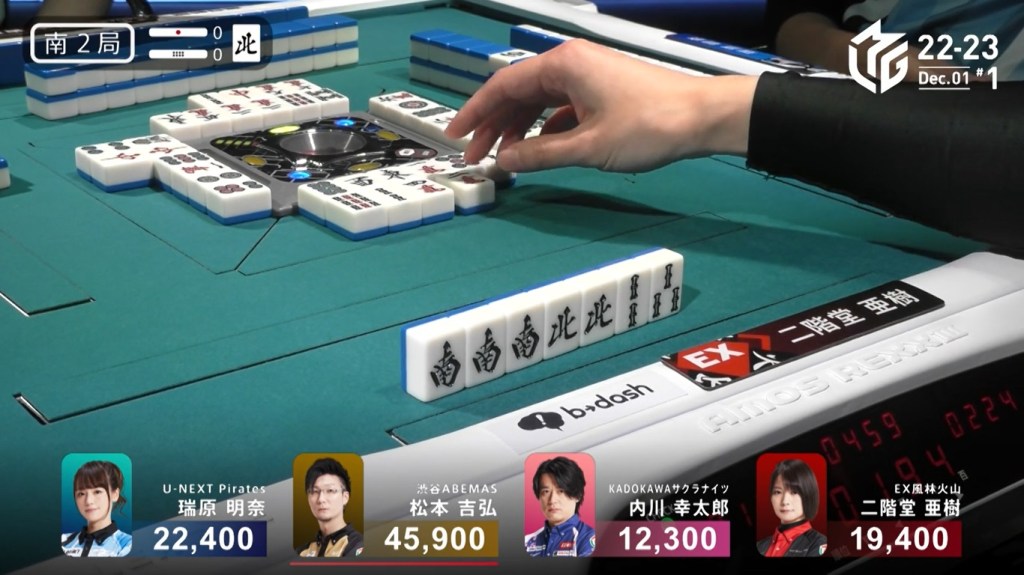
She starts out the hand the hand 4-shanten, but her hand leans towards a souzu honitsu. The 1st row fails to give her much advancement, only putting her 3-shanten at the end of the row. At the start of the 2nd row, Mizuhara draws a 4s. Not only does it put her 2-shanten for a standard hand, it also puts her 2-shanten for chiitoi. As Mizuhara waits for her hand to move, 3rd place Aki is hard at work. Earlier in the 1st row, Aki called pon on the white dragon to confirm an extra yakuhai to go along with her south ankou. In the middle of the 2nd row, Aki calls chii on the red 5m and gets to tenpai on a 14s ryanmen, guaranteed to be a mangan.
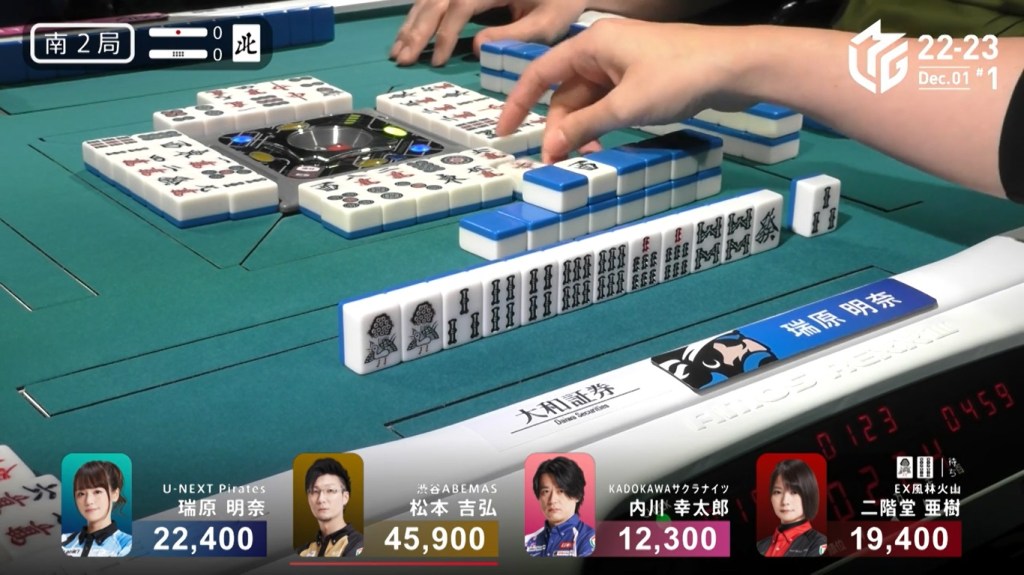
Right after Aki gets to tenpai, Mizuhara draws a 5th pair, putting her iishanten. At the end of the row, Mizuhara gets to tenpai and sits dama on a green dragon tanki. if she draws any 123459s, she would have the option to switch to a chinitsu.
Right after Mizuhara is Matsumoto. With no dora visible and Aki’s two calls, he is suspicious of the table. Though he is iishanten, the danger on the table pushes him towards folding. Looking around the table, The green dragon has already been discarded by Aki and he is holding a pair. The only way for the green dragon to win is if it’s a tanki. Seeing that Mizuhara threw the east (which had two out) instead onto the red dragon (which had all three out at that time) makes a tanki seem unlikely. Matsumoto chooses to throw the green dragon and ends up dealing into Mizuhara.
Mizuhara wins the hand with Honitsu/Chiitoi for 8,000, cutting the deficit down to 7,500 and putting her within a mangan of the lead.
After a few more deal-ins from Matsumoto and Mizuhara avoiding danger, Mizuhara was able to win the game in the end,
Perfect Timing, Perfect Ura

December 2, Game 1, E2-2
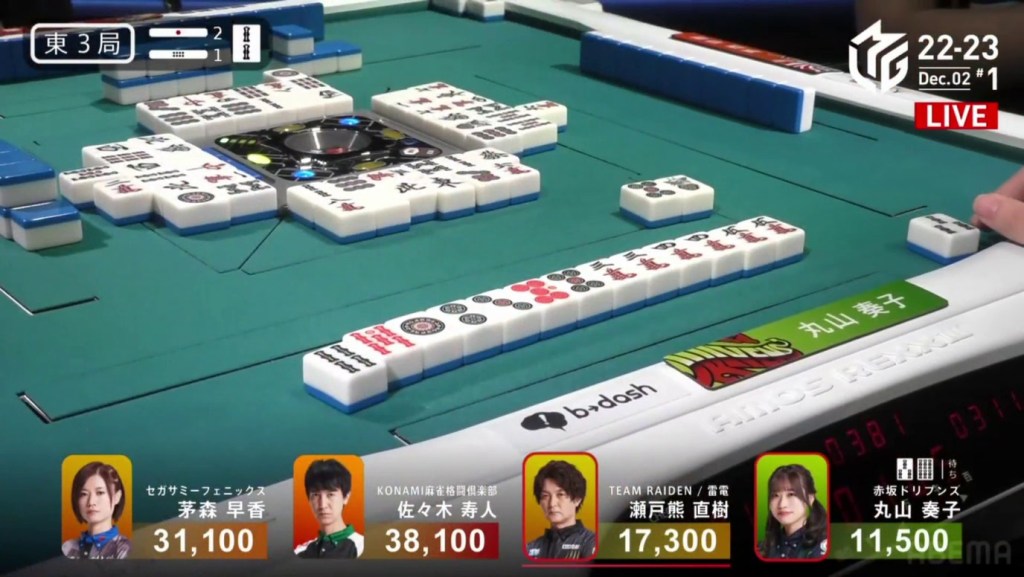
In E2-2, Kayamori is in 3rd place and just 1,000 behind 2nd. With 1st place being 24,800 away, she has a lot of work to do if she wants to chase top spot. She starts out 3-shanten with a red 5p and 7 elements of a pinzu ittsuu. On turn 5, Kayamori advances to 2-shanten and chooses to get rid of the ittsuu chance and 7p penchan for the more likely tanyao. In the 2nd row, Kayamori draws the 1p, which breaks her tanyao but does advance her to iishanten. In the middle of the 2nd row, Kayamori gets to tenpai and calls riichi on a 369s wait. In the hand’s current state, it only has two han and will only get 2,600. Within the ippatsu, Maruyama gets to tenpai and calls riichi on a 25p ryanmen. Right after, on Kayamori’s ippatsu draw, she finds the 9s and wins the hand. The uradora reveals in the 8s as the indicator, making her 9s pair the dora. Kayamori wins with Riichi/Ippatsu/Tsumo/Aka 1/Ura 2 for 3,000+200/6,000+200 plus Maruyama’s riichi stick, putting her solidly in 2nd place and within 5,000 of 1st place.
Escape
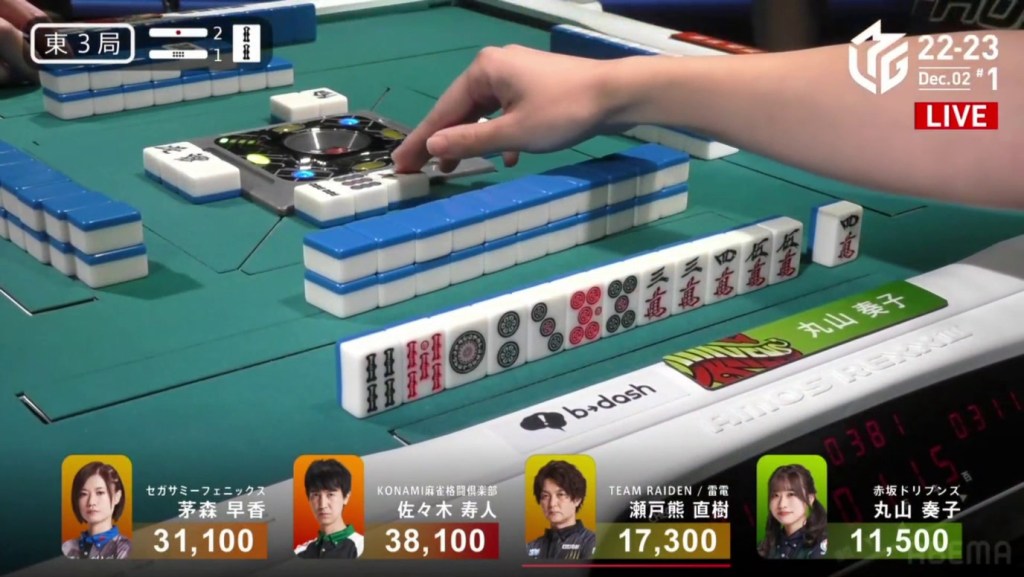
December 2, Game 1, E3-1
In E3-1, Maruyama is in last place and 5,800 behind 3rd. With 2,300 in bonus sticks available, any win would put her in a much better spot. She starts out with an excellent hand, being iishanten from the get-go with two red fives and at least one more han to gain from either iipeikou or pinfu. On turn 3, she draws the 4m to complete her 345m iipeikou and calls riichi on a 36s ryanmen, guaranteed to be at least a mangan.
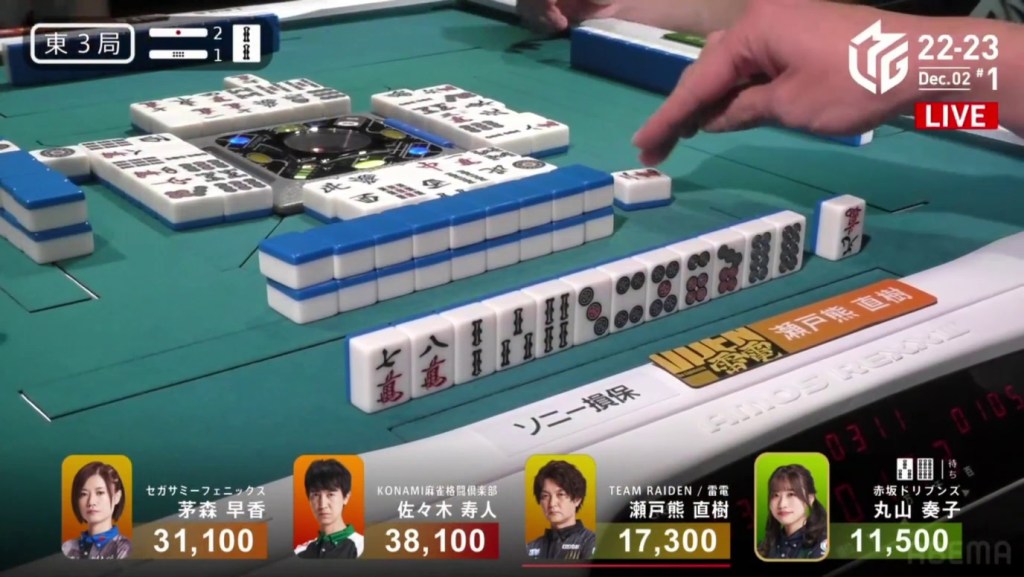
With so few hints at what is safe and what is dangerous, everyone tried the best they can to avoid dealing in. While Kayamori and Hisato were purely folding, Setokuma’s hand took some shape. By the middle of the 2nd row, Setokuma was iishanten. In the 3rd row, Setokuma finally gets to tenpai and calls riichi on a 258p sanmenchan.
Immediately after, just like Kayamori’s win after Maruyama’s riichi in E2-2, Maruyama drew the her winning tile. Maruyama wins the hand with Riichi/Tsumo/Pinfu/Iipeikou/Aka 2 for 3,000+100/6,000+100 plus three riichi sticks. With the win, Maruyama goes from 4th place to 3rd place and just 1,200 behind 2nd.
Never Too Late For Tenpai
December 2, Game 2, S2-3
Video: https://abema.tv/video/episode/444-14_s40_p712
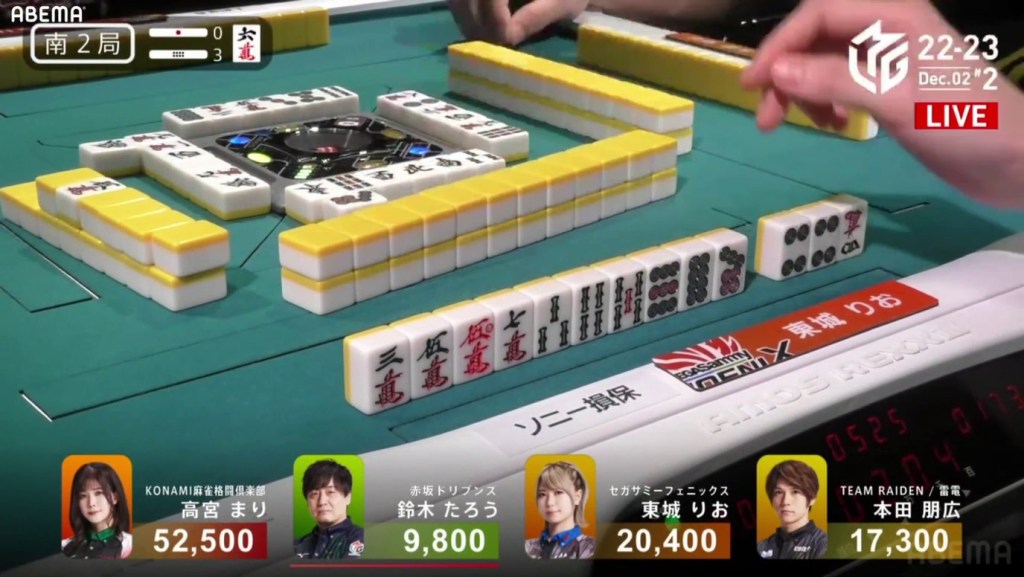
In S2-3, Takamiya has a big 1st place at 52,500, being 32,100 ahead of 2nd place. Even so, she aims to go higher. If she can finish a game with 61,800, the Konami Mahjong Fight Club would move into 2nd place. She starts out the hand 3-shanten with a pair of white dragons and an isolated dora 6m. Through the first row, Takamiya only manages to draw one more pair to get to chiitoi 2-shanten. When we look across the table, we see Tojo at iishanten. At the start of the 2nd row, 2nd place Tojo gets to tenpai and calls riichi on a 6m dora kanchan.
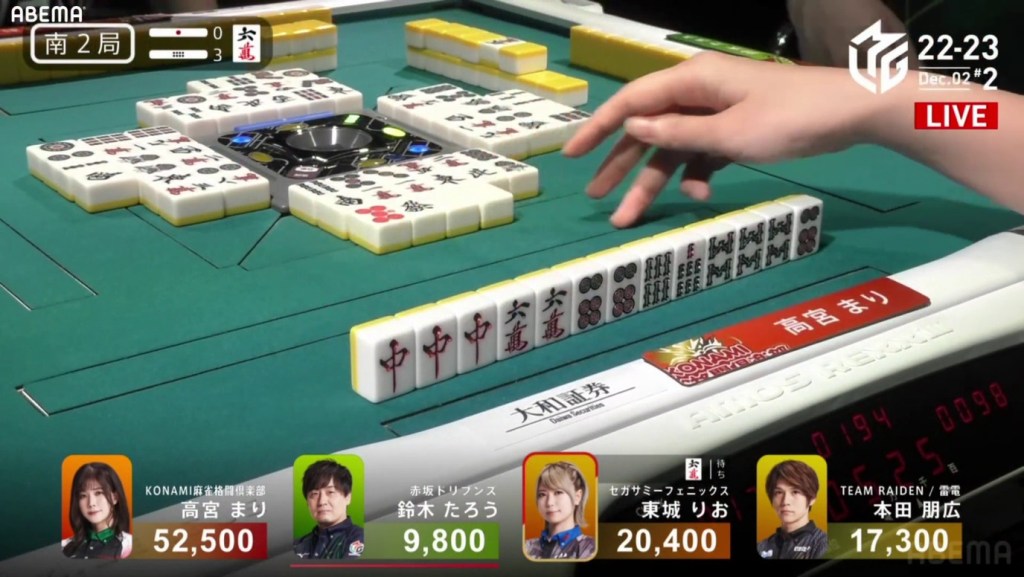
With a big lead and not being too close to tenpai, Takamiya starts out by breaking up some safe pairs. But as she breaks these shapes, she draws pairs in other place. By the end of the 2nd row, Takamiya is 2-shanten for both chiitoi and a standard hand, as well as holding pairs of white dragons and red dragons. On Takamiya’s third-to-last draw, she draws an ankou of red dragons, putting her iishanten. On her second-to-last draw, she draws an ankou of 6p, getting her tenpai on a 58s/6m. If she wins on the 5s or 8s, she would add on sanankou.
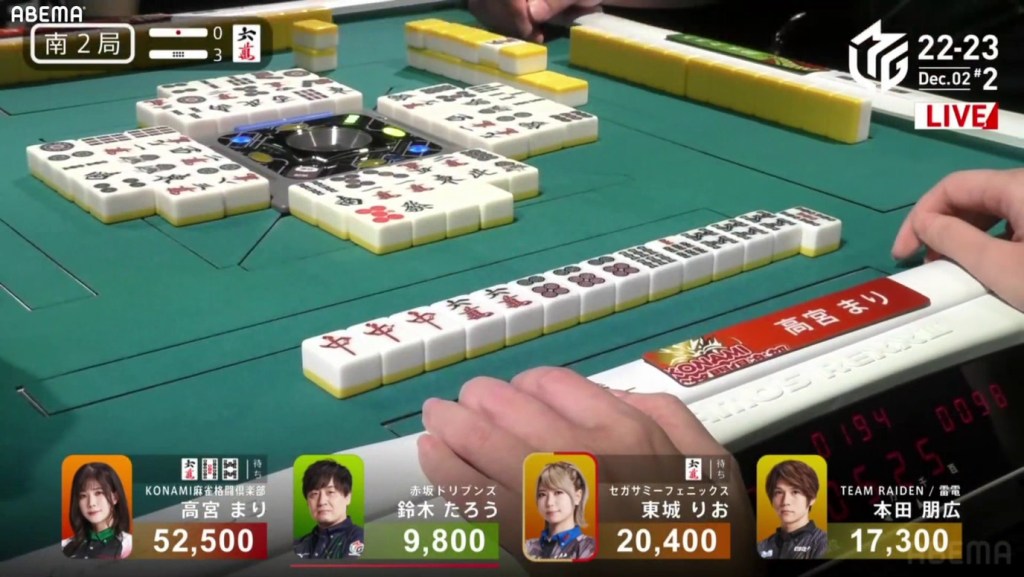
On Takamiya’s very last draw, She finds the 5s and wins the hand! Takamiya wins the hand with Tsumo/Red Dragon/Sanankou/Dora 2 for 3,000+300/6,000+300 plus one riichi stick.
She would end up finishing the game with 66,400, meeting the goal and putting her team in 2nd place overall in the standings.
