
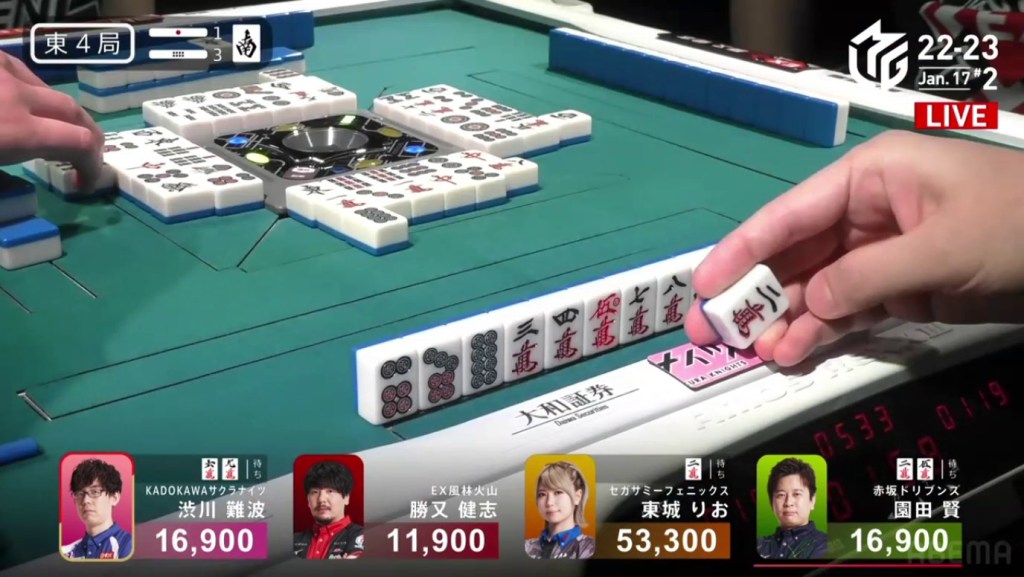
Highlights
Ura 3
January 16, Game 1, E1-0
Video: https://abema.tv/video/episode/444-14_s50_p723
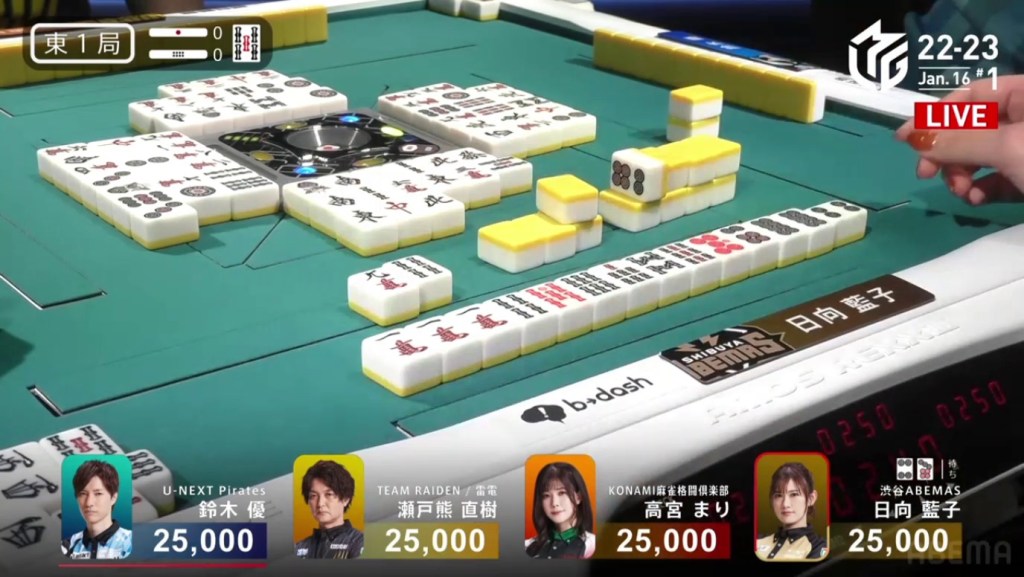
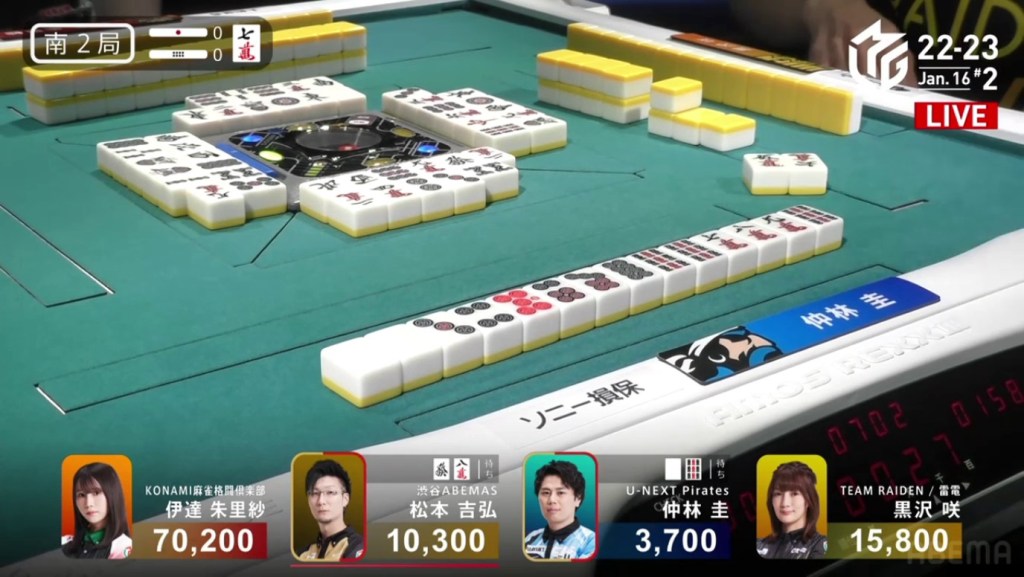
In E1-0, Hinata is sitting in the north seat and trying to break the team’s streak of 14 games without a 1st. Hinata starts out the hand 4-shanten with an ankou of 1m and a single 5s dora. In the first row, Hinata draws a red 5p and a red 5s, getting to 2-shanten by the end of the row. In the second row, Hinata is only able to advance to iishanten, filling in a ryanmen at the end of the row. A turn later, Hinata gets to tenpai and calls riichi, throwing a 5s dora to wait on a 47p ryanmen. With her current hand, she is guaranteed at least a mangan. While Hinata waits, Takamiya gets to tenpai and waits in a 58p ryanmen. On Takamiya’s last draw, she draws a dangerous 4s and folds her hand. On Hinata’s last draw, she finds the 4p and wins the hand. With the flip of the uradora, Hinata’s 1m ankou becomes dora and boosts his hand significantly. Hinata wins the hand with Riichi/Tsumo/Dora 1/Aka 2/Ura 3 for 4,000/8,000, taking a strong early lead.
Shortcut to Baiman
January 16, Game 1, E3-0
Video: https://abema.tv/video/episode/444-14_s80_p728
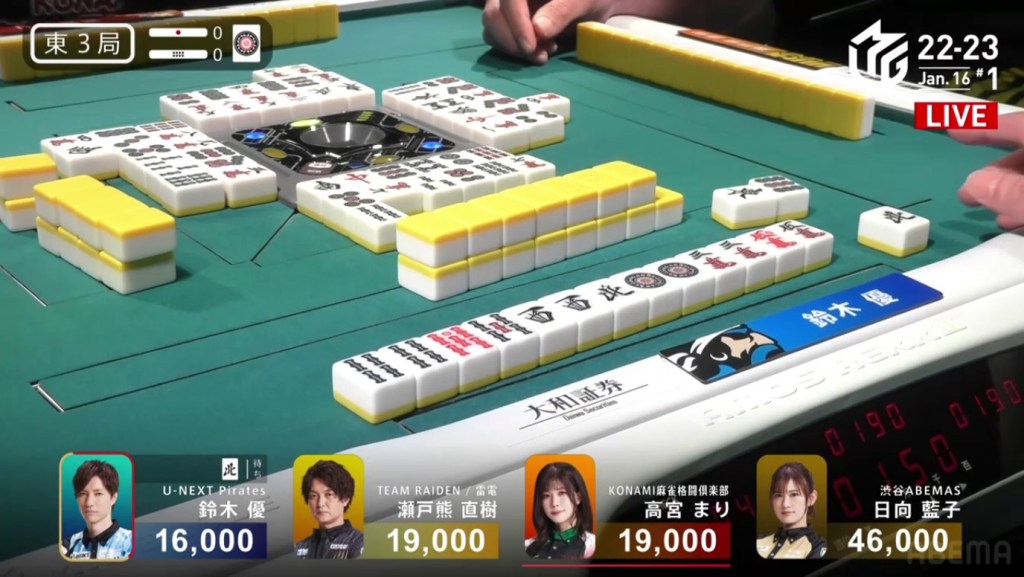
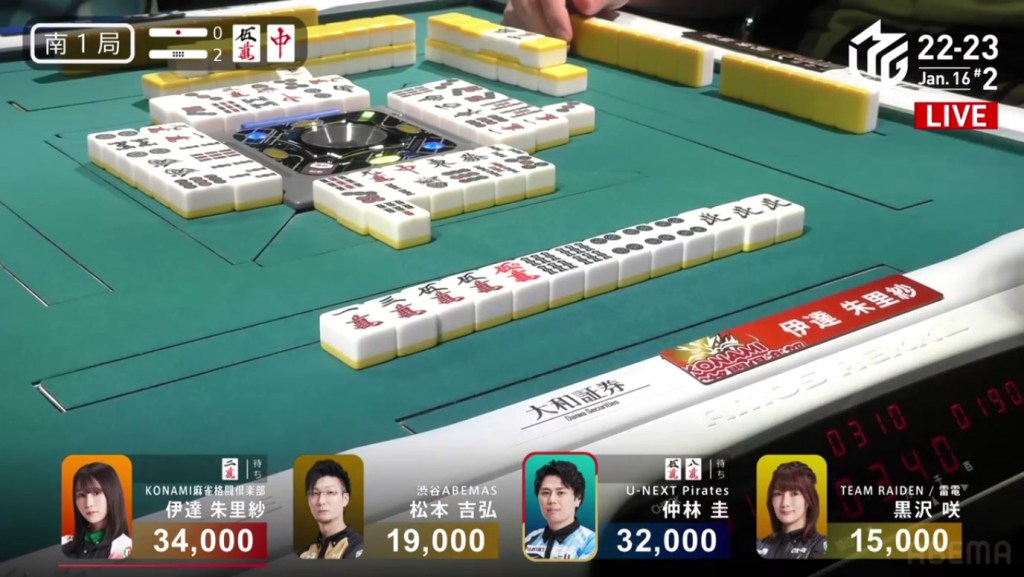
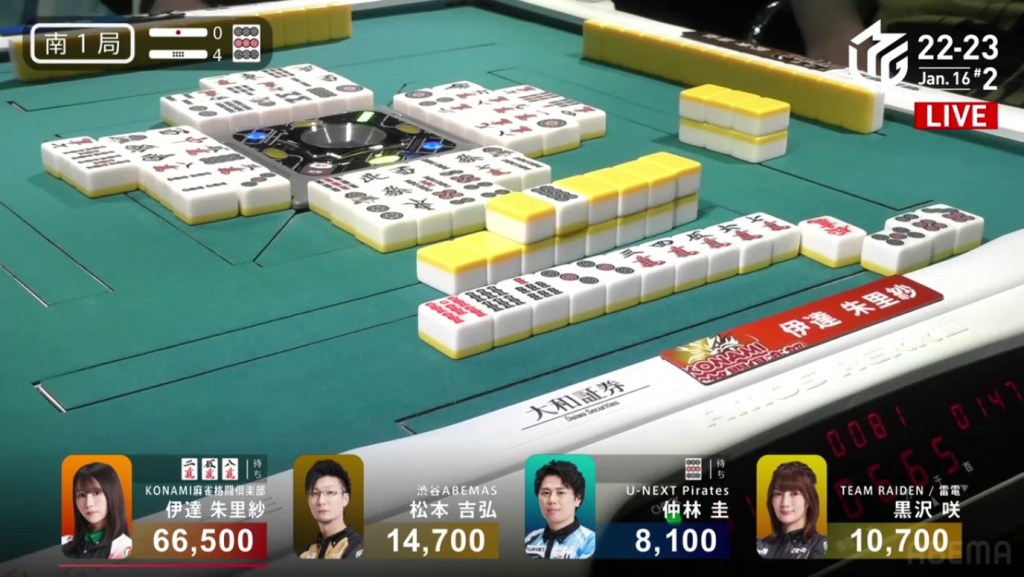
In E3-0, Yu is in 4th place, 3,000 behind 2nd and 3rd and 30,000 behind 1st. He starts out the hand 3-shanten for chiitoi (4-shanten for a standard hand) with a lone dora 1p. On turn 5, Yu pairs up the 1p to get to chiitoi 2-shanten. On turn 7, Yu pairs up the 5m, securing a red 5m in his hand. The very next turn, Yu draws a red 5s and calls riichi on a north tanki. His hand is expensive, being at least a haneman on ron and baiman on tsumo. In the third row, Yu draws a north and wins the hand. Yu wins with Riichi/Tsumo/Chiitoi/Dora 2/Aka 2 for 4,000/8,000, moving into 2nd place.
Date
January 16, Game 2
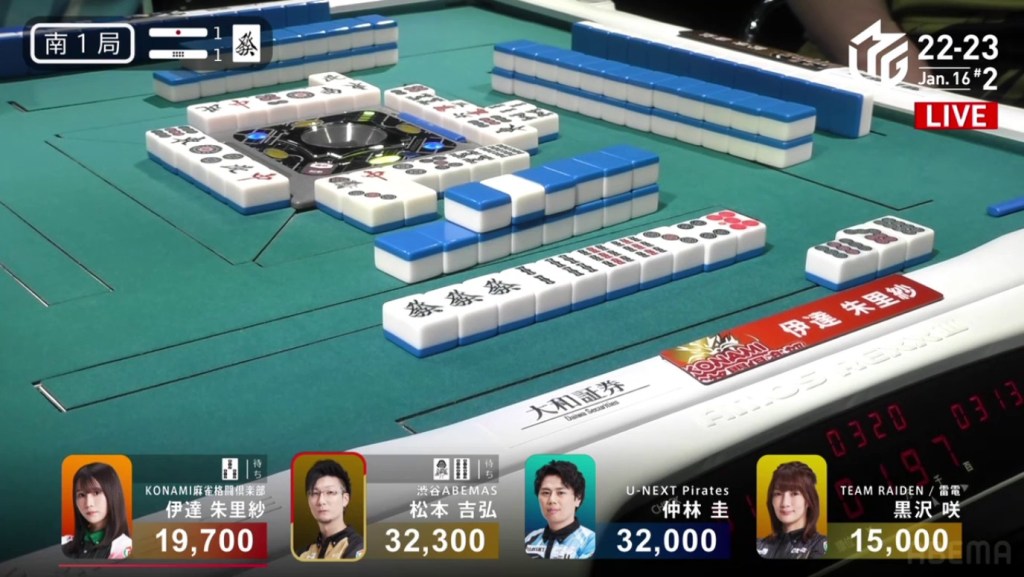
In S1-1, Date is in 3rd place, 12,300 behind 2nd and 12,600 behind 1st. After the team’s heavy negative last game pushing them down to second in the standings, Date wants to bring the team up. She starts out the hand 3-shanten holding an isolated green dragon dora. On turn 3, Date pairs up the green dragon to get to 2-shanten. On turn 5, Date draws a third green dragon for iishanten. With a call, Date gets to tenpai at the end of the row on a 3s kanchan. However, her pursuit isn’t without resistance. To her right is Matsumoto, in riichi with a 14s ryanmen. In the second row, Matsumoto ends up drawing a 3s and deals into Date. Date wins the hand with Green Dragon/Dora 3/Aka 1 for 12,000+300, moving into 1st place.
Video: https://abema.tv/video/episode/444-14_s40_p727
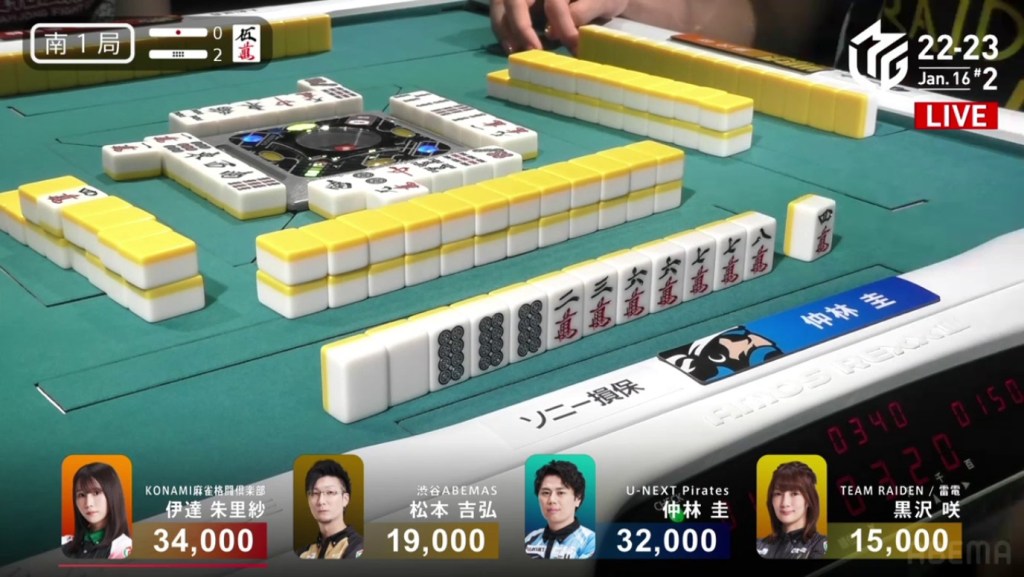
In S1-2, Date is in 3-shanten and holding a pair of 5m dora (including the red 5m). On turn 2, Date draws an ankou of norths to get to 2-shanten. On turn 4, Date creates a ryanmen to get to iishanten. As Date waits at iishanten, Nakabayashi gets to tenpai and calls riichi on a 58m ryanmen.
On the ippatsu round, Date draws a third dora. With four dora, a chance at sanankou and being the dealer, Date pushes. While Date waits, Nakabayashi calls a kan. The new dora and rinshan miss, but it gives Nakabayashi a chance at another uradora. Right after the Kan, Date gets to tenpai and stays dama on a 2m kanchan. In the third row, Nakabayashi draws the 2m and deals into Date. Date wins the hand with Sanankou/Dora 3/Aka 1 for 18,000+600, putting Date above 50,000 and Nakabayshi into 4th.

In S1-3, Date starts out 3-shanten with a dora 3p and a red 5m. On turn 3, Date fills in a kanchan to get to iishanten. On turn 5, Date fills a penchan and calls riichi on a 7s kanchan. With players folding, Date has time to draw her winning tile herself. It takes a while, but Date manages to draw the 7s on her last draw to win the hand. Date wins with Riichi/Tsumo/Dora 1/Aka 1 for 4,000+300 all.
Video: https://abema.tv/video/episode/444-14_s40_p728
In S1-4, Date starts out with a 2-shanten hand with a red 5s already incorporated. In the first row, Date shifts her hand to have three ryanmens while staying at 2-shanten. In the second row, Date shifts her hand to tanyao and creates a three-sided wait to get to iishanten. In the third row, Date makes a call and waits on a 258m. If Date can get a 2m or a 5m, she would add sanshoku to her hand. Near the end of the hand, Date manages to draw a red 5m and wins the hand. Date wins with Tanyao/Sanshoku/Aka 2 for 4,000+400 all, putting Date up to 79,700.
He Giveth, He Taketh Away
January 16, Game 2
In S2-0, Nakabayashi is in 4th place, 6,600 behind 3rd place dealer Matsumoto and 12,100 behind 2nd place Kurosawa. Nakabayashi starts out 3-shanten with a pair of white dragons. In the first row, Nakabayashi creates a few kanchan and one ryanmen, getting to only 2-shanten. In the second row, Nakabayashi shifts one of the kanchans into a three-sided wait, draws a red 5p and fills in a ryanmen. Near the end of the second row, Nakabayashi gets to tenpai and calls riichi on a white dragon/9s shanpon.
Within the ippatsu turn, Matsumoto gets to tenpai and calls riichi on a green dragon/8m shanpon.
However, on Nakabayashi’s ippatsu turn, Nakabayashi draws his winning 9s and wins the hand. Nakabayashi wins with Riichi/Ippatsu/Tsumo/Dora 1/Aka 1 for 2,000/4,000, moving into 3rd place.

In S3-0, Matsumoto is in 3rd place. Before Matsumoto even gets his first draw, dealer Nakabayashi calls pon on a white dragon, skipping Matsumoto’s turn. When Matsumoto does get his first draw, he is 2-shanten with an ankou of south doras and a pair of red dragons. Near the end of the first row, Matsumoto gets to iishanten. With a call just a turn later, Matsumoto gets to tenpai and waits on a 69s ryanmen. In the middle of the second row, Nakabayashi draws and discards the 9s and deals into Matsumoto. Matsumoto wins the hand with South/Dora 3 for 8,000.
Quick Shortcut
January 17, Game 1, S3-0
Video: https://abema.tv/video/episode/444-14_s30_p721
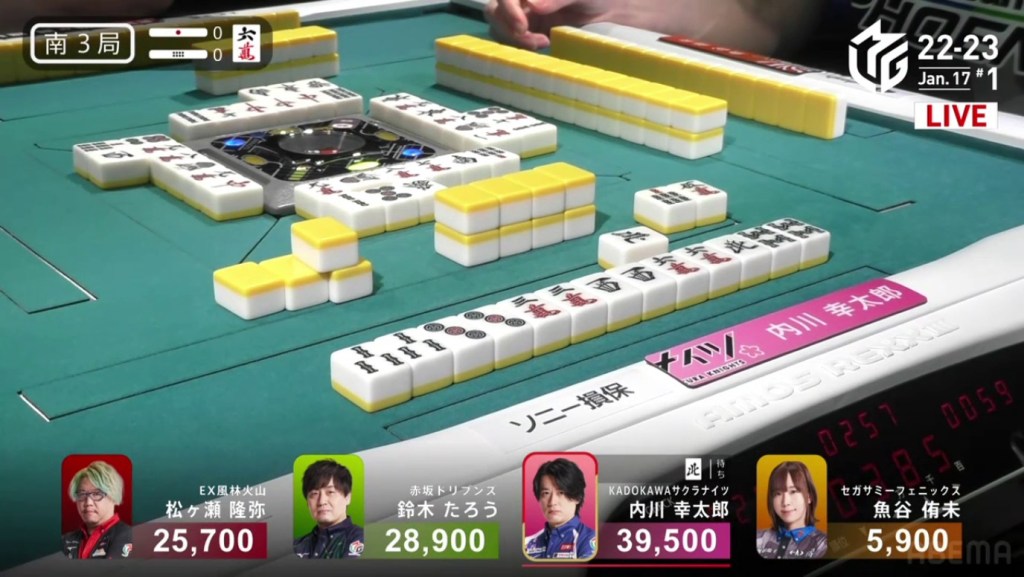
In S3-0, Uchikawa is in 1st place as the dealer, 10,600 ahead of 2nd. He starts out the hand with 4 pairs (including a pair of 6m dora), getting his fifth pair on his first draw. On his second draw, Uchikawa draws his sixth pair and calls riichi on north tanki. With such an easy honour wait, it was almost guaranteed that he would win. In the middle of the second row, Taro discards the north and deals into Uchikawa. Flipping two uradora, Uchikawa wins the hand with Riichi/Chiitoi/Dora 2/Ura 2 for 18,000.
Hane Hane
January 17, Game 2
Video: https://abema.tv/video/episode/444-15_s90_p612
In E3-0, Tojo is the dealer in 4th place, 8,000 behind 3rd place. On turn 1, Tojo completes a 345m iipeikou to get to iishanten. With two 4m dora and a red 5m, her hand is already set for mangan with a decent chance at haneman. On turn 2, Tojo fills penchan and calls riichi on a 14s ryanmen, guaranteed to be at least a haneman. Though the riichi is so early, people are able to dodge it. At the start of the second row, Tojo draws the 1s and wins the hand. Tojo wins the hand with Riichi/Tsumo/Pinfu/Iipeikou/Dora 2/Aka 1 for 6,000 all, moving her into 1st place.
Video: https://abema.tv/video/episode/444-14_s60_p731
In E3-1, Tojo is starting her second hand as dealer and starts out iishanten with her first 13 tiles with a red 5p and a dora 7p. Though the double riichi misses, she still has 4 different tiles that can get her to tenpai. At the end of the row, Tojo shifts her hand to tanyao and increases her tenpai acceptance to 5 tiles. As Tojo waits for tenpai, Shibukawa fills in a kanchan and calls riichi on a 25p ryanmen, guaranteed at least a mangan.
Within the ippatsu round, Tojo draws Shibukawa’s last 5p (holding all four of them) to get to tenpai and calls riichi on a 25s ryanmen, guaranteed at least a mangan as well. With only 2 tiles for Shibukawa and 4 tiles for Tojo, Tojo is favoured to win. On Tojo’s ippatsu turn, she finds the 5s and wins the hand. Tojo wins with Riichi/Ippatsu/Tsumo/Tanyao/Dora 1/Aka 1 for 6,000+100 all plus one riichi stick, putting Tojo above 50,000.
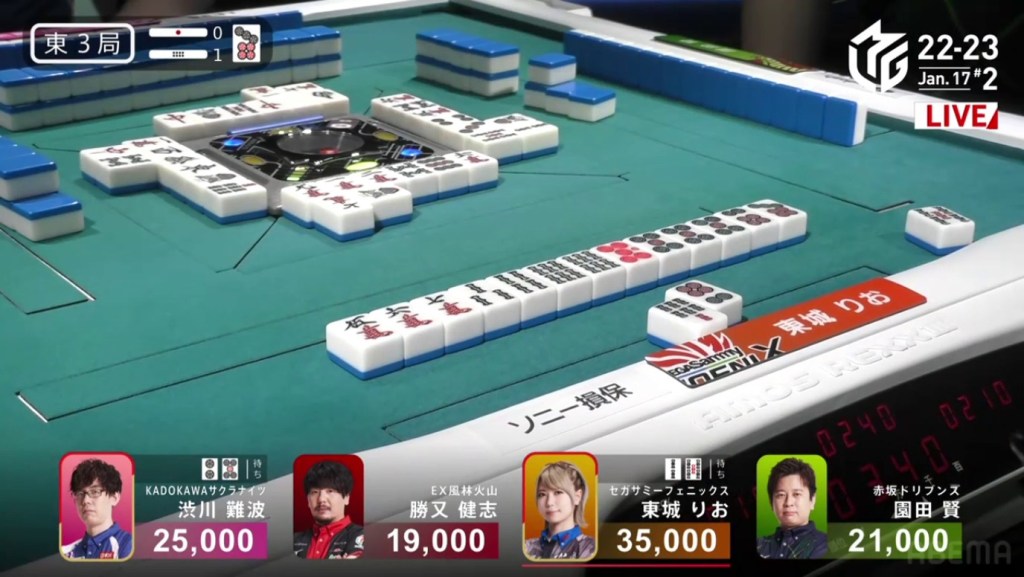
Headbump
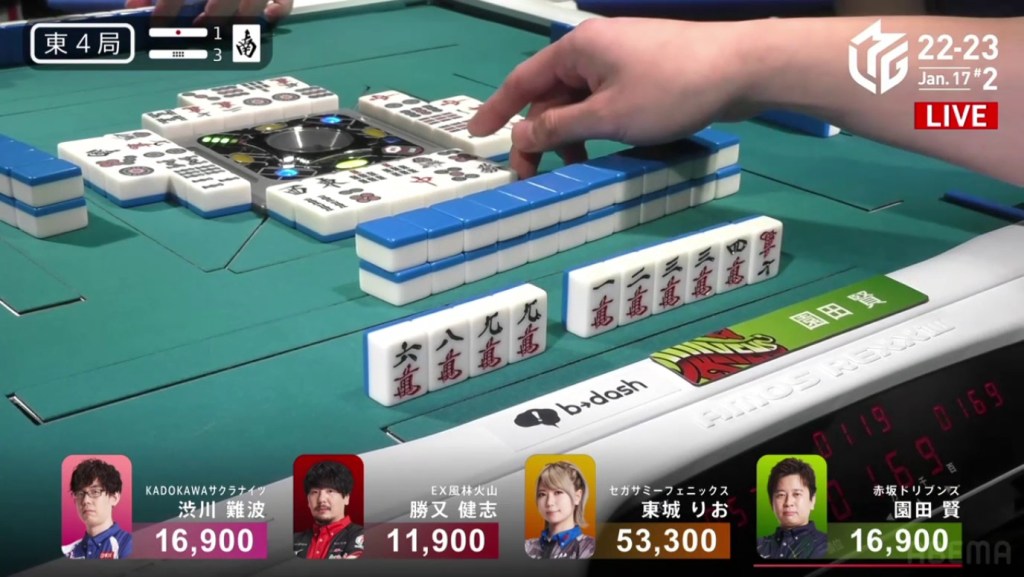
January 17, Game 2, E4-3
Video: https://abema.tv/video/episode/444-14_s60_p732
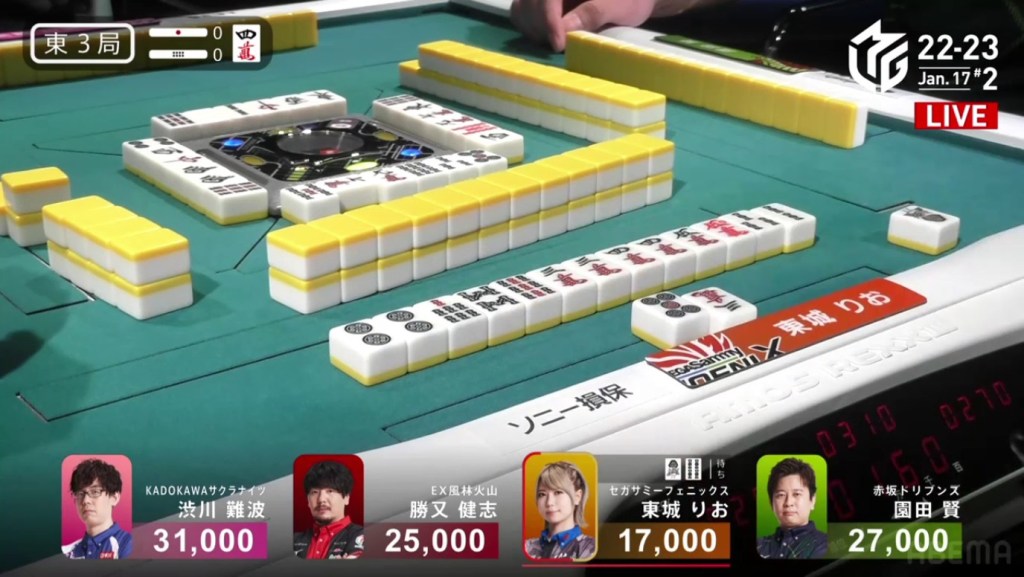
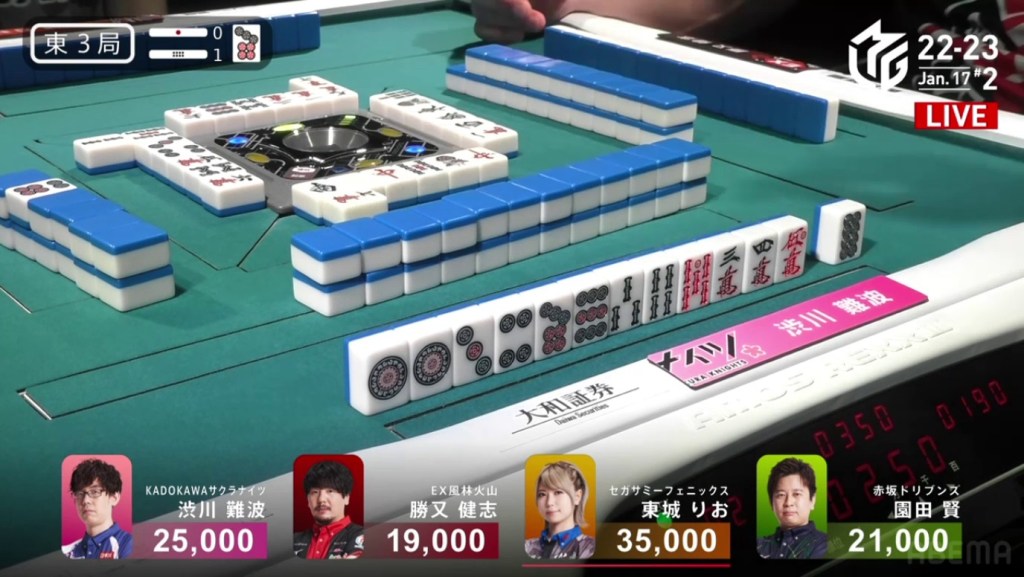
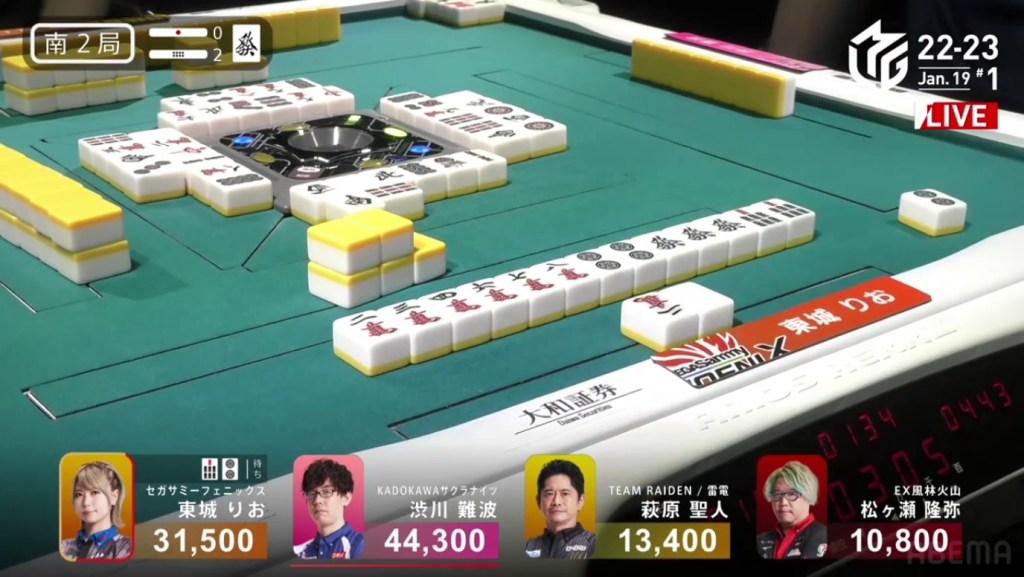
In E4-3, Sonoda and Shibukawa are tied for 2nd place, 36,400 behind 1st place Tojo. At the start, Sonoda is 4-shanten with a pair of south doras, Shibukawa is 4-shanten with a red 5s and Tojo is 4-shanten with a lone south dora. In the first row, Sonoda shifts his hand to honitsu, Shibukawa makes ryanmens and draws another red dora and Tojo pairs up the green dragon. By the end of the row, all three of them are 3-shanten. In the second row, Sonoda calls pon on the south, Shibukawa shifts his hand to tanyao and Tojo confirms her good shapes. At the end of the row, Sonoda gets to tenpai and waits on a 25m ryanmen, guaranteed to be a mangan.
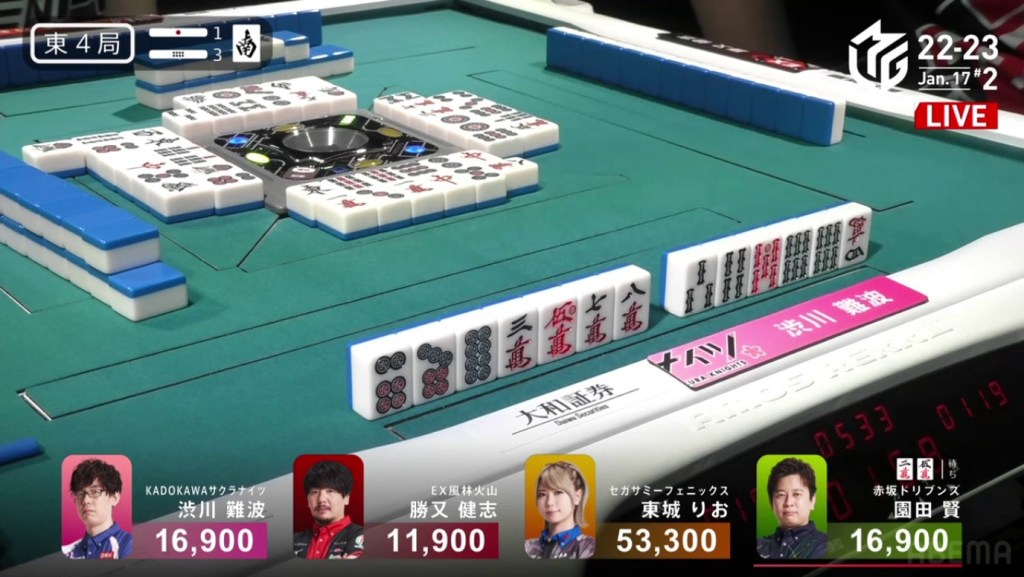
Soon after, Tojo has a chance to get to tenpai. However, because she doesn’t want to throw the 2m, she passes on the tenpai and stays iishanten. After that, Shibukawa gets to tenpai and calls riichi on a 69m ryanmen, guaranteed to be at least a mangan.
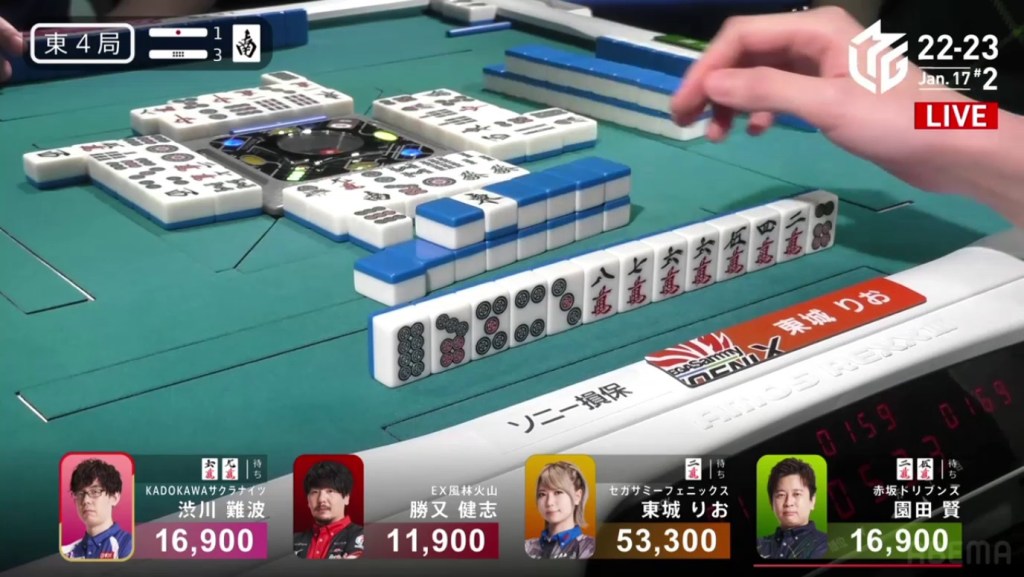
On the ippatsu turn, Tojo gets to tenpai and waits on a yakuless 2m tanki. A turn later, she draws a 6p to give her tanyao, allowing her to win on a ron.
Within the next go-around Shibukawa draws and discards the 2m
At the same time, Tojo and Sonoda called ron. Because of the headbump rule, the next in order from the discarder wins the hand. In this case, Tojo’s hand wins. Tojo wins with Tanyao only for 1,300 while Sonoda’s mangan and dealership are gone.
Atozuke

January 17, Game 2, S1-0
In S1-0, Shibukawa is the dealer in 3rd place and sitting 3,200 behind 2nd place Sonoda. He starts out the hand 4-shanten with a 6p dora. In the first row, Shibukawa gets rid of all the honours in his hand to push his hand towards tanyao. However, the unresolved 69s ryanmen could put the tanyao in jeopardy. At the start of the second row, Shibukawa get to iishanten. Around the same time, Sonoda gets to tenpai and stays dama on a 3p yakuless hand. In the second row, he moves out of tenpai and gets back in. On turn 8, Sonoda calls riichi on a 4s/north shanpon.
In the middle of the row, Sonoda discards the 8m. With a chii, Shibukawa gets to tenpai on a 69s ryanmen. However, this is a big gamble. If Shibukawa gets the 6s, he would have mangan. If he gets the 9s, he would have no yaku. With a high-risk high-reward gamble, only the wall will determine his fate. On Shibukawa’s very next draw, he finds the 6s and wins the hand. Shibukawa wins with Tanyao/Sanshoku/Dora 1/Aka 1.
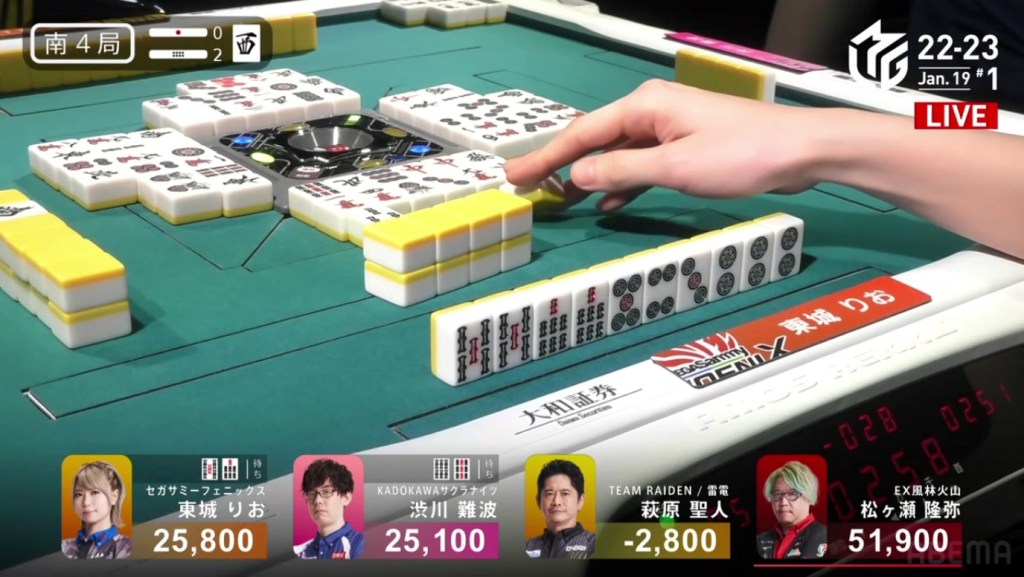
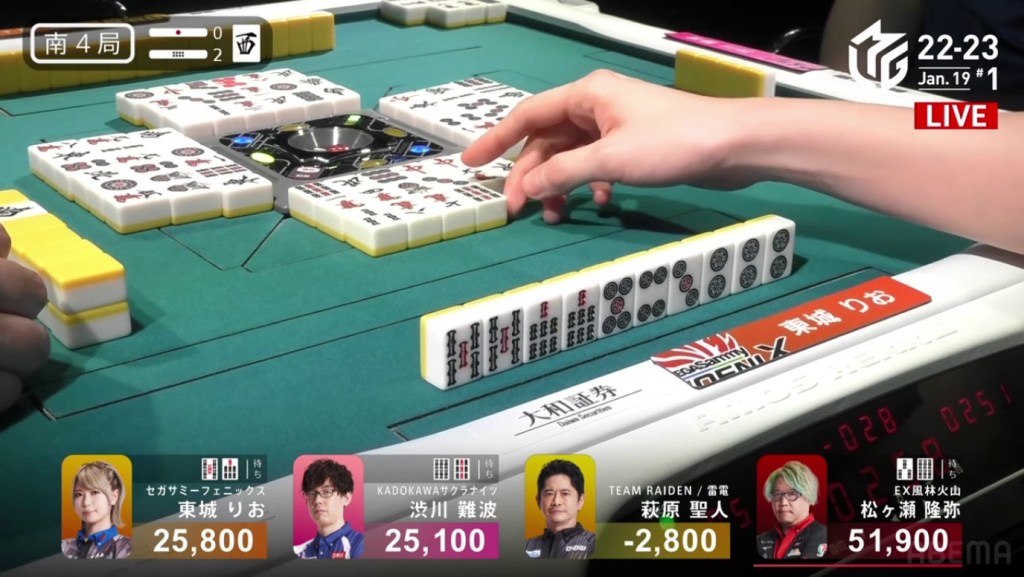
All the Reds

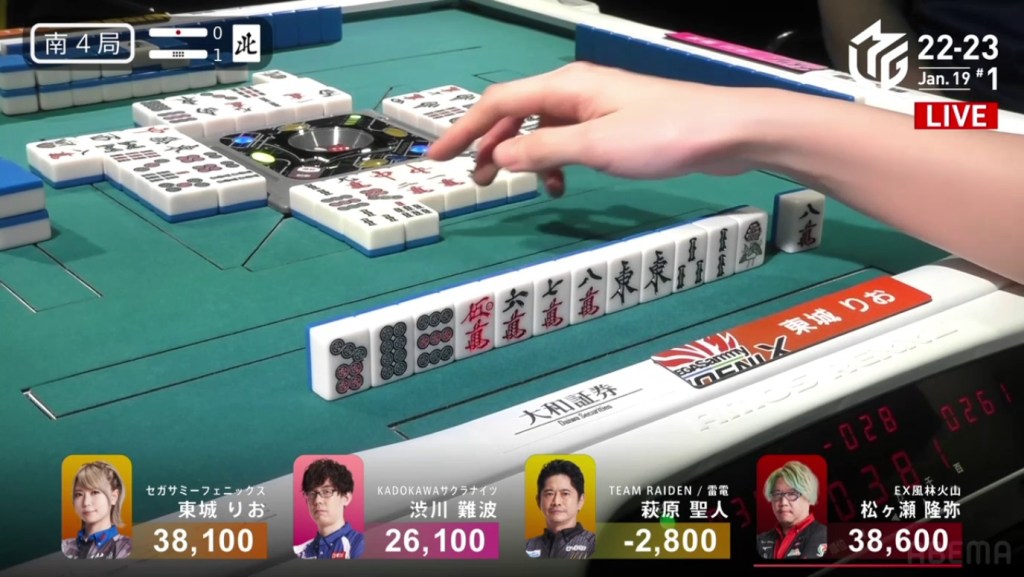
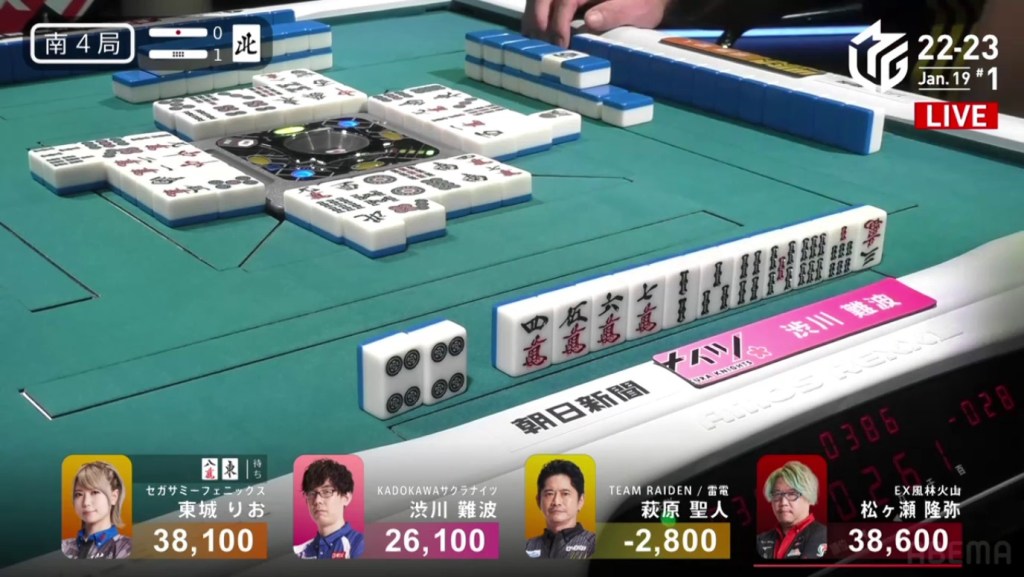
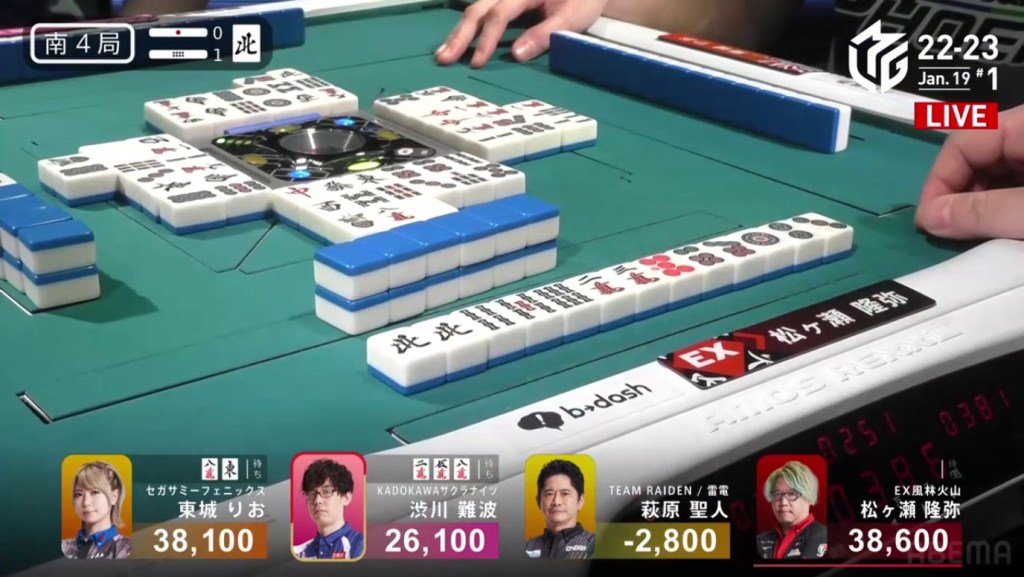
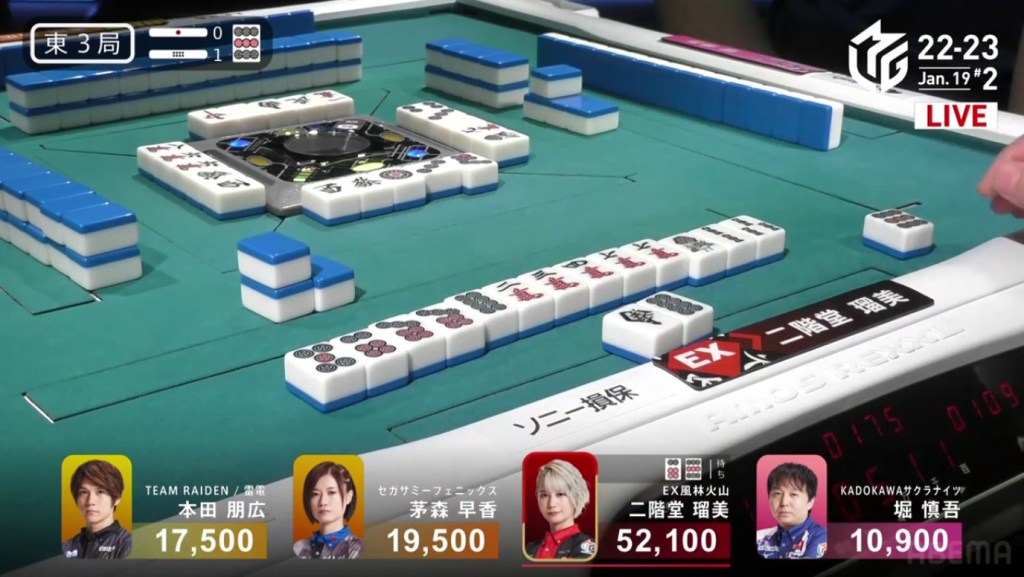
January 19, Game 1, S2-0
In S2-0, Shibukawa is the dealer in 2nd place and 16,800 behind 1st place Tojo. He starts out the hand 4-shanten with a red 5s and geared towards tanyao. In the first row, pairs up the 5p with a red 5p and creates simple ryanmens. By turn 4, he was 2-shanten with three ryanmens. On turn 5, Shibukawa fills the 14p ryanmen with a 1p, killing tanyao for now but advancing him to iishanten. In the middle of the second row, Shibukawa gets to tenpai and calls riichi on a 58m ryanmen. At the start of the 3rd row, Matsugase gets to tenpai on a 14s ryanmen, but it’s too late. On Shibukawa’s draw, he finds the red 5m and wins the hand. Shibukawa wins with Riichi/Tsumo/Pinfu/Aka 3 for 6,000 all, putting him in 1st place.
Ippatsu
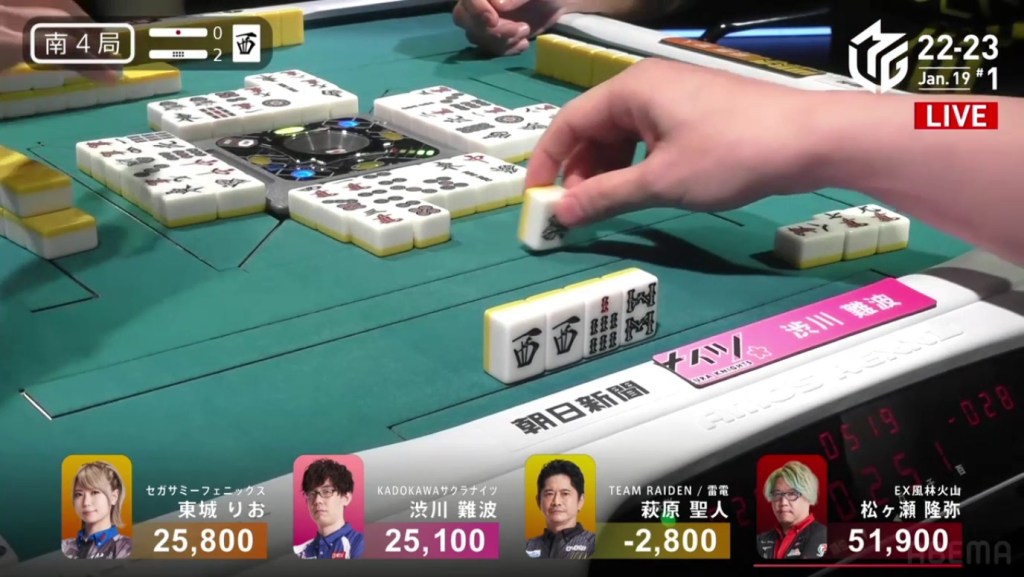
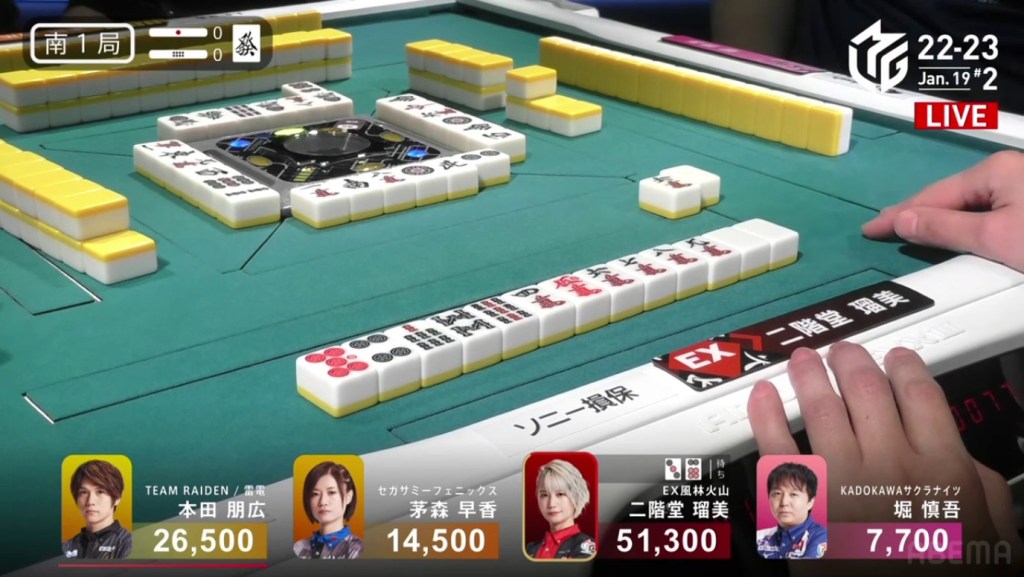
January 19, Game 1, S2-2
Video: https://abema.tv/video/episode/444-14_s60_p733
In S2-2, Tojo in 2nd place after Shibukawa passed her two hand ago. With a 12,800 gap to fill, she gets to work. She starts out the hand 2-shanten with a stray red 5p and dora green dragon. Early on, it was clear that Shibukawa didn’t want to give his dealership away easily, calling pon on the east. Tojo switches her penchan for a kanchan in the first row, but is otherwise unproductive. At the start of the second row, Tojo pairs up the green dragon to get to iishanten. The very next turn, Tojo draws a third green dragon and stays dama on an 8s kanchan, guaranteed a mangan. With Tojo’s red 5p discard, Shibukawa calls chii to advance his hand to iishanten. On Tojo’s next draw, she decides to add pressure to the table by calling riichi and switching to a 7s/2p shanpon. On the ippatsu draw, Tojo finds the 2p and wins the hand. Flipping one uradora, Tojo wins with Riichi/Ippatsu/Tsumo/Green Dragon/Dora 3/Ura 1 for 4,000+200/8,000+200, moving her back into 1st place.
Gase
January 19, Game 1
In S3-0, Matsugase is in 4th place, 2,600 behind 3rd place and almost a yakuman away from 2nd. He starts out the hand 4-shanten with a dora 2p and a red 5m. In the first row, Matsugase draws another 2p dora, fills in a few of his bad shapes and gets to 2-shanten by the end of the first row. In the second row, he gets rid of his 3m penchan for a 2m pair, makes a ryanmen call and gets to iishanten by the end of the row. With a pon of the 2s and the start of the third row, Matsugase is the first to tenpai, waiting on a 2p/2m shanpon. In the middle of th row, Matsugase draws the 2m and wins the hand. Matsugase wins with Tanyao/Dora 2/Aka 1 for 2,000/4,000, moving into 3rd place.
Video: https://abema.tv/video/episode/444-14_s20_p726
In S4-0, Matsugase is the last dealer, sitting 20,500 behind 2nd place and 31,500 behind 1st. With this last dealership, he can go wherever he wants. He starts out the hand 3-shanten with two red fives and the ability to easily accept the 4s dora. On turn 2, Matsugase creates a ryanmen for 2-shanten. On turn 3, Matsugase draws the 4s dora to fill in a kanchan and get to iishanten. On turn 4, he fills in his ryanmen and has a chance to get to tenpai. However, Matsugase chooses to wait for a better wait and shift to tanyao instead of taking a 3m penchan. At the end of the row, Matsugase gets to tenpai and waits dama on a 6m tanki with 13 different tiles improving his tenpai.
In the middle of the second row Matsugase draws a 7m. The wait does improve his wait to a 58m ryanmen, but the wait is furiten. Even though it is furiten, it gives him a chance at a 567 sanshoku. If he can get it, it would be at least a baiman. Even if he were to draw the 8m, it would be at least 7 han. With such an expensive hand, he decides to take the furiten riichi.
Looking around the table, Matsugase still has three 5m and one 8m left in the wall. Through the second row, Matsugase’s dreams were will alive, all four of his waits were still drawable. At the end of the second row, Hagiwara draws a red 5m, dropping the count to three. On Hagiwara’s next draw, the count went down to two, one of each. As the wall got shorter, excitement built. On Matsugase’s second-last draw, he gets the 6m. Right suit, wrong tile. Each player had one more tile to draw. On Shibukawa’s draw, he finds the last 8m, leaving Matsugase with only one tile left. Hagiwara’s last tile wasn’t the 5m, keeping the chance at a comeback. On Matsugase’s last draw, the second-last tile in the wall Matsugase finds the last 5m! Matsugase wins the hand with Riichi/Tsumo/Pinfu/Tanyao/Sanshoku/Dora 1/Aka 2 for 8,000 all, moving him into 1st place.
Video: https://abema.tv/video/episode/444-14_s20_p727
In S4-1, Matsugase is in 1st place, a far cry from the 4th place he had two hands ago. Though he is in 1st, the lead is only 500. He starts out the hand by filling in a kanchan to get to 3-shanten with a pair of dora norths. With the norths being non-yakuhai honours, Matsugase keeps his hand efficient to aim for riichi. By the end of the first row, Matsugase is 2-shanten with two ryanmens. At the same time, Tojo and Shibukawa are both aiming for 1st place. With Tojo iishanten and Shibukawa 2-shanten, both pose real threats. By turn 8, all three of them are iishanten. At the end of the second row, Tojo has a chance to get to tenpai but she chooses not to take the 5m/east shanpon with all the easts discarded. Similarly, Shibukawa has a chance to take tenpai but declines his shanpon because it isn’t enough value. In the third row, Tojo is the first to take tenpai, sitting dama on a yakuless 8m/east shanpon.
Right after, Shibukawa gets to tenpai and calls riichi on a 258m ryanmen. With an ippatsu draw with one uradora, he would have enough for 1st place.
During the ippatsu round, Matsugase gets to tenpai and stays dama on a 14m ryanmen. With the 4m being previously discarded by Shibukawa, the trap is set. On Tojo’s draw, she draws and discards the 1m and deals into Matsugase. Matsugase wins the hand with Pinfu/Dora 2/Aka 1 for 12,000, putting him over 50,000.
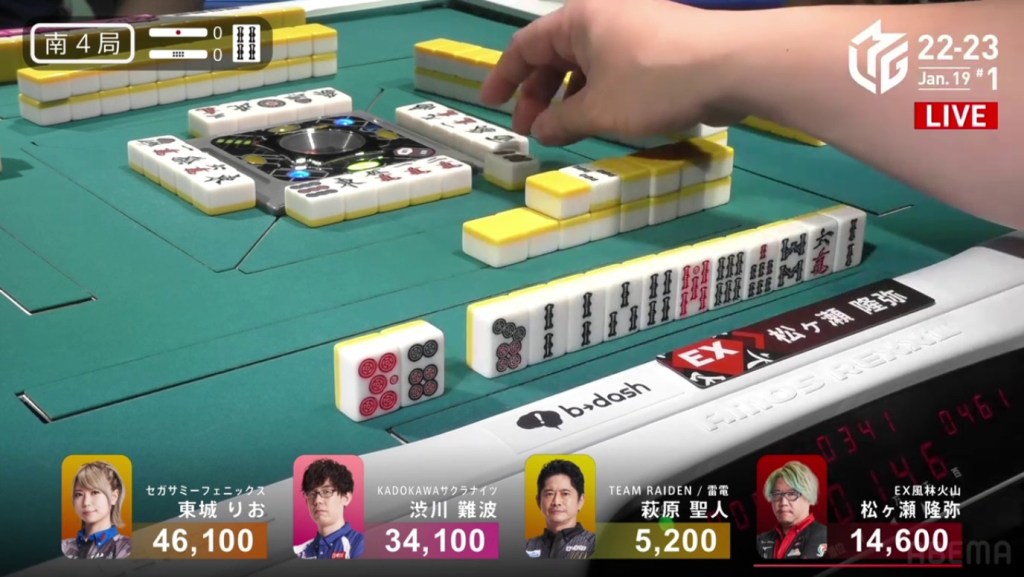
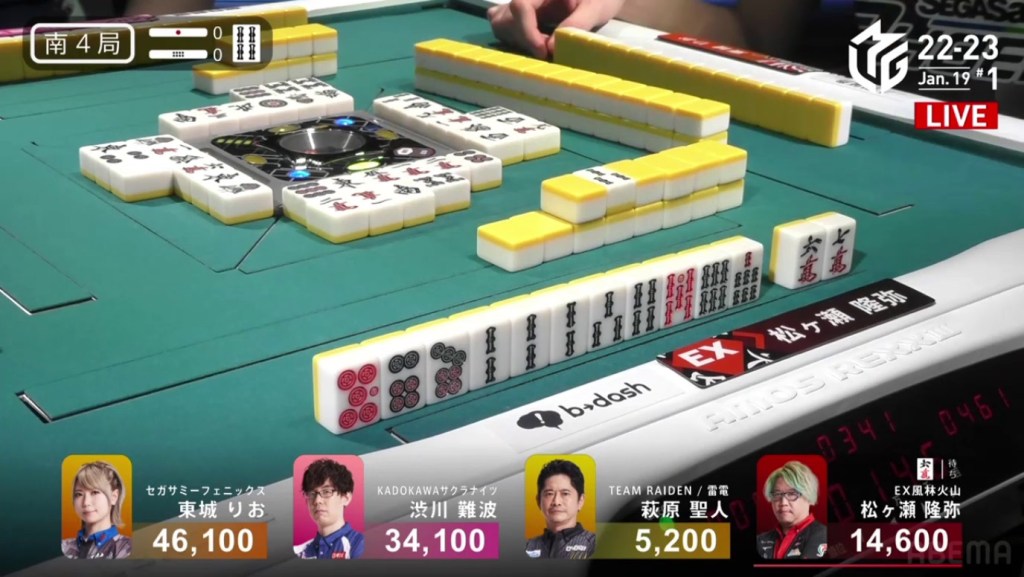
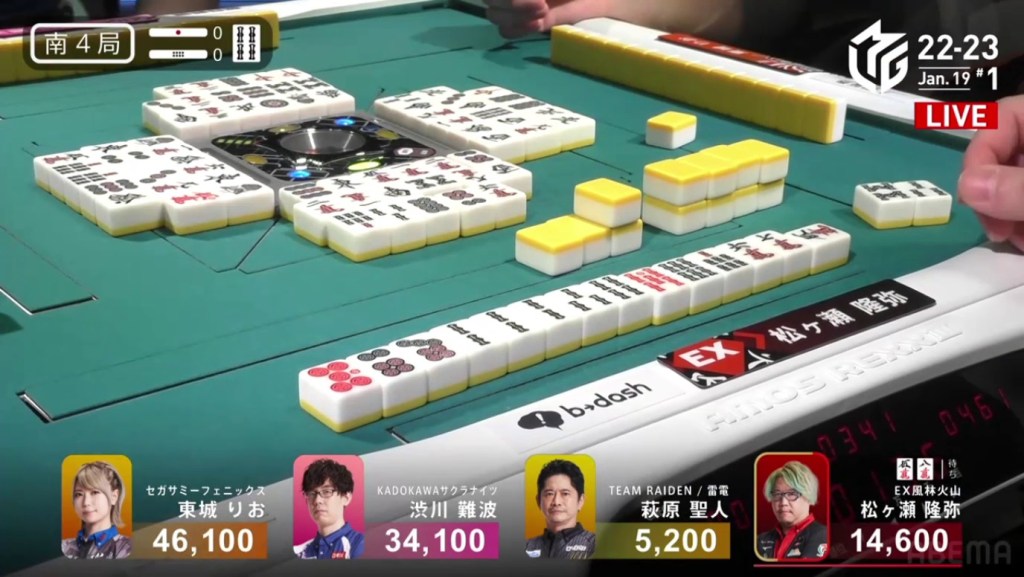
Atozuke
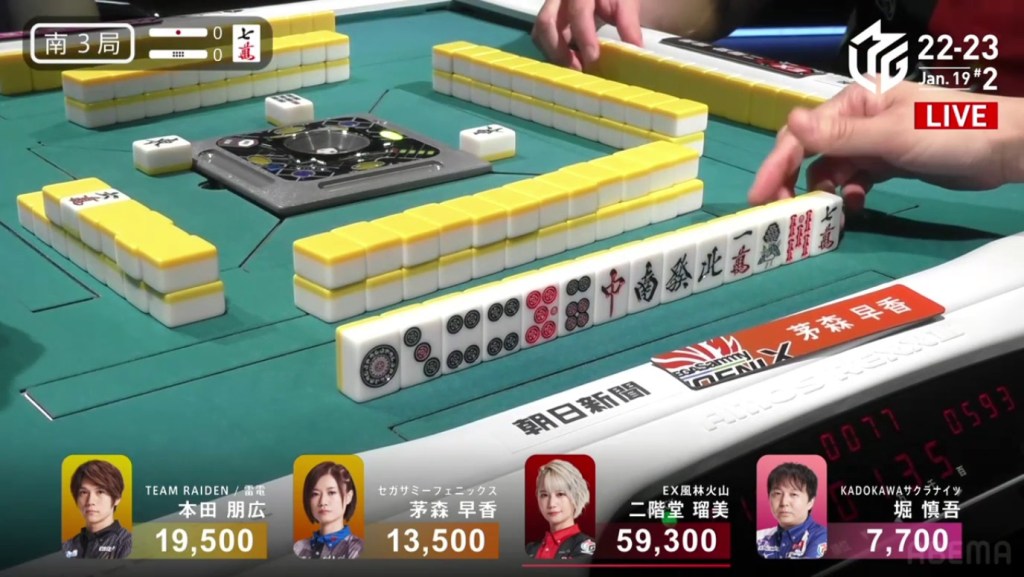
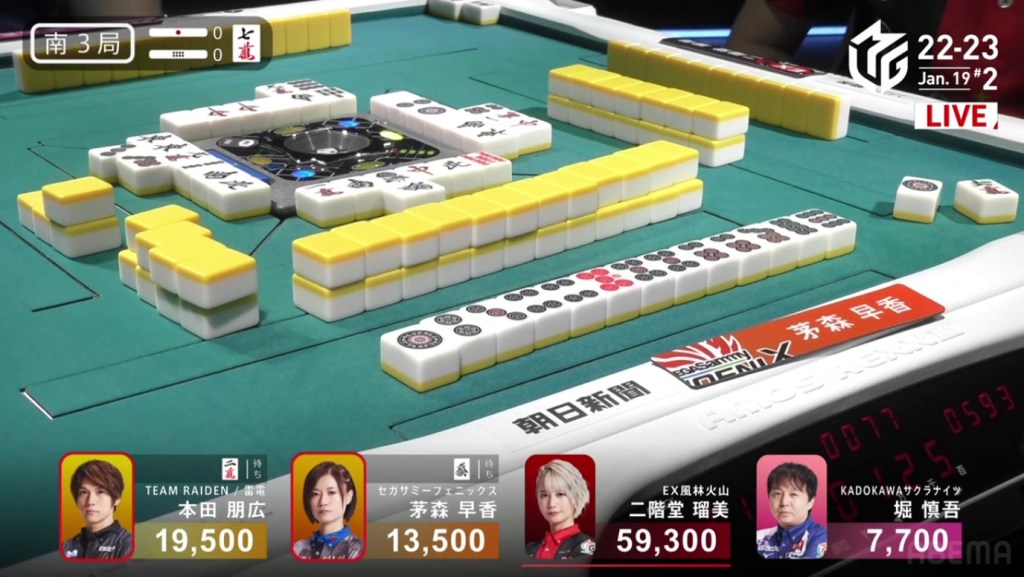
January 19, Game 1, S4-2
Video: https://abema.tv/video/episode/444-14_s30_p722
In S4-2, Shibukawa is in 3rd place and just 700 behind 2nd place Tojo. Even before his first draw, Shibukawa calls chii for a 789p sequences. When we do see his hand, we see that he is 2-shanten with a pair of west doras that is also his yakuhai. Besides the wests, the only other options for yaku are the distant 789 sanshoku or chanta. When we look around the table, Hagiwara is holding a pair of wests as well, killing the chance at a west pon. Creating a pair of 2m on turn 2 and discarding the 1m, the chanta chance is now out of the question. With only sanshoku left as his only real option, Shibukawa has get the 8s, 9s and 8m to complete it. At the end of the first row, Shibukawa draws an 8s to get to 2-shanten. Looking around the table, Matsugase is iishanten at the start of the second row and Tojo is 2-shanten with a guaranteed tanyao. In the second row, Shibukawa calls pon to get to iishanten, still waiting on a 9s and an 8m. In the middle of the third row, Shibukawa calls chii on the 8m and gets to tenpai 69s (with the 9s giving yaku).
A few turns later, Tojo gets to tenpai and waits on a 5s/7s shanpon.

As the wall got shorter and shorter, the hand seemed to be a draw. Then, on the second-last draw, Matsugase gets to tenpai on a 36s ryanmen.
On the last tile, Tojo drew the 9s. With this 9s draw, Tojo can keep tenpai by throwing either the 9s or the 7s. Since the hand was clearly a 789 sanshoku, both of them are dangerous. After taking a bit of time to decide, Tojo discards the 9s and deals into Shibukawa
Shibukawa wins the hand with Houtei/Sanshoku/Dora 2 for 8,000+600, finishing the game in 2nd place.
Rumi’s Rise

January 19, Game 2
In E2-2, the scores are still close with the bottom two players being 2,000 behind the top two players. Rumi starts out the hand 4-shanten with two red fives and a floating dora 2p. In the first row, Rumi creates a few sequences and ryanmens. By the end of the first row, Rumi is 2-shanten with two ryanmens and a 5p away from a 567 iipeikou. At the start of the second row, Rumi discards the 2p dora as she gets to iishanten with a chance at a 345m iipeikou. At the start of the 3rd row, Rumi draws an 8p to get to tenpai on a 25m ryanmen (with the 2m giving iipeikou). Immediately after, Hori discards the 2m and deals into Rumi. Rumi wins the hand with Pinfu/Tanyao/Iipeikou/Aka 2 for 8,000+900 plus two riichi sticks.
Video: https://abema.tv/video/episode/444-14_s20_p728
In E3-0, Rumi is the dealer and starts out by filling in a 3s penchan to be iishanten on turn 1. Holding a pair of red dora and a dora 4m, her hand has an opportunity to get another big hand. On turn 3, Rumi gets to tenpai and waits dama on a yakuless 4s kanchan. At the end of the first row, Rumi improves her wait and calls riichi on a 47s ryanmen (with the 4s giving a 456 sanshoku). On the ippatsu turn, Rumi finds the takame 4s and wins the hand. Rumi wins with Riichi/Ippatsu/Tsumo/Sanshoku/Dora 1 for 6,000 all, putting her above 50,000.
In E3-1, Rumi again starts out by filling in a 3s penchan to be 3-shanten. Her hand develops very quickly and she gets to tenpai on turn 4. Calling riichi, Rumi waits on a 69p ryanmen (with the 9p being dora). At the end of the first row, Rumi draws the dora 9p and wins the hand. Rumi wins with Riichi/Tsumo/Pinfu/Dora 1 for 2,600+100.
After dealing into Honda in E3-2, Rumi continues her pursuit in S1-0. Rumi starts out the hand 3-shanten with two sequences and a red 5m. On turn 2, Rumi creates a ryanmen to secure the red 5m. On turn 4, she fills in that ryanmen. On turn 5, she pairs up the white dragon to get to tenpai on a yakuless 3p kanchan. The very next turn, Rumi draws the red 5p to improve the wait and calls riichi on a 36p ryanmen. Within the ippatsu turn, Honda discards the 6p and deals into Rumi. Rumi wins the hand with Riichi/Ippatsu/Aka 2 for 8,000, getting her revenge on Honda.
Kayamori Comeback
January 19, Game 2
Video: https://abema.tv/video/episode/444-14_s60_p734
In S3-0, Kayamori is in 3rd place, 6,000 behind 2nd place Honda and 45,800 behind 1st place Rumi. Looking around the table, Rumi starts out 3-shanten with a dora 7m, Honda is 3-shanten with two kanchans and a ryanmen and Kayamori is 5-shanten with a dora 7m and two red fives. With every draw after the first, Kayamori draws a pinzu tile. With each draw, her hand gets closer to chinitsu despite her starting with only six pinzu tiles. By the end of the first row, Kayamori has 11 pinzu tiles, sitting 2-shanten for chinitsu. Her pinzu luck continues in the second row, getting a 7p on turn 7 to get to tenpai on a green dragon tanki. On her next turn, Kayamori draws a 5p to get to tenpai on a 456p wait. With Honda calling riichi just before her, Kayamori decides to call a chasing riichi, guaranteeing at least a baiman. During the ippatsu turn, Rumi discards the 6p trying to get to tenpai and deals into Kayamori. Kayamori wins the hand with Riichi/Ippatsu/Chinitsu/Aka 1/Ura 1 for 16,000 significantly cutting Rumi’s lead.
In S4-0, Kayamori is in 2nd place and just 12,800 behind 1st place. In order to take the top spot, Kayamori would need a baiman general ron, a 3/50 or 4/25 direct hit (for a tie) or a haneman tsumo. Kayamori starts out the hand 2-shanten. The clear only yaku she had was tanyao, meaning she had to hunt for more value. On turn 4, Kayamori creates a 58p ryanmen, giving the potential for either a 567 or a 678 sanshoku. On turn 5, Kayamori draws a red 5p and gets to tenpai on a 3m kanchan, staying dama. If she can shift the 678s sequence, she would add sanshoku to her hand. At the end of the first row, Kayamori finds the 5s and calls riichi on a 3m kanchan. If she can draw the 3m herself, she would win the hand.
Looking around the table, every other player has a 3m, leaving only one 3m for Kayamori to draw. As Kayamori waits for that last 3m, dealer Hori moves his own hand forward. In the middle of the second row, Hori gets to tenpai and calls riichi on a 147m wait.
With the riichi call, Kayamori’s win criteria has changed. With the extra 1,000, Kayamori can win a general haneman and take 1st place. Within the ippatsu turn, Honda gets to tenpai. With his choices being the 3m and red 5m, both were bad choices. Instead of taking the tenpai, Honda discarded the 9m, simultaneously moving his hand to tanyao. On his next draw, Honda draws a 6m. Trying to take a 58m nobetan wait, Honda calls riichi by throwing the 3m and deals into Kayamori. With the win, Kayamori has 5 han. With only one uradora, Kayamori would win the game. Unfortunately, the uradora misswed, leaving Kayamori in 2nd. Kayamori wins the hand with Riichi/Tanyao/Sanshoku/Aka 1 for 8,000 plus one riichi stick, missing 1st place by just one han.
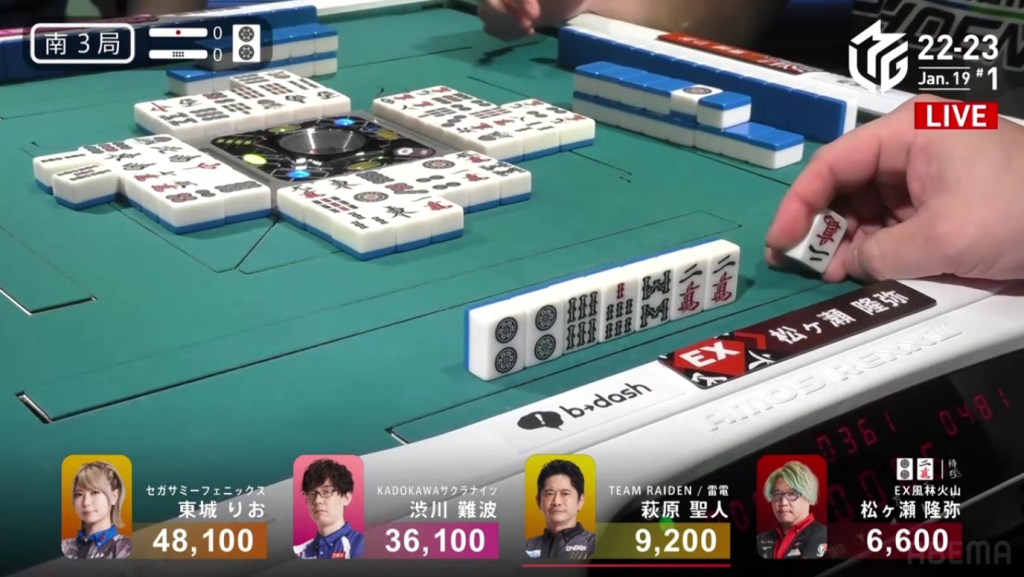
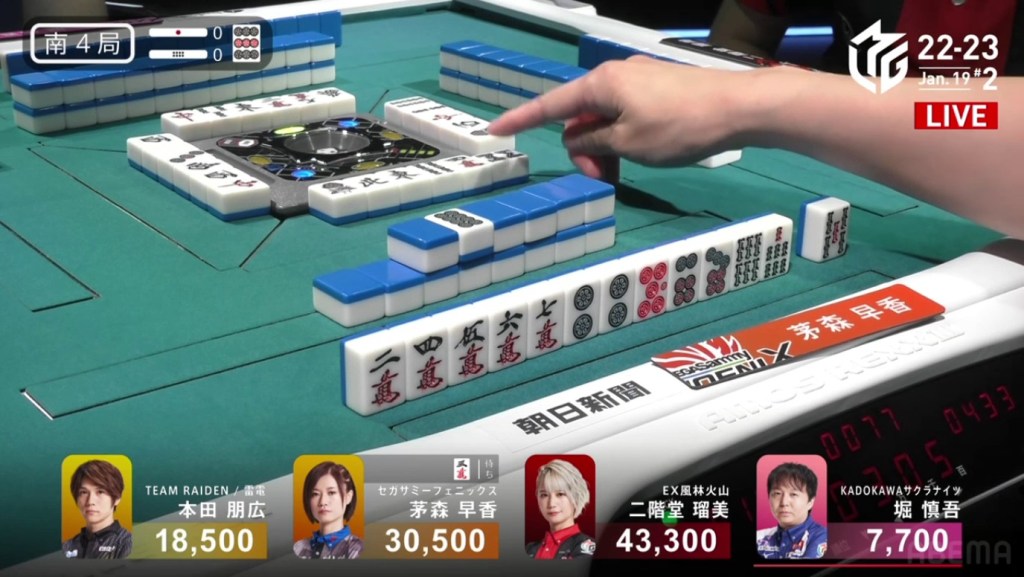
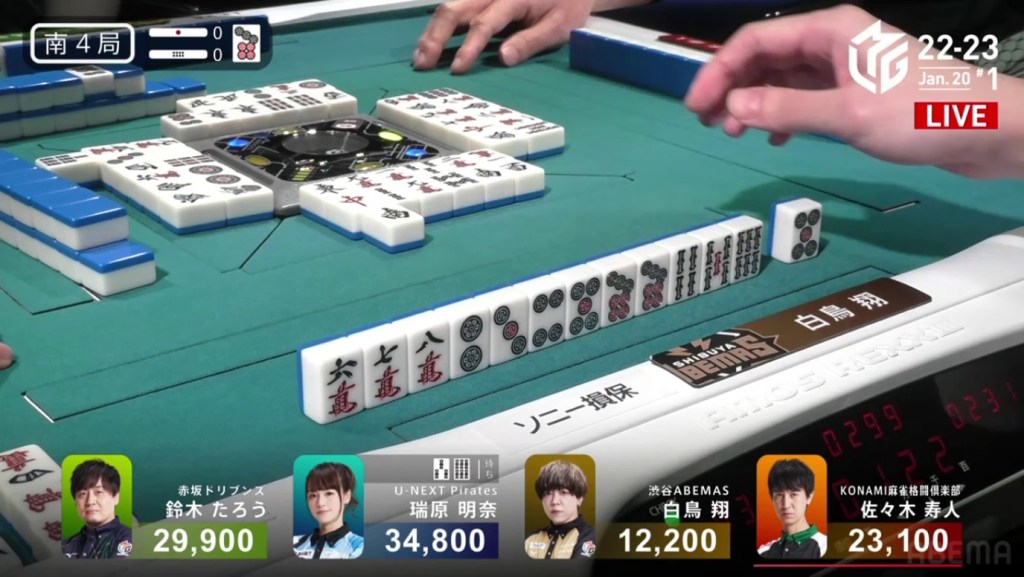
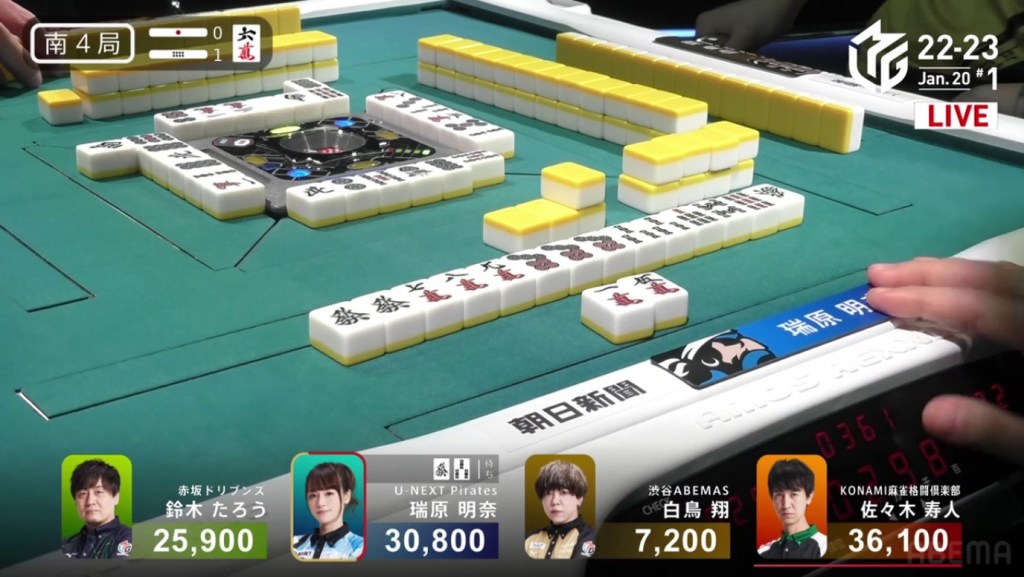
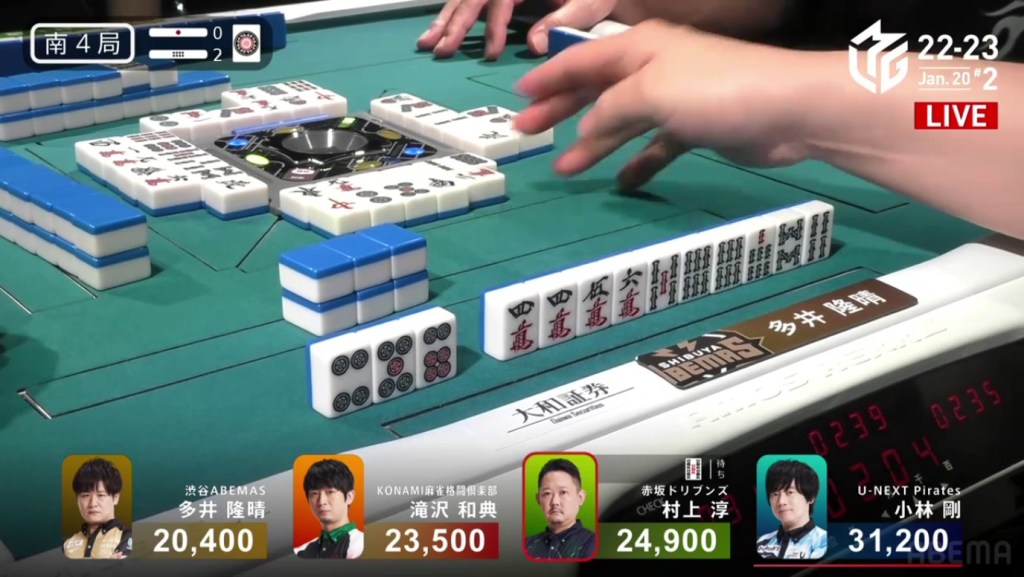
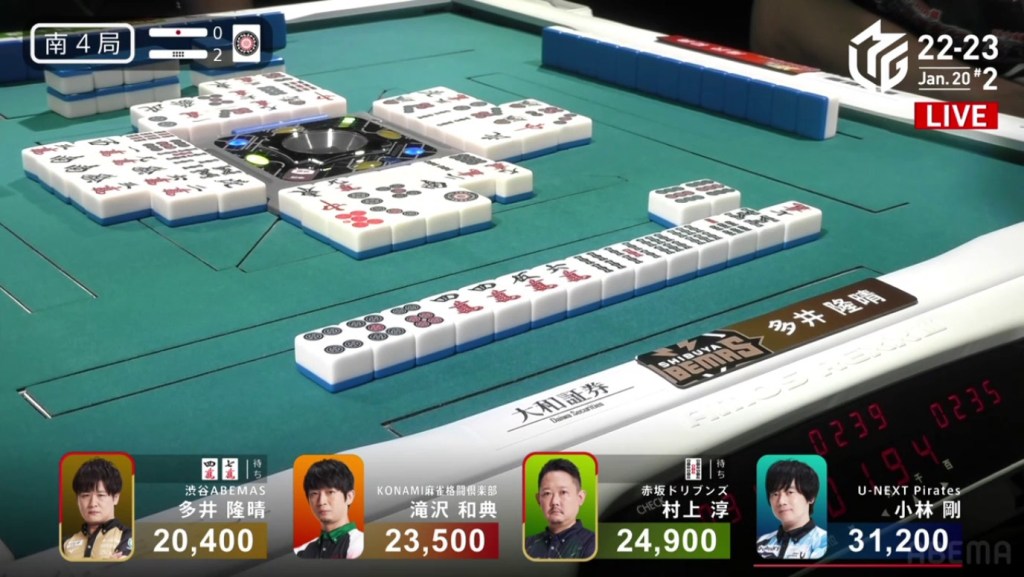
South 4
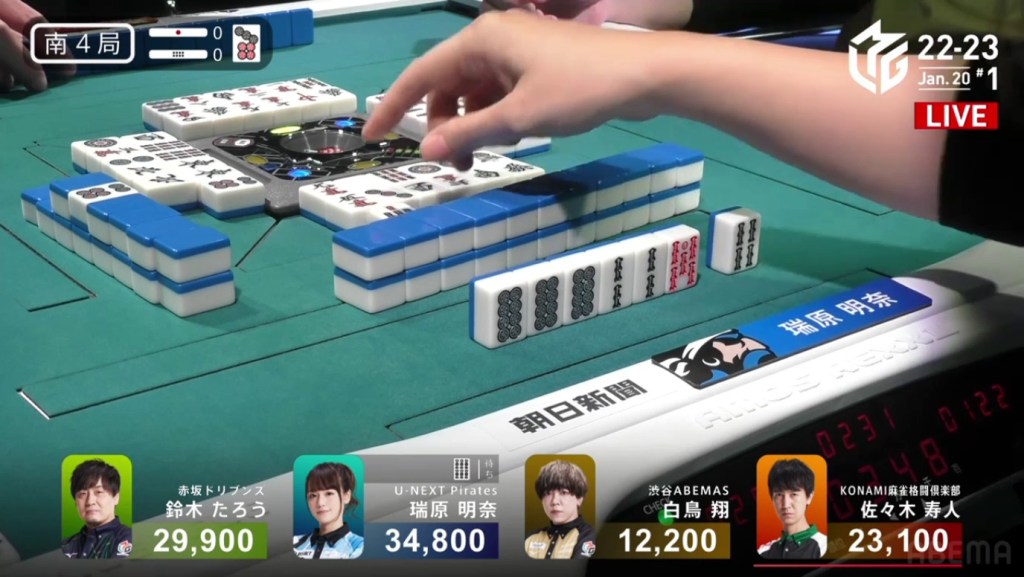
January 20, Game 1
Video: https://abema.tv/video/episode/444-14_s40_p729
In S4-0, Hisato is the dealer in 3rd place, 6,800 behind 2nd place Taro and 11,700 behind 1st place Mizuhara. He starts out the hand 3-shanten with a red 5p and a 7p dora. Across from him is Mizuhara who is 2-shanten for both a standard hand and chiitoi. In the first row, Hisato fills in a 4p kanchan and later creates a 258p sanmenchan, while Mizuhara goes back a shanten to pursue tanyao. By the end of the first row, Hisato is iishanten while Mizuhara is 3-shanten. In the second row, Mizuhara catches up by making two calls and getting to tenpai on a 6s kanchan. A turn later, Mizuhara improves her wait to a 36s ryanmen.
Around the same time, Shiratori gets to tenpai. Being 11,900 behind 3rd place Hisato, he needs a haneman or a mangan tsumo to move out of last. Holding tanyao and two dora, he stays dama and hopes to draw his winning tile.
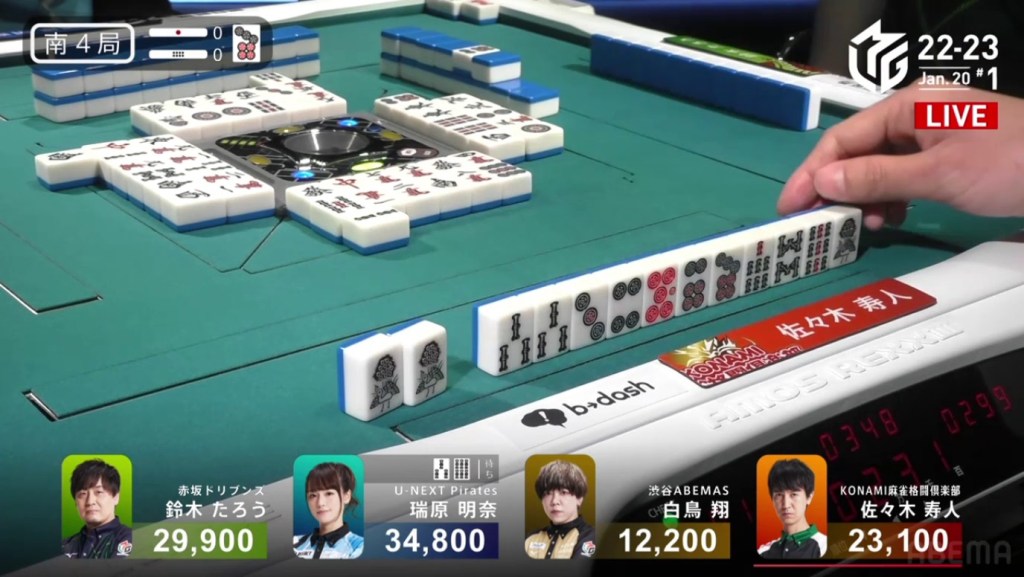
Right after, Hisato gets to tenpai. Instead of throwing the 3s that would give him pinfu (and would deal into Mizuhara), Hisato chooses to throw the 2s and calls riichi on a 258p wait.
With a call off of Hisato’s riichi tile, Taro gets to tenpai on a 4p/6s shanpon.
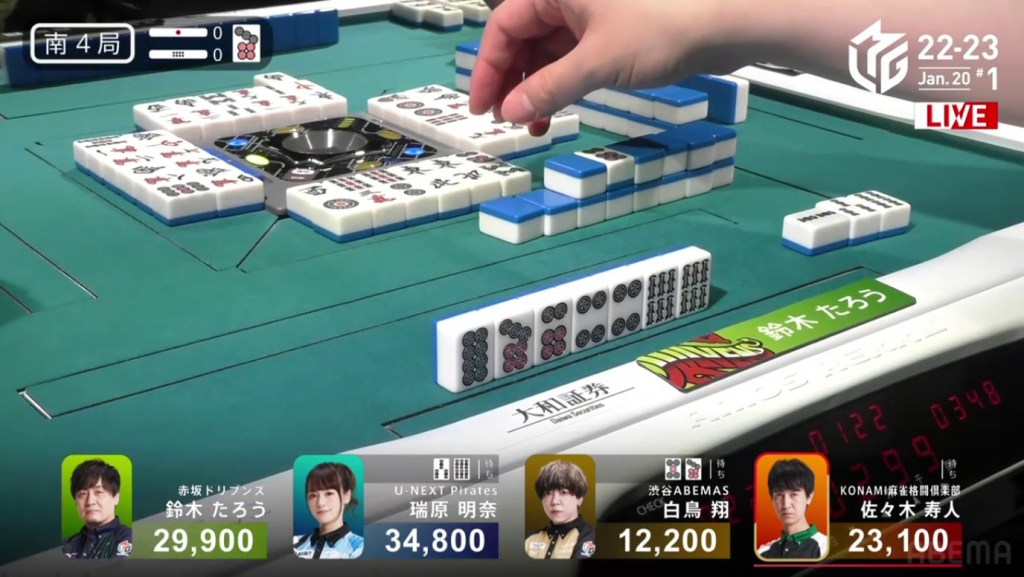
With all four players tenpai, all forur of them have a chance to change the standings. When Mizuhara draws a dangerous 7s, she chooses to fold, letting everyone else handle the situation. When Shiratori’s turn comes around, he chooses to call riichi on his 5p/7p shanpon. However, his riichi risk was all for naught. On Hisato’s next draw, he finds his winning 2p and wins the hand. Hisato wins with Riichi/Tsumo/Dora 1/Aka 1/Ura 1 for 4,000 all plus one riichi stick, moving him into 1st place.
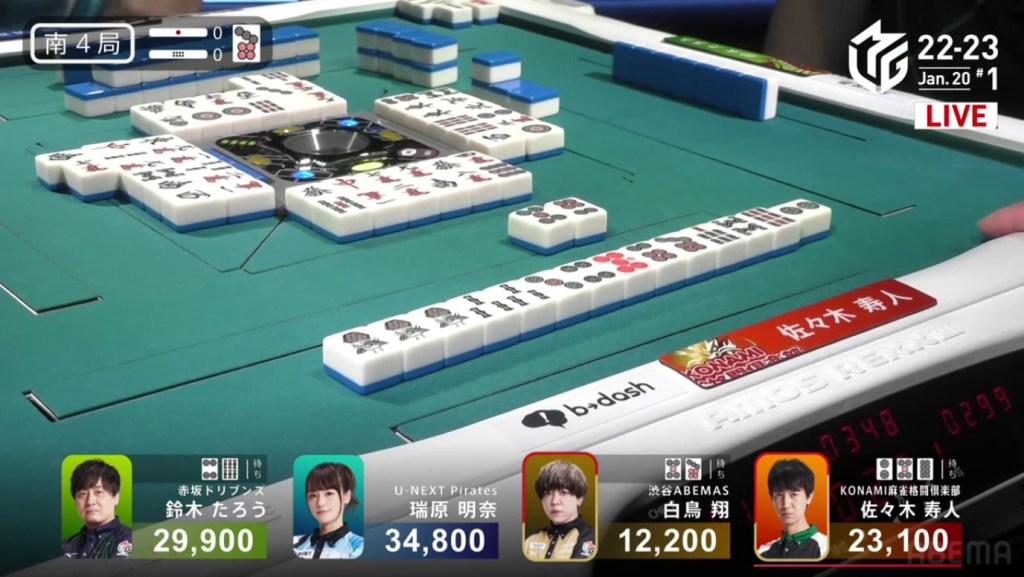
Video: https://abema.tv/video/episode/444-14_s80_p729
In S4-1, Mizuhara is in 2nd place after Hisato’s dealer mangan tsumo. Being 5,300 behind him, Mizuhara needs a 3/30 tsumo, a 3,40 general ron or a 2/40 direct hit.
Mizuhara starts out the hand 3-shanten with a pair of green dragons. In order to get enough value, she would need to keep her hand closed or draw some dora. On turn 3, Mizuhara gets to iishanten with her green dragon being the pair. On turn 4, she makes the 3s a second pair, giving her the opportunity to make a green dragon triplet. On turn 6, Mizuhara fills in an 8s kanchan and calls riichi on a green dragon/3s shanpon. If she wins by drawing the green dragon, she will finish the game in 1st. If she wins on anything else (including calling ron on the green dragon), she will have to hope for uradora. However, she didn’t have to worry long. On Mizuhara’s very next draw, she finds the takame green dragon to win the game. Mizuhara wins the hand with Riichi/Ippatsu/Tsumo/Green Dragon for 2,000+100/4,000+100, finishing the game in the top spot.
Beating the Sanmenchan
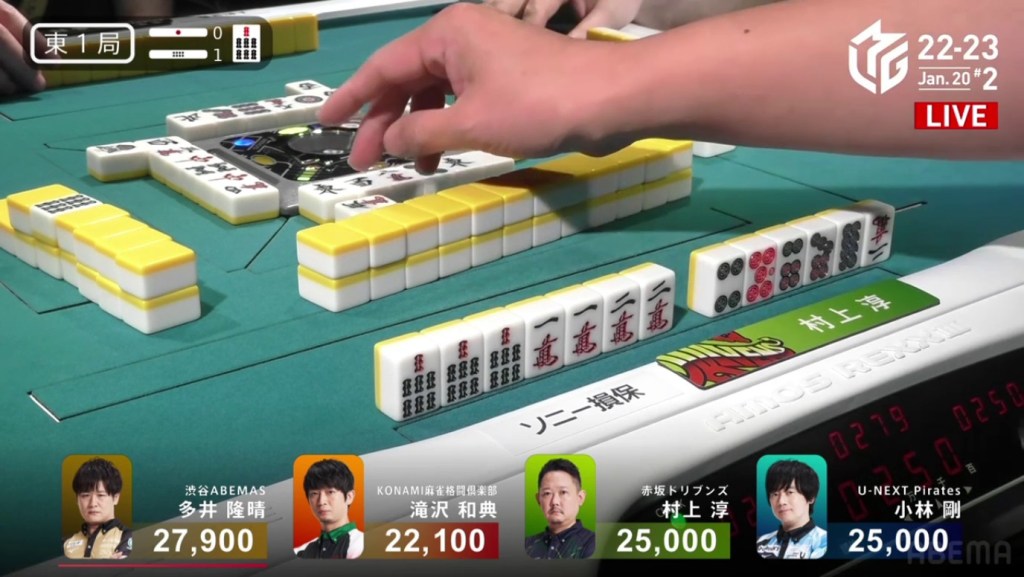
January 20, Game 2, E1-1
In E1-1, Takizawa is behind early after dealing into Ooi in the first hand. Having won both of his last two games, he looks to make in 3 in a row. To his right is Murakami, still trying to get his first win of the season. Takizawa starts off the hand 3-shanten with a red 5s while Murakami is 3-shanten with an ankou of 7s and a red 5p. Both advane they hands with good shapes early on, with Muarakami creating a three-sided wait and Takizawa filling in a penchan to get to a ryanmen-ryanmen iishanten. By turn 4, both of them are iishanten. On turn 7, Murakami gets to tenpai and calls riichi on a 369p wait. If Murakami can draw his winning tile himself, he would have a haneman.
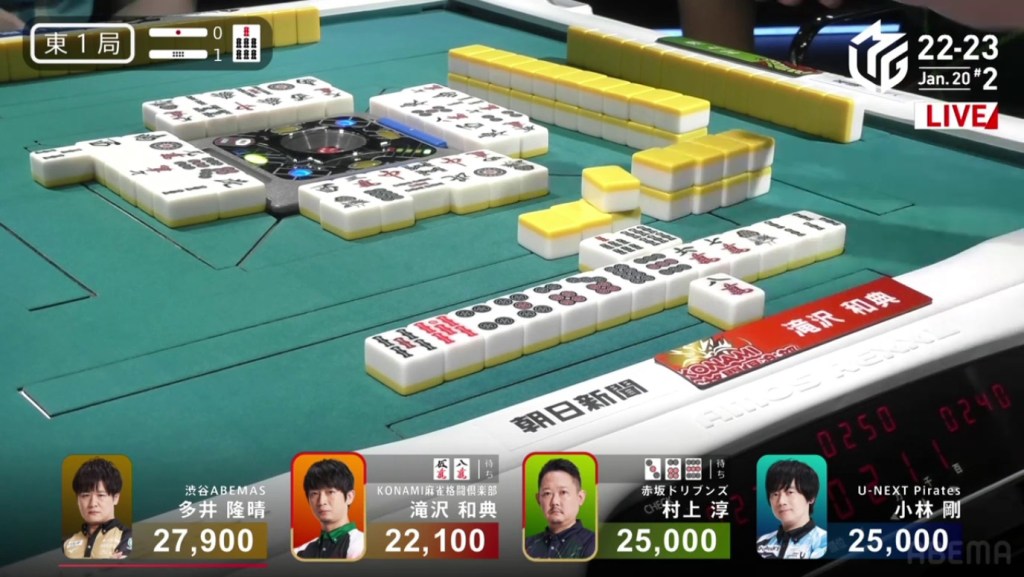
At this point, Takizawa is iishanten with eight different tiles that will get him to a good wait tenpai. With such a good prospect, Takizawa pushes. In the middle of the second row, Takizawa gets to tenpai and calls riichi on a 58m ryanmen. With about five tiles still alive for each of them, this hand was going to be won, but by whom? At the start of the third row, Takizawa answered the question by drawing his winning 8m. Takizawa wins the hand with Riichi/Tsumo/Pinfu/Aka 1 for 1,300+100/2,600+100 plus Murakami’s riichi stick to move from 4th to 1st.
Out of Last

January 20, Game 2, E4-0
In E4-0, Murakami is in 4th place, 3,700 behind 3rd place Takizawa, 4,600 behind 2nd place Ooi and 9,900 behind 1st place Kobayashi. Murakami starts out the hand 4-shanten for chiitoi (5-shanten for a standard hand) and holding an isolated 9s dora. On turn 3, he makes a pair of 5s as his third pair. On turn 5, he pairs up the west to get his next pair. Drawing a second 9s dora the very next turn, Murakami is iishanten for chiitoi before the end of the row. Still holding an ankou of 4s, he still keep the option of toitoi alive. At the start of the second row, Murakami gets to tenpai and stays dama on a 2s tanki. As Murakami waits, Ooi pushes his hand to tenpai and calls riichi on a 58m ryanmen near the middle of the second row. However, that riichi stick is merely a donation as Murakami draws his winning 2s just two turns later. Murakami wins the hand with Tsumo/Chiitoi/Dora 2 for 2,000/4,000 plus Ooi’s riichi stick, moving Murakami from 4th to 1st.
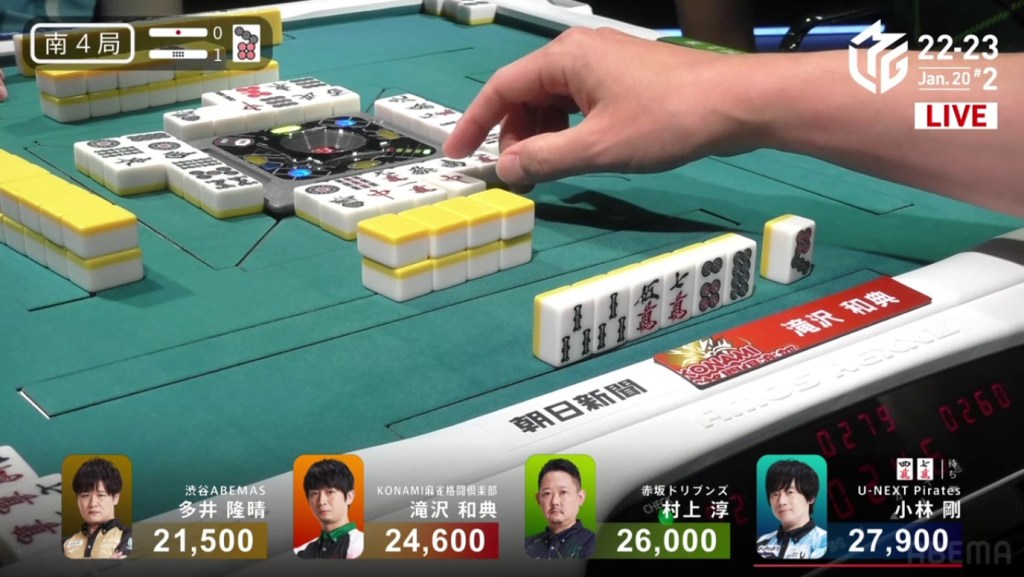
South 4 Again
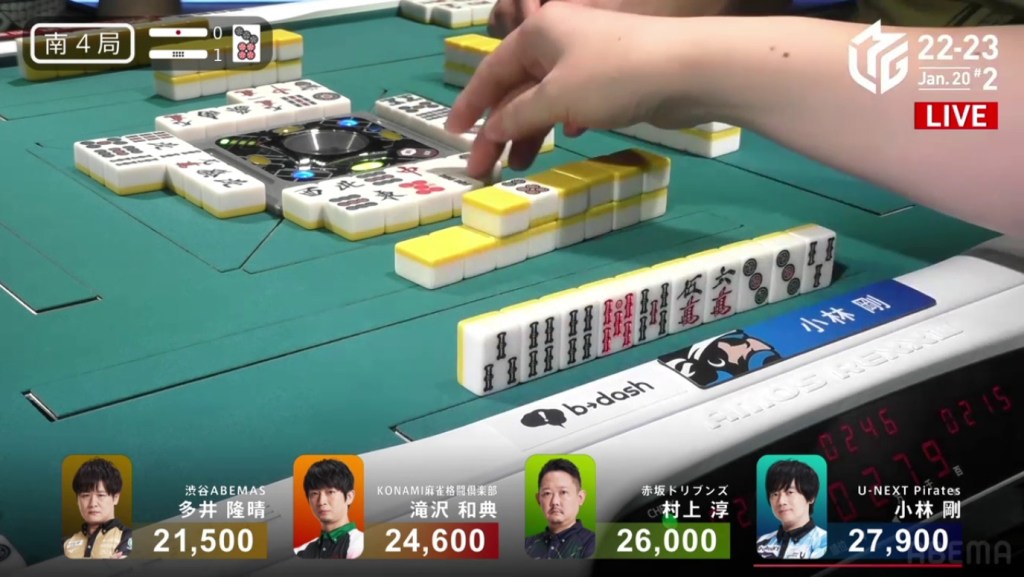
January 20, Game 2
Video: https://abema.tv/video/episode/444-14_s80_p730
In S4-1, the scores are close with 4th place Ooi being only 6,400 away from 1st place Kobayashi. From the start, we see Kobayashi 5-shanten with two red fives, Ooi 2-shanten for chiitoi with nine manzu tiles, Takizawa 3-shanten with three kanchans and Murakami 3-shanten with an ankou of white dragons. Through the first row, Ooi forces his chinitsu by making two calls, and Takizawa makes a call to speed up his hand and Kobayashi makes a call to force tanyao. Before the end of the first row, Ooi is iishanten while everyone else is 2-shanten. In the second row, Murakami makes a call for iishanten, Kobayashi draws to iishanten and Takizawa also makes a call for iishanten. With all four players iishanten, it was only a matter of time before someone is tenpai. In the middle of the second row, Kobayashi is the first to tenpai and waits on a 47m ryanmen.
On Takizawa’s draw, he fills in a kanchan and waits on a 6m kanchan. If Takizawa draws the winning tile himself, he will take 1st place by 100 points.
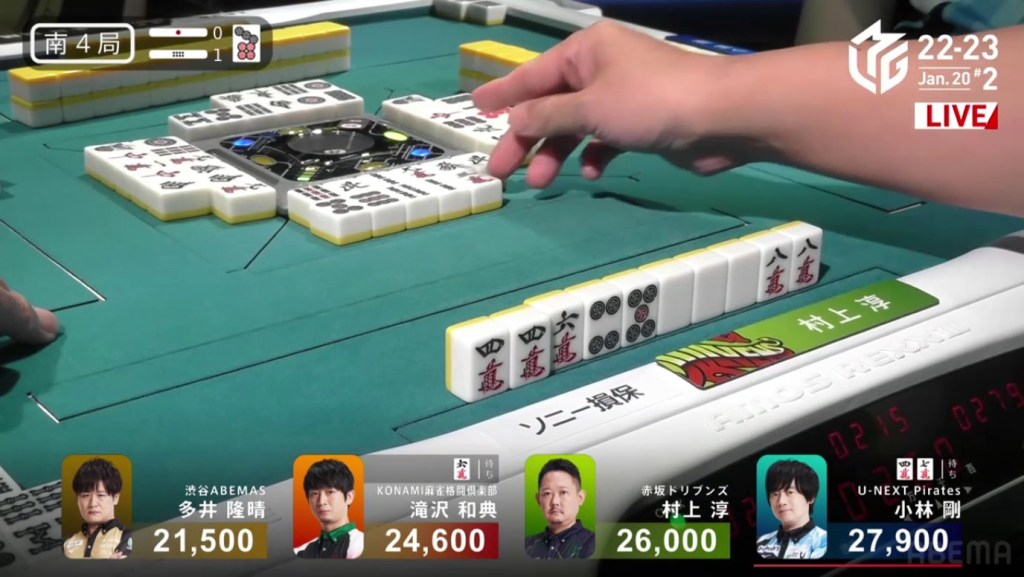
While Takizawa and Kobayashi tsumogiri their way through the hand, Murakami and Ooi keep searching. For Ooi, he needs just one of seven different manzu tiles to get to a mangan tenpai, enough for 1st place. For Murakami, he just needs to get to tenpai and draw his last tile to get his first 1st. Near the end of the second row, Murakami draws a 3m. The 3m guarantees a ryanmen wait, but throwing the 6m to get there deals into Takizawa. After taking some time to think about it, Murakami decides against throwing the 6m and instead throws the 3m.
The tsumogiri battle continues and suspense is high. Then, In the third row, Kobayashi draws his winning 7m and wins the hand. Kobayashi wins with Tanyao/Aka 1 for 1,000+100 all.
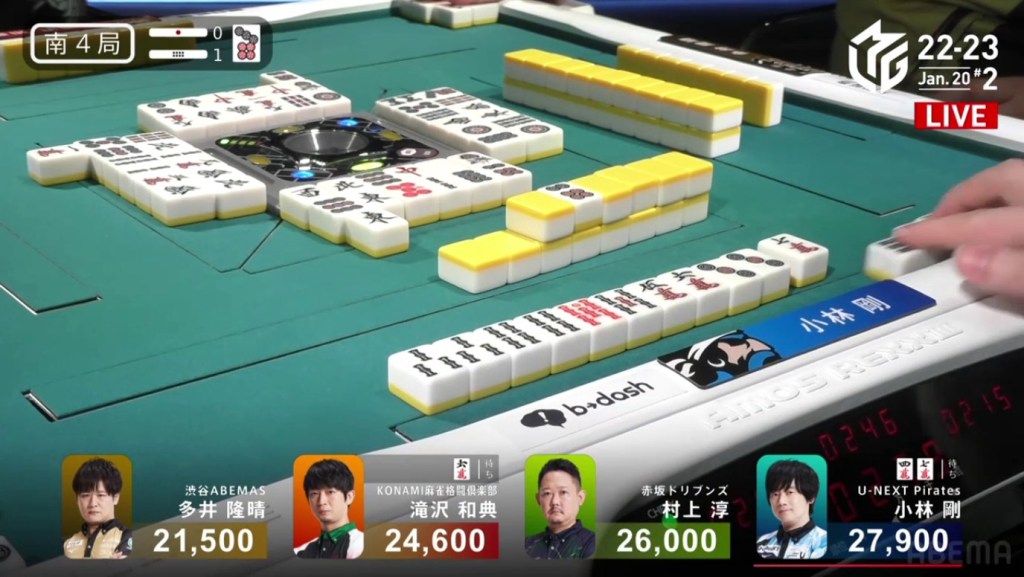
Video: https://abema.tv/video/episode/444-14_s50_p724
In S4-2, all three of Kobayashi’s opponents are within a mangan tsumo away of 1st place. For Murakami, he wants his first 1st. For Takizawa, he is looking for his third in a row. For Ooi, he just wants to get out of 4th.
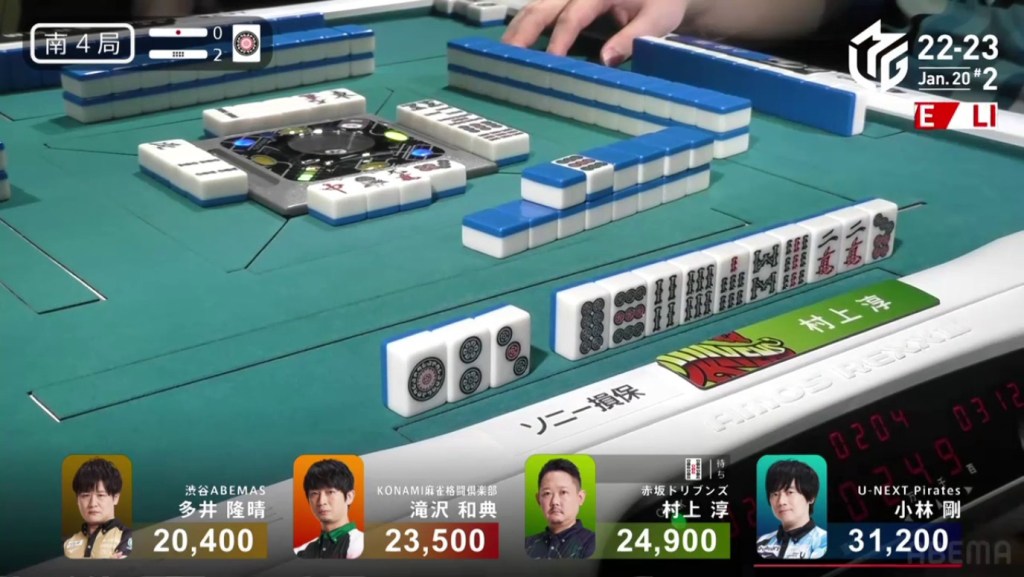
At the start, we see Ooi 2-shanten with a pair of white dragons and Murakami 2-shanten with a 1p dora. With Murakami being 6,300 behind dealer Kobayashi, he just needs a 3/30 tsumo or better to reach the top. Early on, Kobayashi makes a call to speed up his own hand. Around turn 3, Ooi has a chance to be iishanten, but chooses to discard his white dragon pair to get more value in his hand. On Murakami’s draw, he gets to iishanten with a kanchan and a penchan. On Murakami’s next draw, he fills in the 3p penchan and sits tenpai on a 5s kanchan. Murakami chooses not to call riichi, hoping for a slightly better wait. Within the next go-around, Ooi and Takizawa both discard the 2s, reducing Murakami’s improvement possibilities. With Riichi/Tsumo/Dora 1 being enough, Murakami decides to call riichi on his 5s kanchan.
While Murakami’s path is set, Ooi still has to make his own path. During the ippatsu turn, Ooi gets to iishanten and makes tanyao very likely, finding one han in the search for mangan. In the middle of the second row, Ooi increases his tile acceptance to 10 different tiles. Near the end of the second row, Ooi gets to tenpai and calls riichi on a 47m ryanmen (with the 4m being sanshoku).
Counting the winning tiles, Ooi only has a single 7m left in the wall. For Murakami, only a single 5s (which happens to be the red 5s) is left in the wall. It was a 1 vs. 1, 1 tile vs. 1 tile. With Kobayashi folding his hand, the game was going to end here. Every draw had the chance to be a hand winner or a hand killer. Ooi draws a manzu on the ippatsu turn, but it was the 9m. Ooi draws a red 5, but it’s a safe 5p. Murakami draws a manzu, but it’s the safe 3m. Then, near the end of the third row, Ooi finds his last 7m. With three han guaranteed, he only needs one uradora to win. Abemas fans at the edge of their seats, Ooi slowly flips the uradora. With the 1p being the new dora, Ooi just misses. Ooi wins the hand with Riichi/Tsumo/Pinfu/Tanyao for 1,300+200/2,600+200 plus Murakami’s riichi stick, enough for a respectable 2nd.
